Hey @JKelley! Here’s the process I came up with, in case you are still working on this.
Zapier tasks:
- Trigger: Course completion on Skilljar
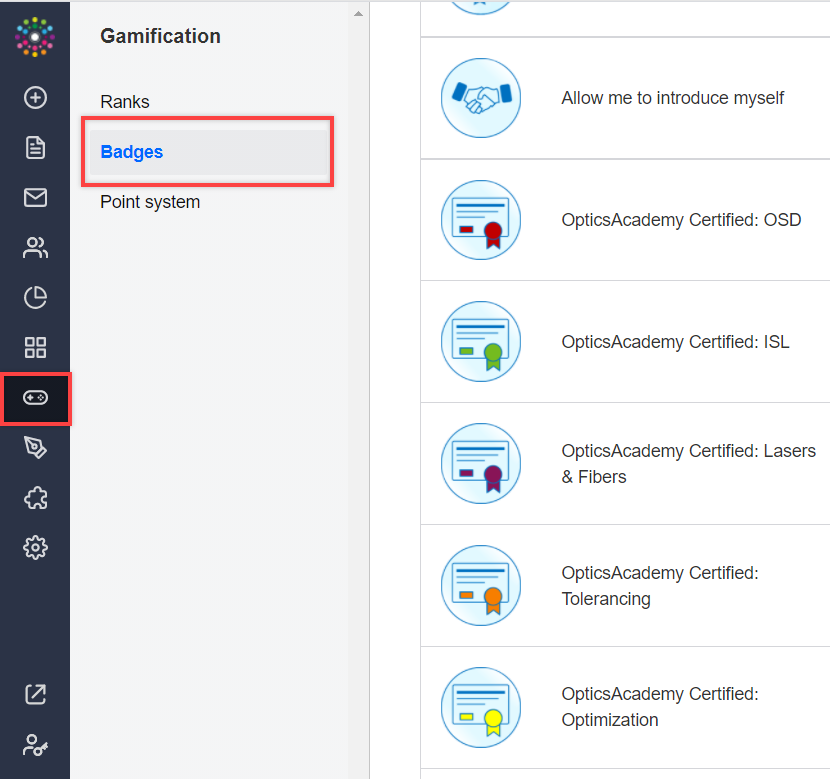
- Filter: Only continue if the course is one of 5 I have selected to award badges for
- InSided: Find a user based on the email from the Skilljar course completion
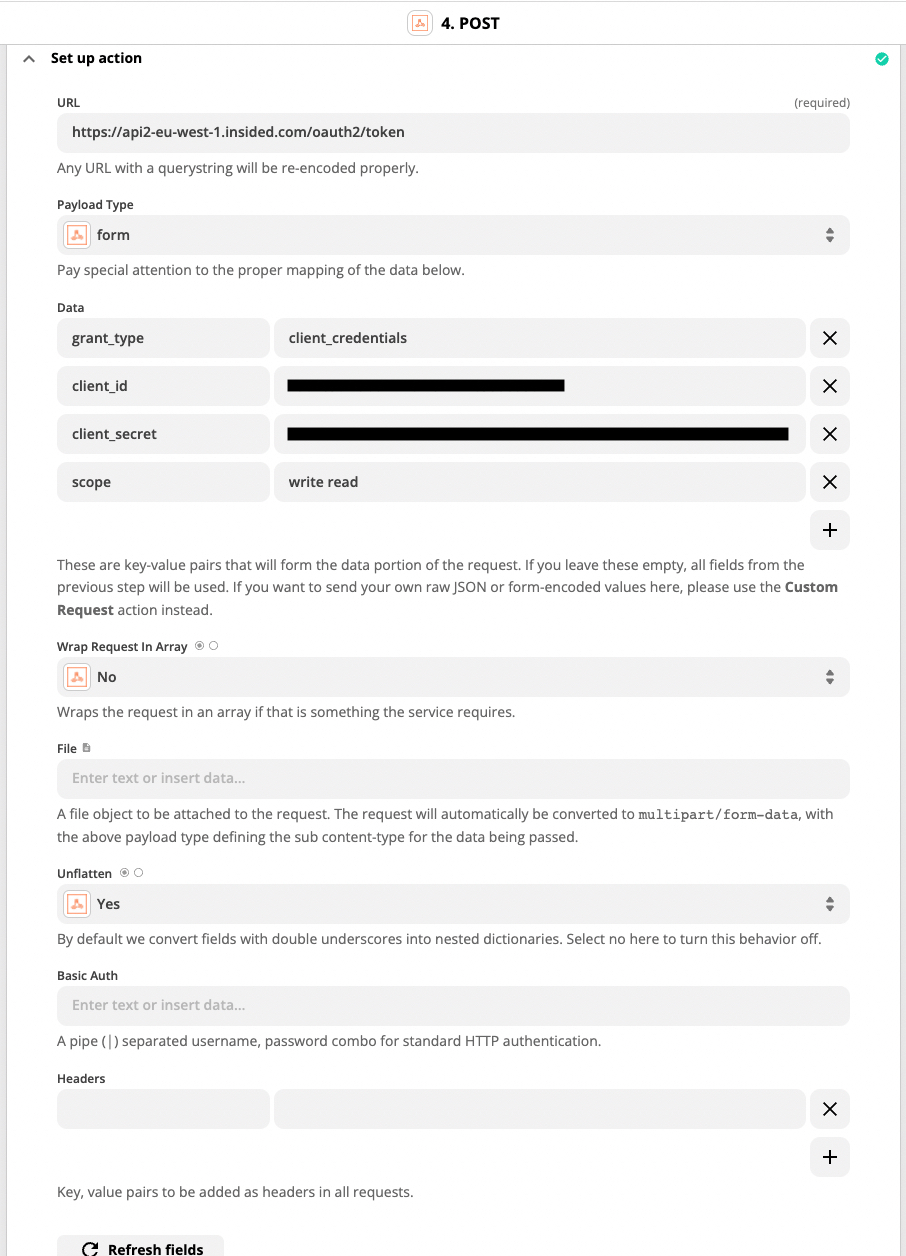
- Webhook: Obtain an API token as discussed in this post
- Code with Javascript: Write a few IF statements to determine which badges are applied. My code is below.
This Zap will trigger every time someone completes a course in Skilljar. But, with the filter as the second action, I can avoid using up Zapier bandwidth if the course is not related to a badge. The Zap will also stop early if the user can’t be found.
Javascript code (note: I’m not a web developer. This project was handed to me, an optical engineer, and I have been learning API and Javascript code through Stack Exchange exclusively ever since. Please disregard any inefficiencies :)):
const { userID, authType, token, courseName } = inputData;
// Course name
var course = inputData.courseName;
var badgeID = 0;
// What are we using to compare to?
var OSD = "Optical System Design with Zemax OpticStudio";
var Tolerance = "Tolerancing with Zemax OpticStudio";
var Optimization = "Optimization with Zemax OpticStudio";
var Lasers = "Laser & Fiber with Zemax OpticStudio";
var ISL = "Illumination & Stray Light with Zemax OpticStudio";
// Compare course name to badge number to help generate URL
if (course == OSD) {
badgeID = 6;
} else if (course == Tolerance) {
badgeID = 9;
} else if (course == Optimization) {
badgeID = 10;
} else if (course == Lasers) {
badgeID = 8;
} else if (course == ISL) {
badgeID = 7;
}
// Set up authorization for the API request
var auth = inputData.authType + " " + inputData.token;
var URLBadge = 'http://api2-us-west-2.insided.com/user/' + inputData.userID + '/badge/' + badgeID;
console.log(URLBadge);
const userRequest = await fetch(URLBadge, {
method: 'PUT',
headers: {
'Accept': 'application/json',
'Authorization': auth,
'Content-Type': 'application/json'
},
}).then(function(response) {
return response.text();
}).then(function(responsebody) {
var output = {response: responsebody};
callback(null, output);
}).catch(function(error) {
callback(error);
});
 .
.