Note: if your instance was created after 2 February 2022, the Community Overview will already be enabled by default.
By enabling the Community Overview page, this will allow you to build a dedicated homepage as a launch pad for your success content, while also offering your customers a focused and engaging community overview and feed.
Here is how to configure this page:
1. Customize the Community overview page
You can customize the new page without it being visible to end users.
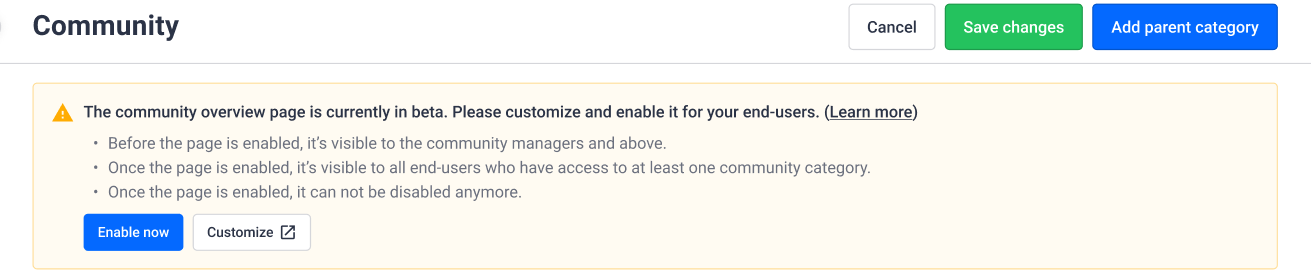
- Access the page by either:
- Going in Control Platform> Community. You can click the button "Customize"

- Or adding to your community URL " .../community". For example: https://community.insided.com/community
- You can now customize the page. Make sure to add a visual and a title to your hero banner
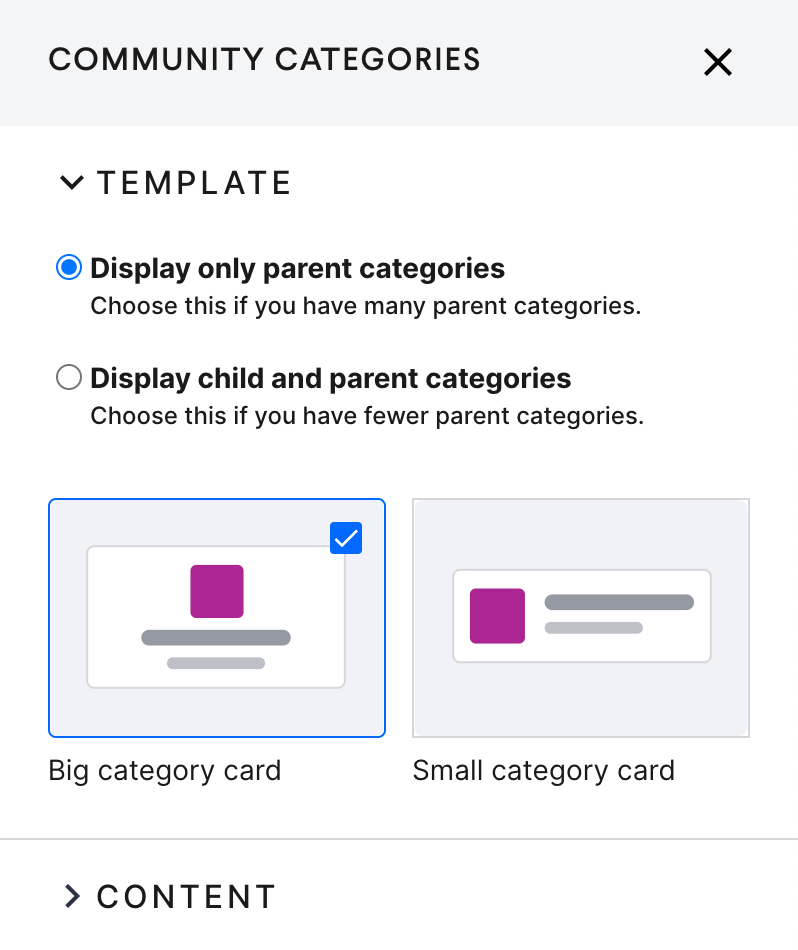
- You can configure your Community category widget to show only parents categories OR parent and child categories. That second option is particularly interesting if you have a limited number of parent categories.
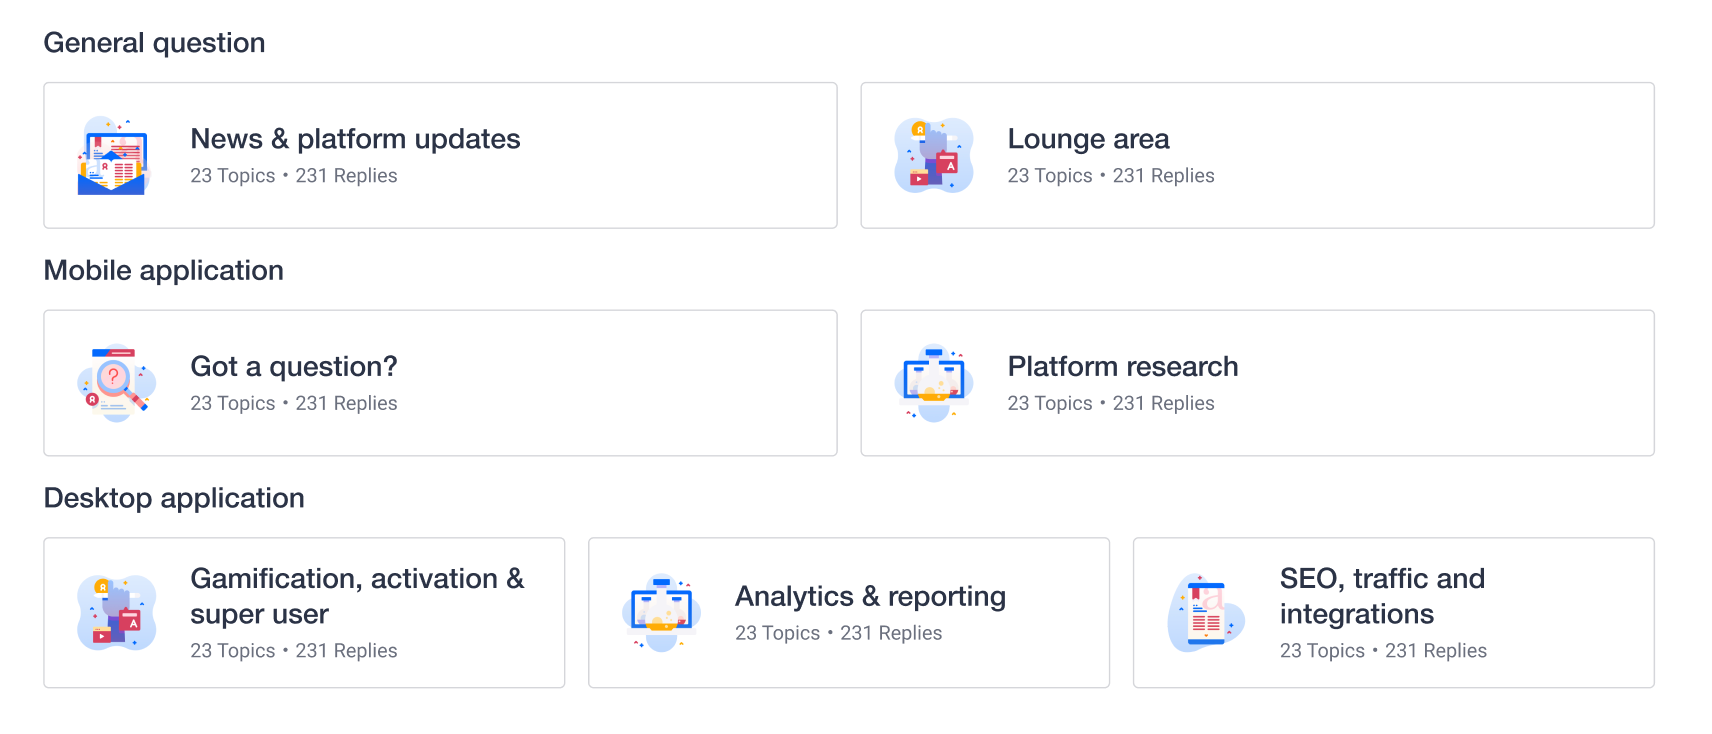
You can access this setting in the configuration side panel of the community categories widget.
Check out this article that share best practices on how to configure the Community overview based on your use case:
2. Configure the navigation
We made a few changes to the navigation.
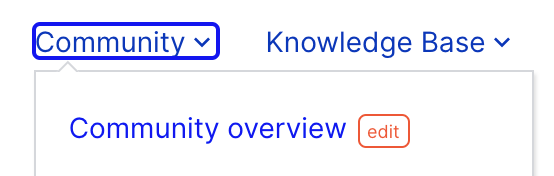
- With the introduction of the new Community overview page, we removed the link to the "Home" from the community dropdown. From now only the link to the community overview can be found in the Community dropdown. Users can still click on the icon to navigate to the homepage which is a very common pattern.

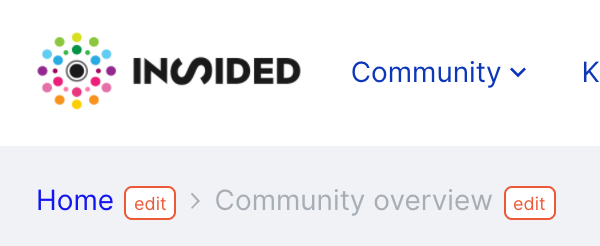
- We also renamed the breadcrumb to say "Home" instead of "Community" when referring to the homepage. This is of course for consistency purposes. If you had previously edited those phrases, you will not be impacted by the change.
Of course the new Community overview page will appear in the breadcrumb from now on.

What you need to do (optional) :
You can update the name of the page in the breadcrumb using phrases if you prefer calling it something else than "Community overview"
If you change the phrase in the breadcrumb, the changes will also be applied in the Mega Menu.
Once you enable the page for end users, the page will be accessible from the Mega Menu. You can also update the phrase from the Mega Menu as well.
If you are using the old navigation menu. We are not investing in building new features in the old navigation menu. We strongly recommend using the new Mega Menu to make the best use of the community overview page.
3. Make the page visible to you end users
Once your page is configured, go to Control in Platform> Community. Click the button “Enable now”.
By clicking this button, the Community overview page will be accessible to all users who have access to at least one Community category. The link to the Community overview page will also appear in the Mega Menu.
Of course the permissions settings at the level of the Community categories still apply. On the Community overview page, end users will only see link to the categories they have access to. This is the same behavior that we currently have on the homepage.
Next steps
Now that you have a dedicated community overview page, this means that you can rethink your homepage to turn it more into a launch pad for your customers, towards your different customer success resources (eg. Community, Knowledge Base, Events, Product Updates, etc.).


