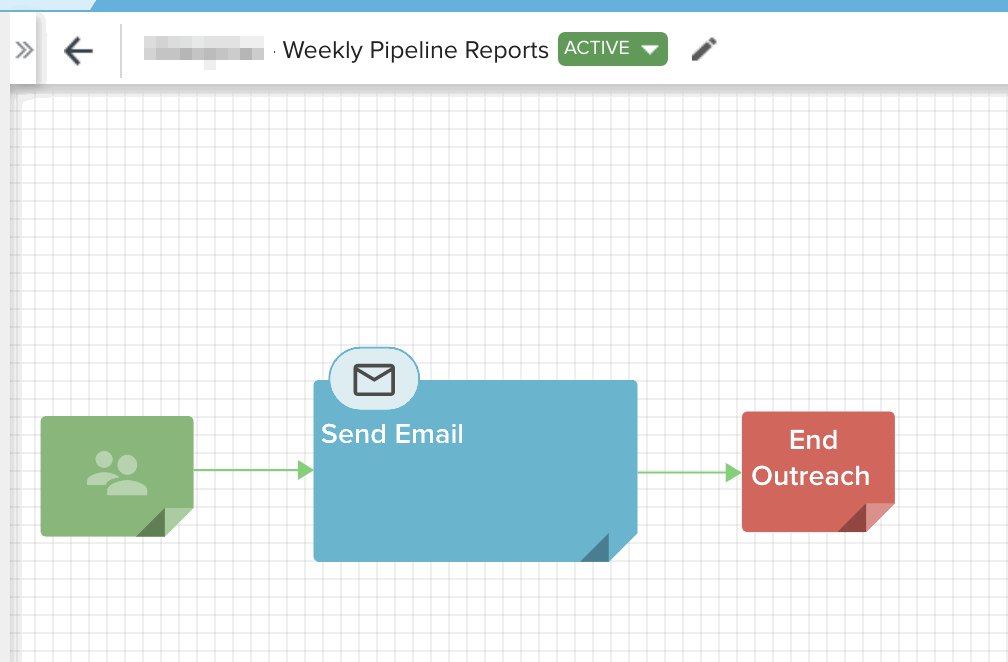
One of my favorite features of Journey Orchestrator is the ability to deliver reports directly in our management teams inbox, first thing Monday morning! I thought I’d share how we’re doing this at Gainsight and would love to hear additional use cases that you have for this feature!
Use Case: Our CO management team doesn’t have great visibility into our Sales pipeline as it pertains to new customers in their segment and cross-sell products.
How we solved the challenge: While dashboards are very helpful, they’re a more passive way to deliver information, plus our management team is often traveling. We decided that a weekly email, containing exactly the data they needed - with the option to dig deeper into the data if time permitted - would be the optimal solution for this use case!
I’m providing a guide below on how we setup this up and I’ll call out areas where you could make modifications to better fit the needs of your organization!
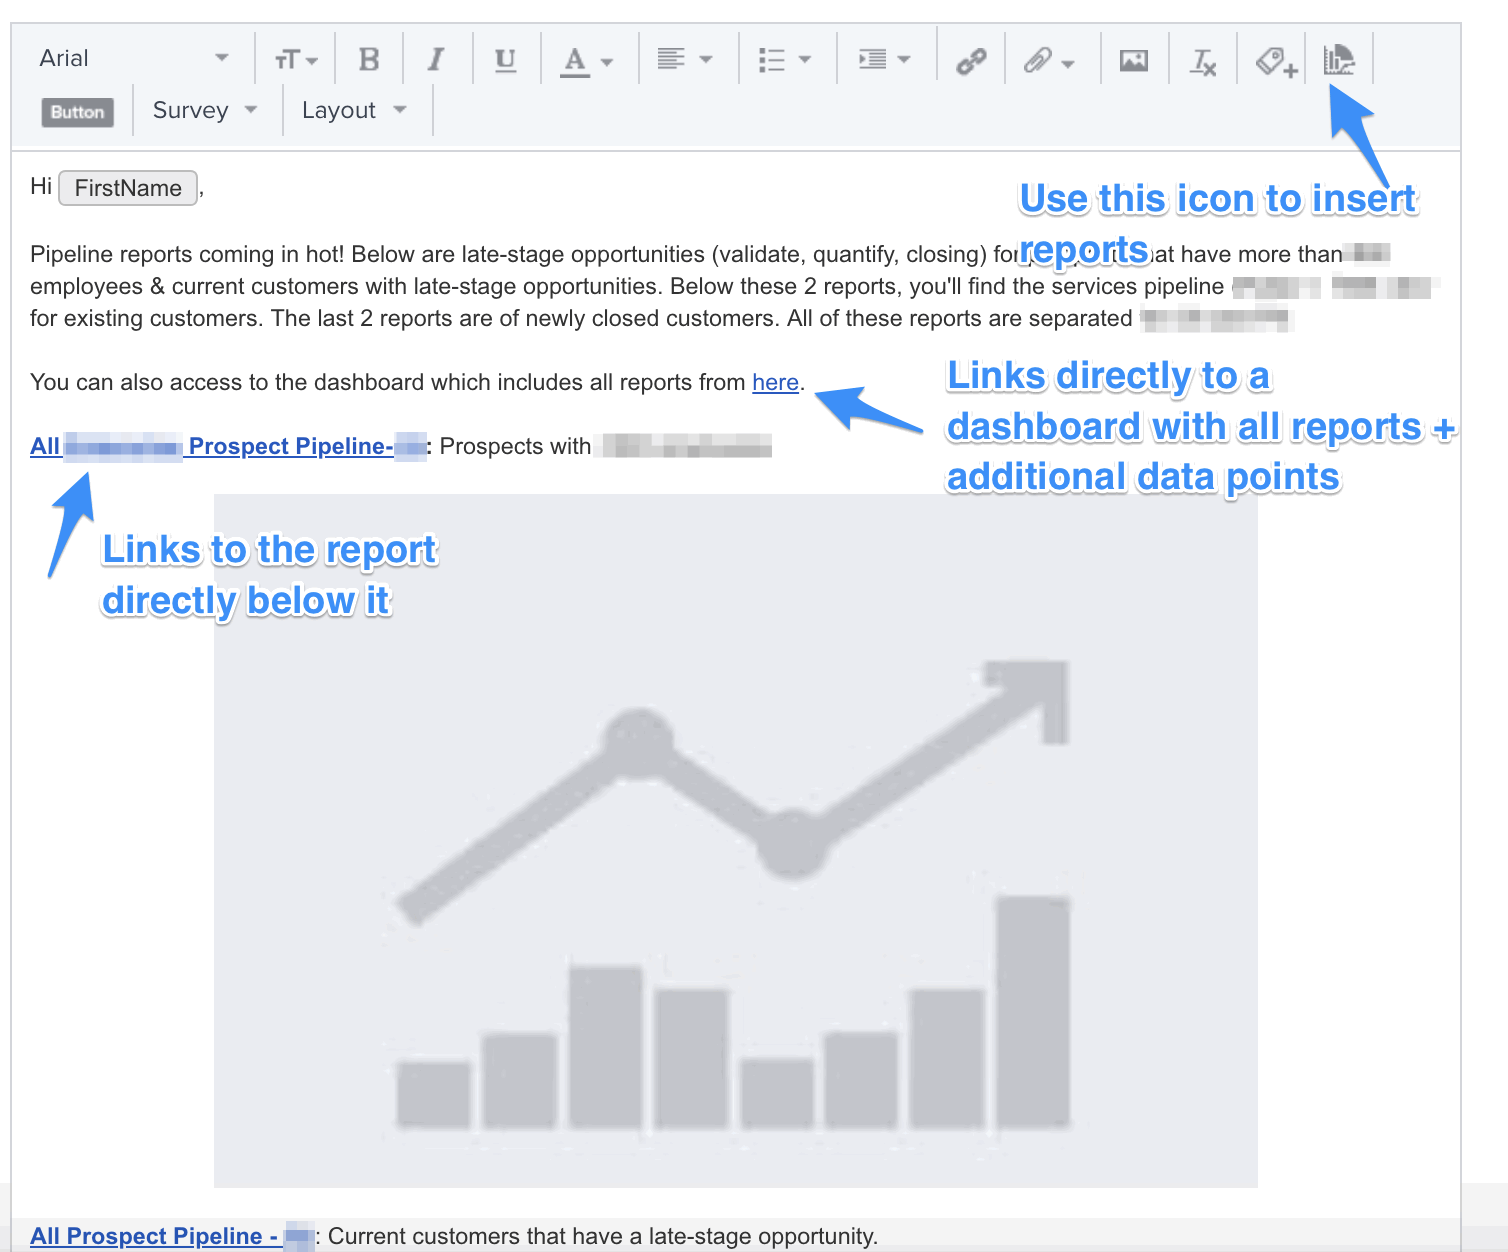
Step 1: Create an Email Template & use the “Insert Reports” functionality to add in up to 5 reports to the template.
Pro Tip: Include links to all of the reports. You’re limited to 5 columns / report within the email template, so include the most important information directly here. In the report, you can have additional columns of supporting data that the user can review if needed.
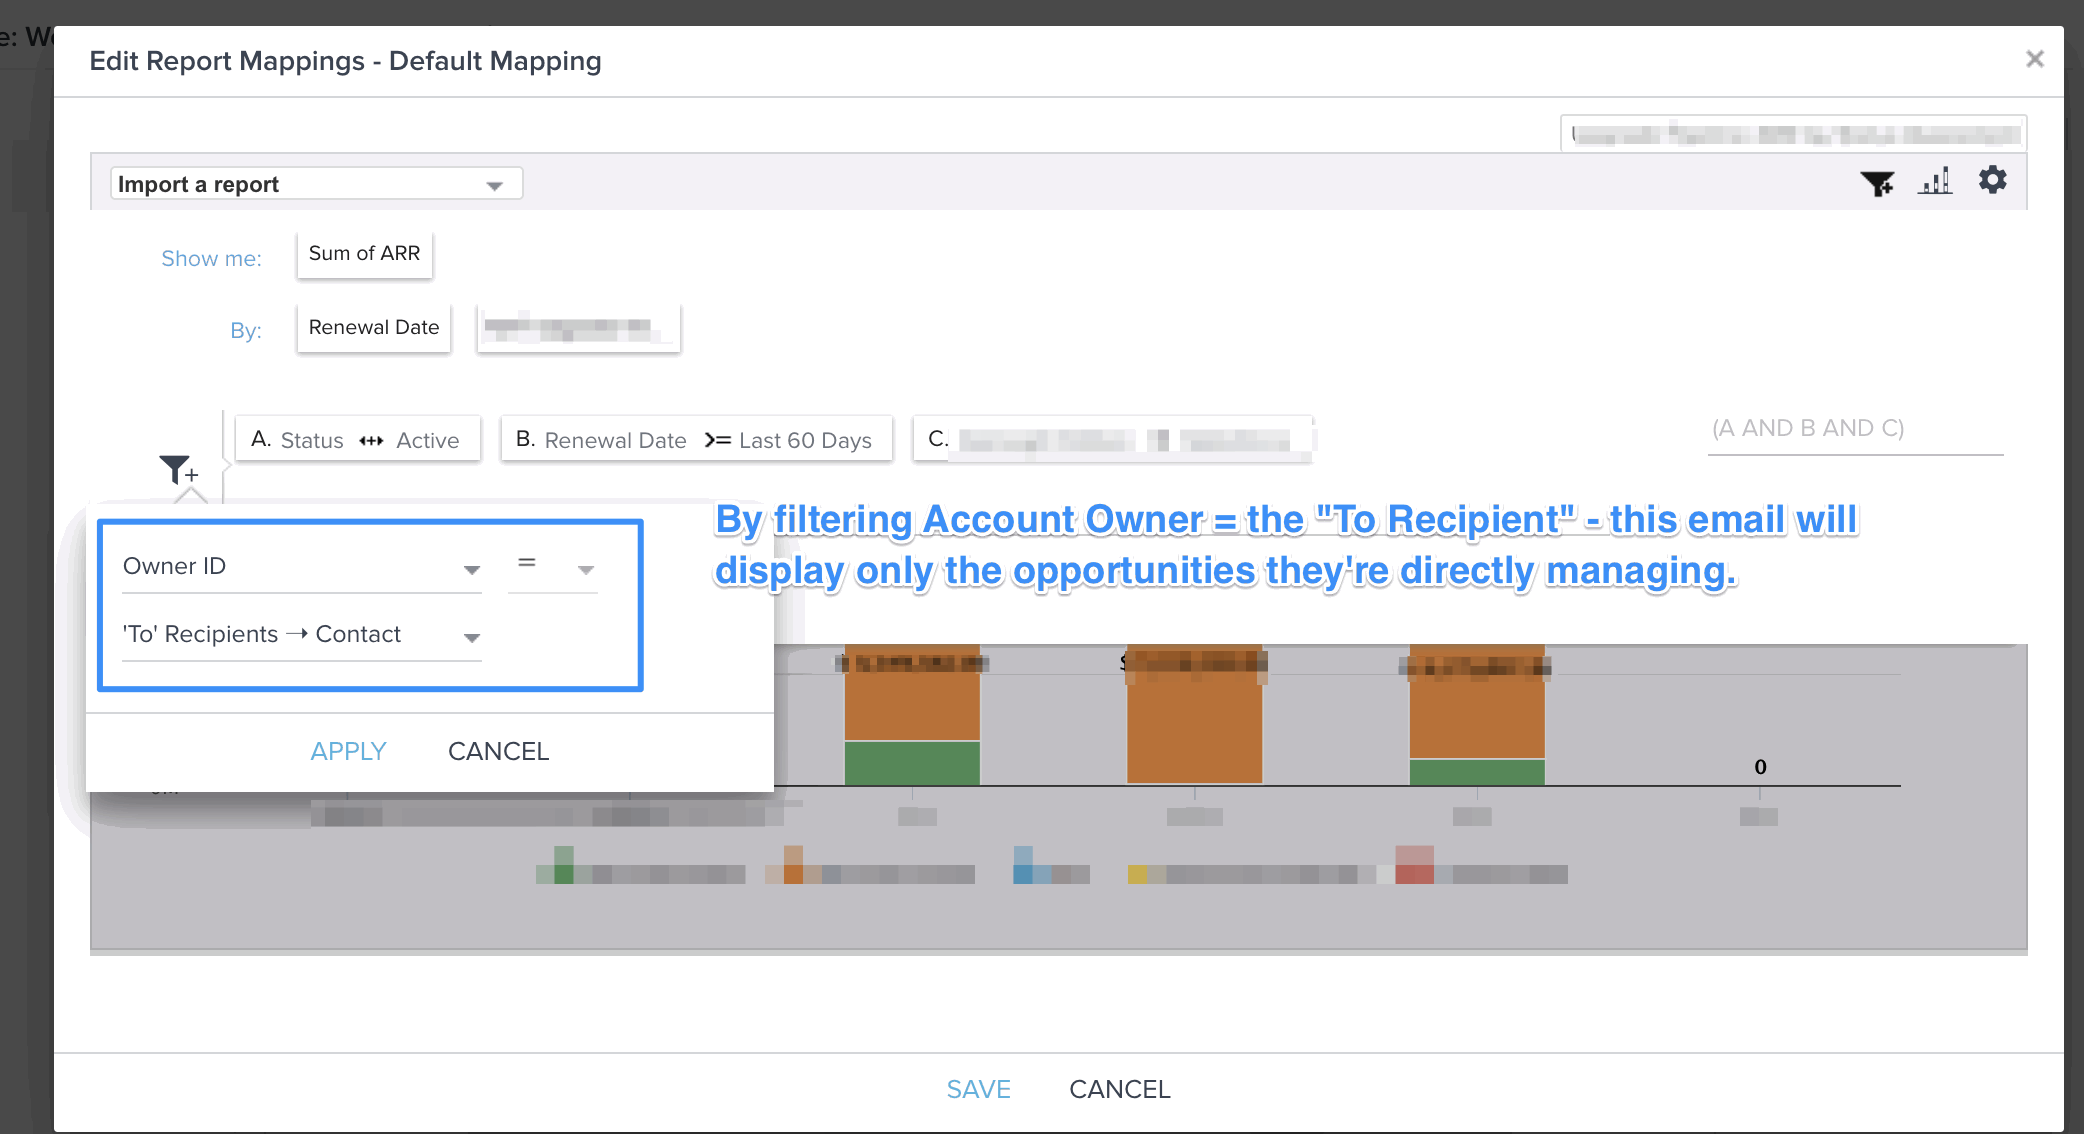
Step 2: Select the report you want to include in the email (you can also do this directly from the program) - you’ll repeat this step for each report that you insert.
Pro Tip: If you want to create an extra layer of filtering, you can do that directly in this setup screen. Ex. Say you’re sending pipeline reports to individual Sales Reps - you could filter the reports here to “Recipient”. This would then filter the reports in the email to only show relevant data for that Sales Rep vs. the entire organization pipeline. Neat!
Step 3: Next, you’ll want to create a Program with the Type = User. This is very important as it will remove the requirement to filter by account/relationship. This will allow you to send records from any account to your Users.
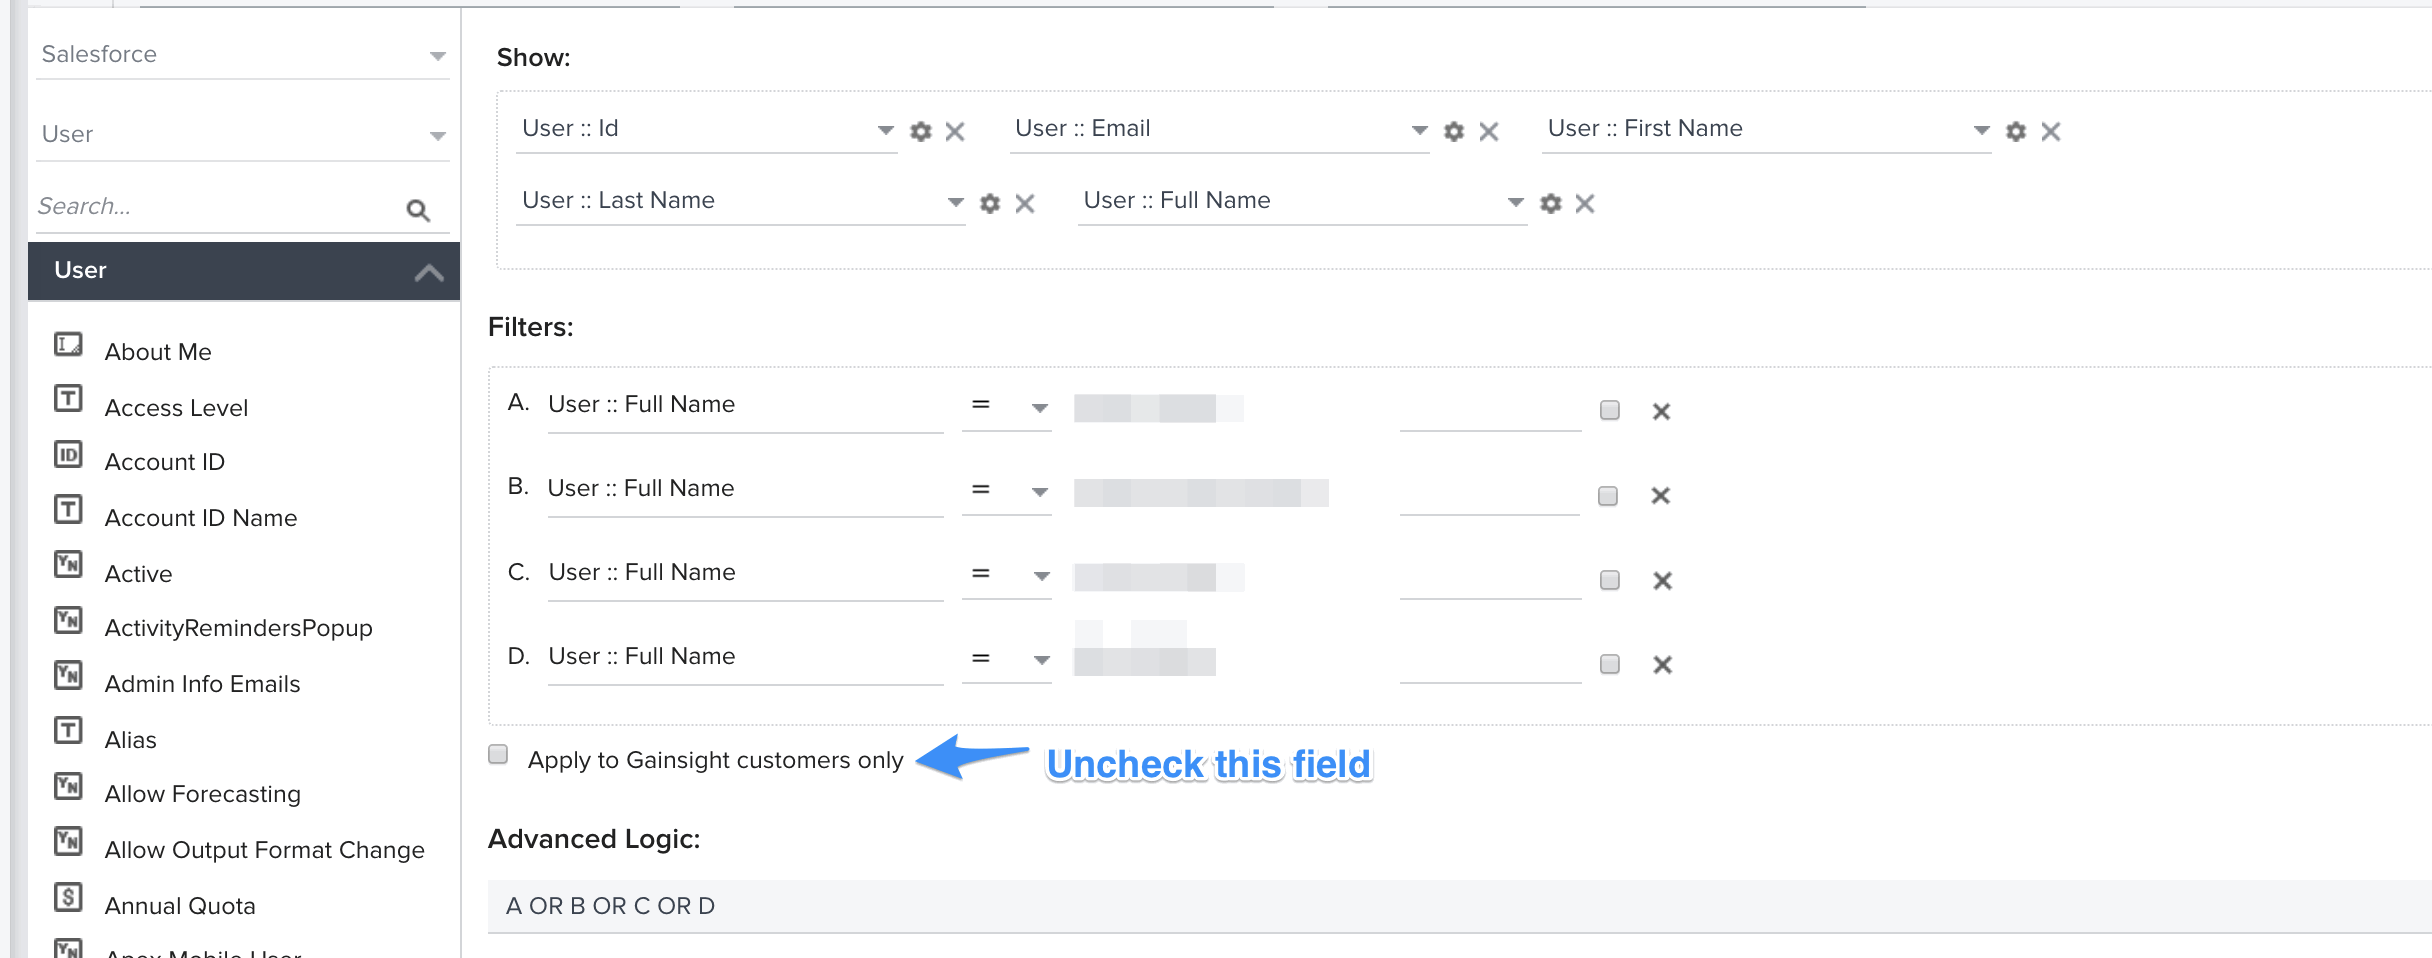
Step 4: Once the program is created, you need to setup your list. There are several ways you can do this. For my use case, I used the user object and filtered to each set of managers (we have 3 main segments - so I ended up with 3 programs to make the management of it easy). If you have easily identifiable Users (by Role, Profile, Manager, etc), you could easily use this object as well. You could also upload a CSV or pull your dataset from another object.
Pro Tip: Salesforce Edition Customers Only: Ensure you’ve unchecked the “Apply to Gainsight Customers Only”. Since your users are likely not associated with an account, you’ll want to have the blank so it pulls users.
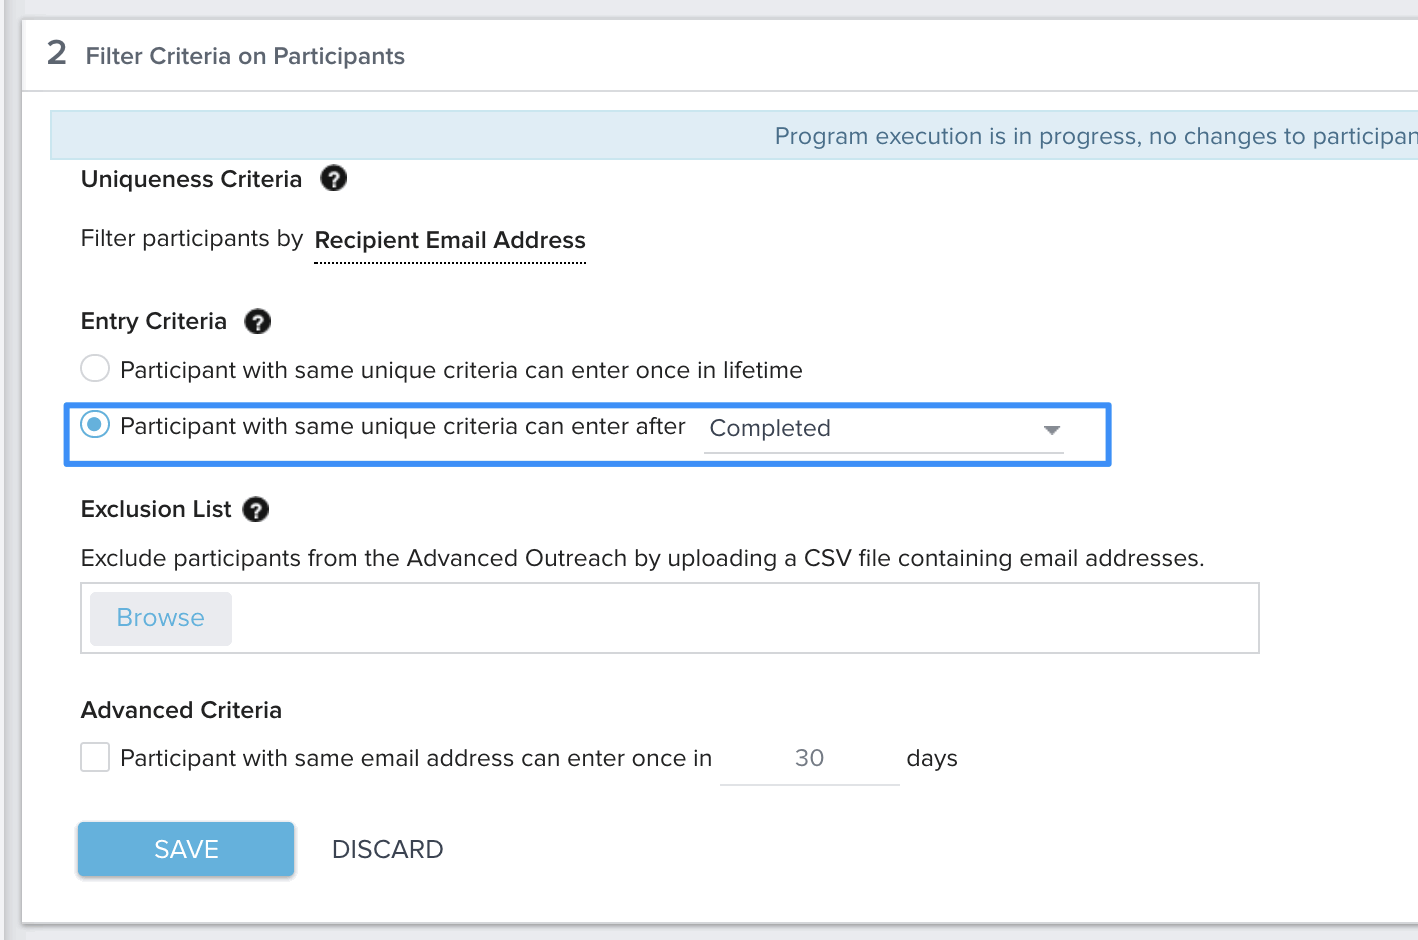
Pro Tip: Ensure you have this setup to resend the email once the participant has “Completed” the program (your schedule will ensure it only goes out in the correct timeframe). If you don’t choose this option - it won’t continue to send the email each week since the participants received this email once.
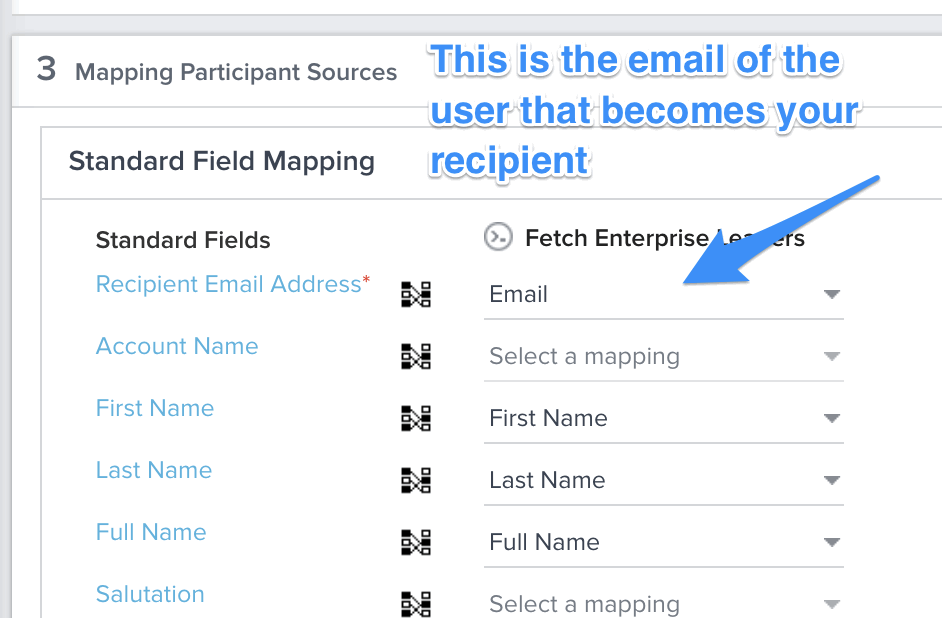
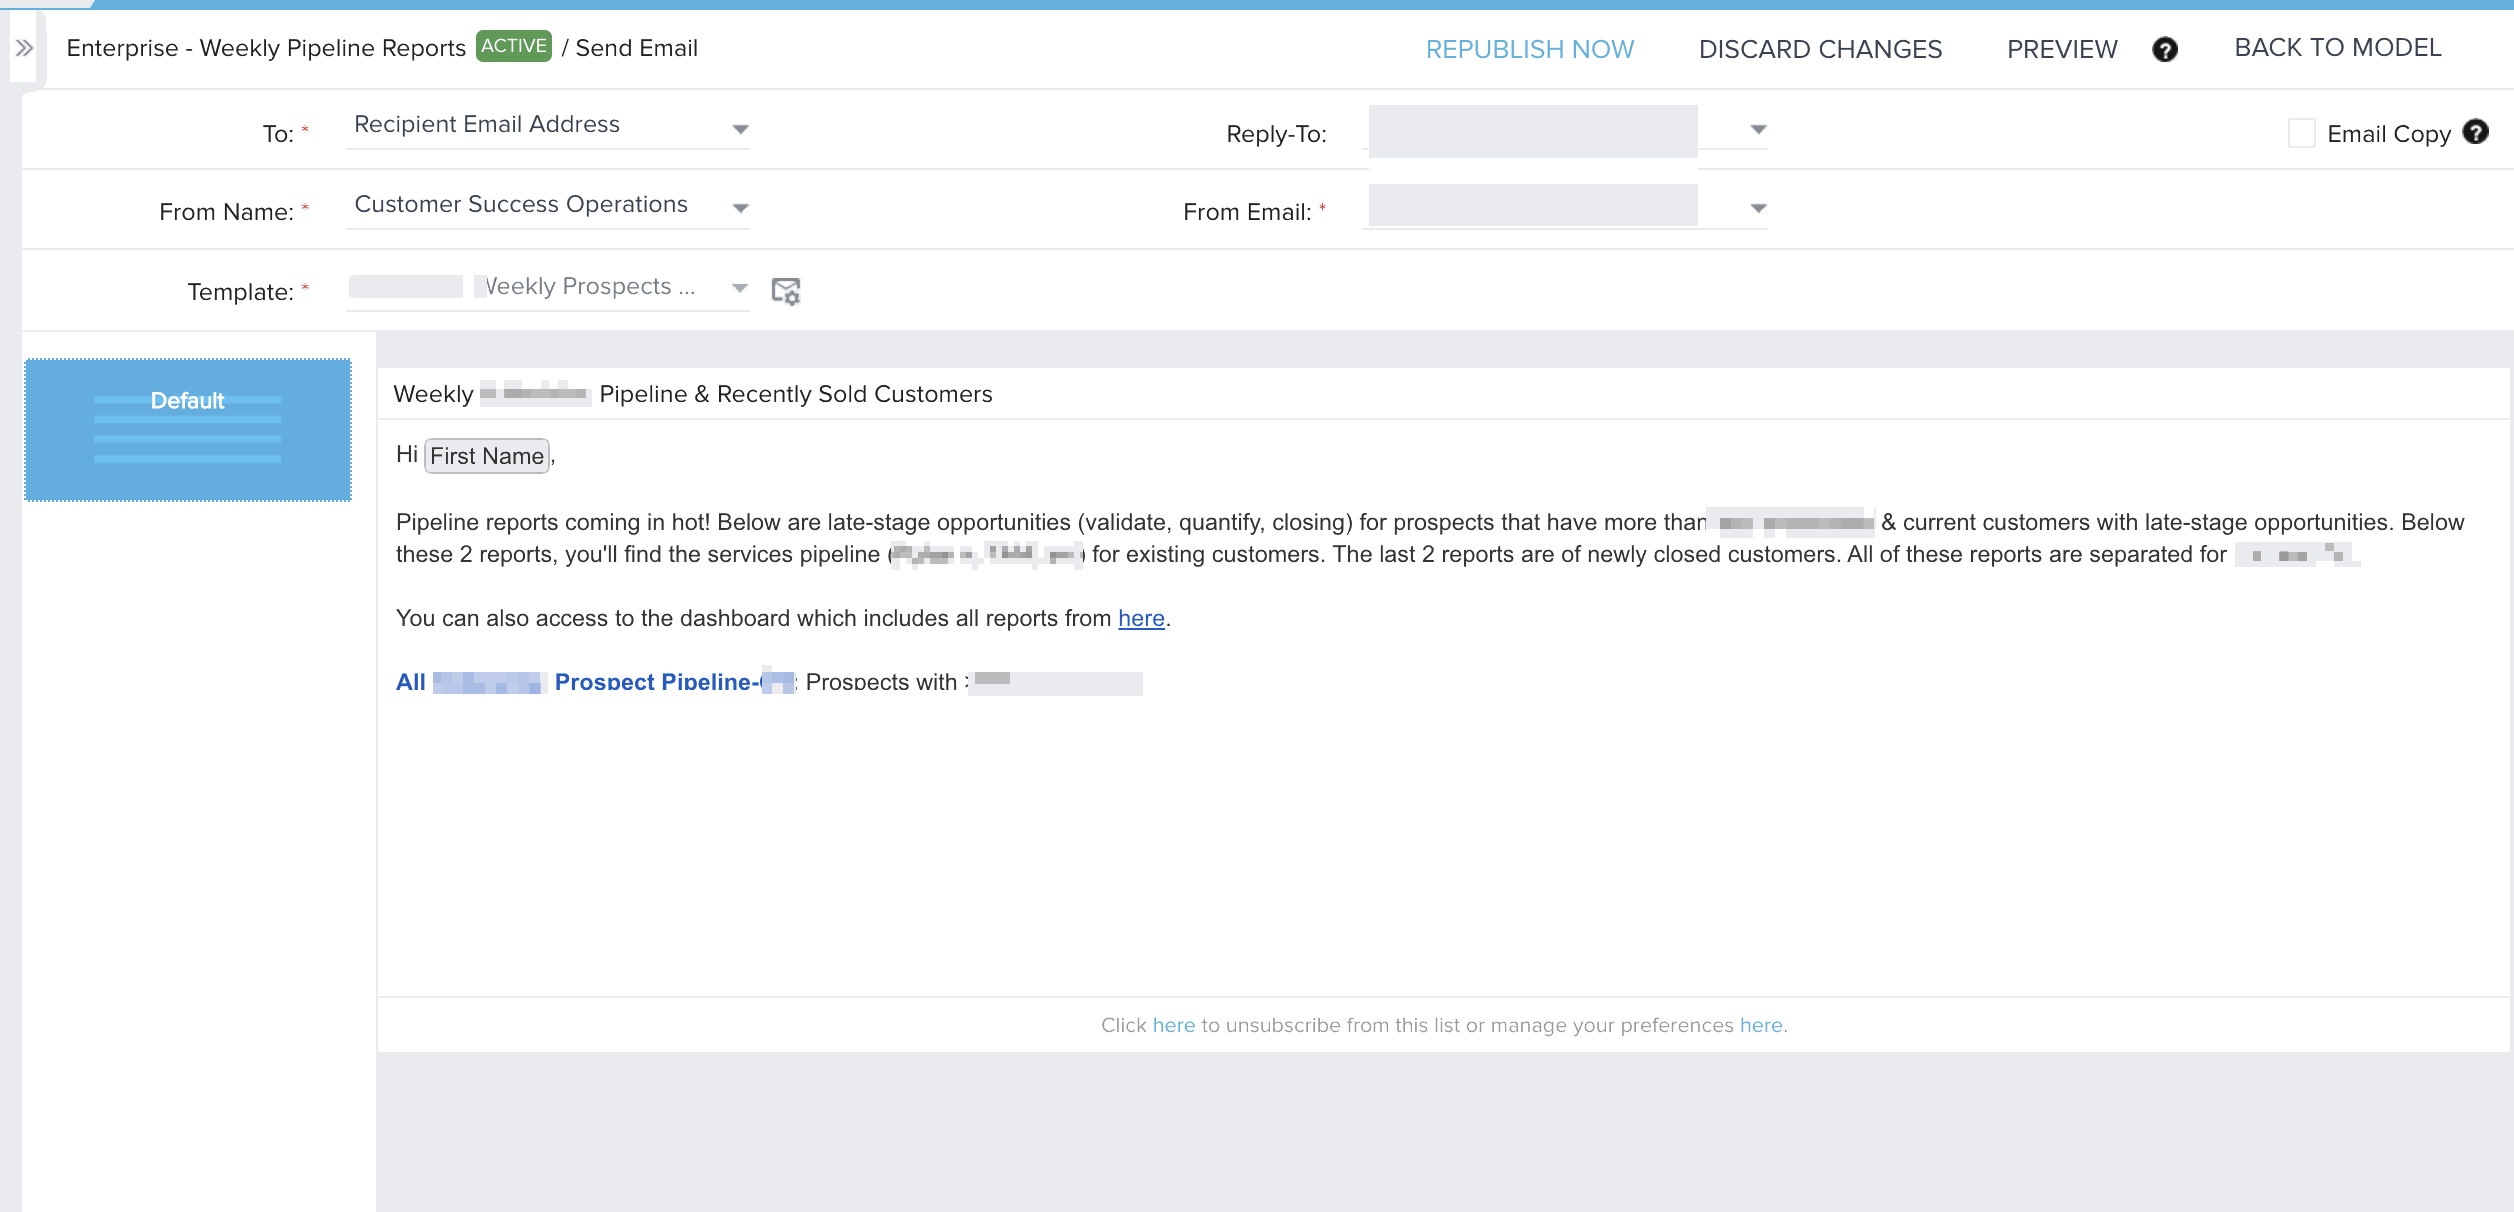
Step 5: Yay - easy part! Now that you have the email template and users setup - you can put those together. If you skipped adding the reports to the templates in Step 2, you can do that here as well.
Step 6: Schedule! The last step is to schedule the Program to run - we have ours setup weekly. You’ll need to do this in 2 locations. First, within the list setup - you’ll want to schedule it to run first so your list is refreshed before the email sends (see example below).
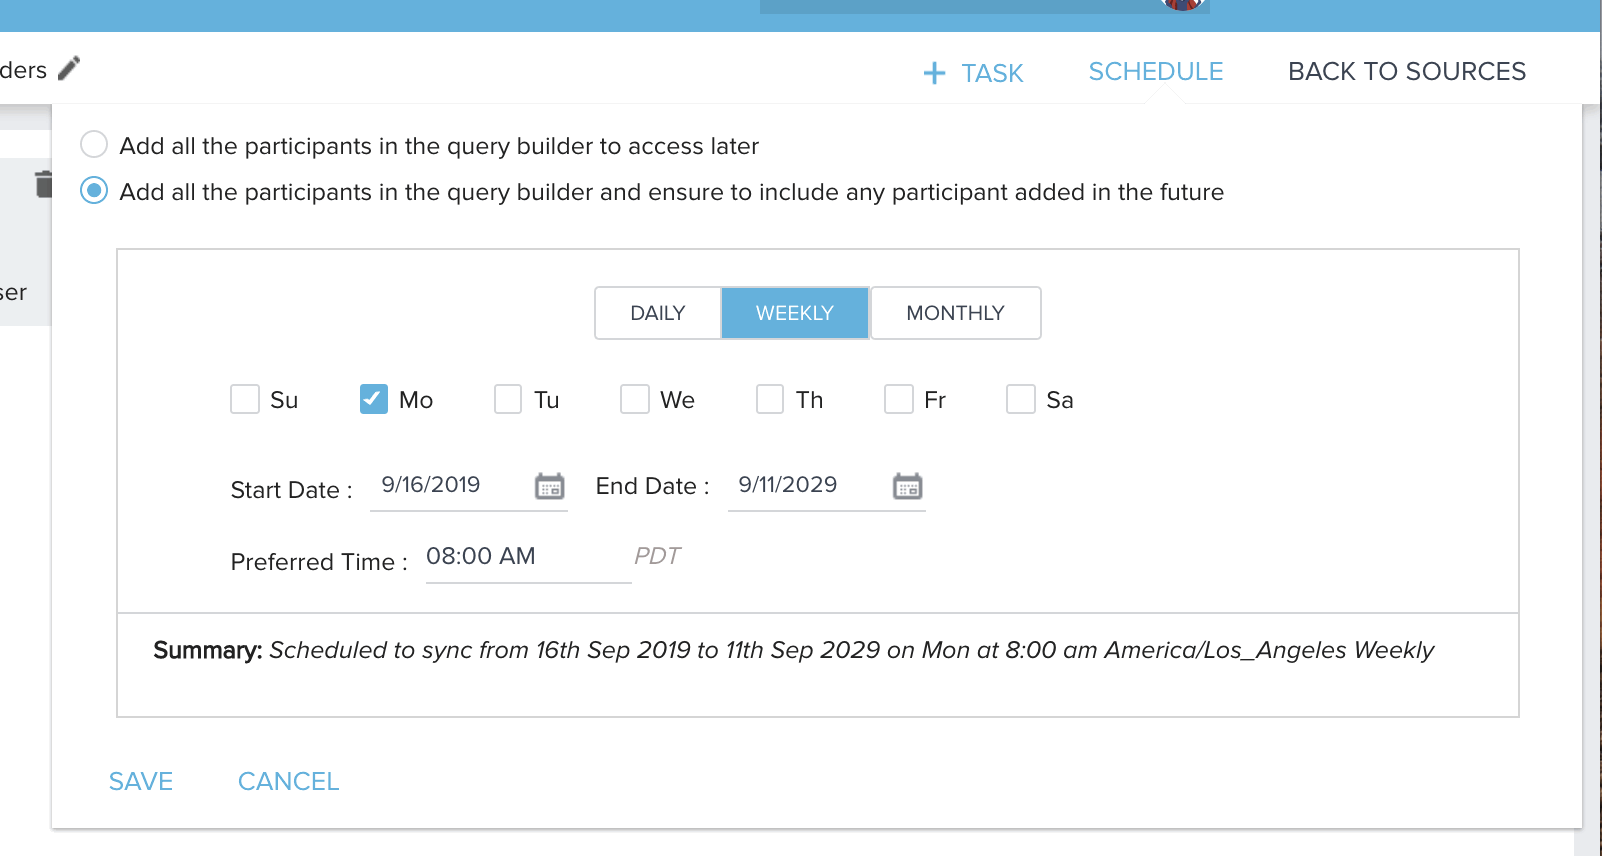
And then once you’re ready to send, you’ll want to “Run” the program and schedule that on the timeframe you want to send the emails out. Remember: this should be at a time that is after the list refresh schedule.
Here’s a final look at our program - let me know if you have questions or want to chat through a use case for this!
