
Last Updated On: March 17, 2026
This article helps admins and community managers install Salesforce in the Customer Communities.
Overview
Salesforce is a cloud-based Customer Relationship Management (CRM) solution that helps organizations to effectively streamline their sales and marketing operations.
Gainsight Customer Community (CC) integration with Salesforce allows you to pull data from Salesforce to CC and link it to community members. You can then get insights on the Salesforce data using the Dashboards within CC.
Prerequisites
Before installing the Salesforce application in CC, ensure the following prerequisites are met:
- Customer Community: You are logged into Control as a community manager or administrator.
- Salesforce: You must have a Salesforce admin permission.
Salesforce integration requires certain user-level permissions in Salesforce in order for the CC platform to interact with objects in your Salesforce instance. Expand the below section for more information.
Salesforce integration requires certain user-level permissions in Salesforce in order for the CC platform to interact with objects in your Salesforce instance.
Gainsight recommends authenticating as a user with the following permissions, or alternatively logging in as a Salesforce admin or a generic service account with admin permissions:
To access the API to issue calls and receive the call results, a user must have the API Enabled permission. The CC app can query or update only the objects and fields to which it has access through the permissions of the user you use to authenticate.
The table below provides an overview of the various object and field-level permissions required for each Salesforce integration to function as intended:
| Salesforce Integration | Object | Object-level permissions | Field-level permissions |
| Community data export | Contact | read | read: Id, Email, Account, LastModifiedDate, CreatedAt |
| Community data export | Community | create read update delete | read: Account, ActivityDate, UserId, Contact, ReplyContent, RepyURLPublic, RequestID, TopicCategoryID, TopicCategoryName, TopicContent, TopicID, TopicTitle, TopicURLPublic |
| Community data export | Community | create read update delete | read: ID, Contact, Email, Account |
| Account import | Contact | read | read: Id, Email, Account, LastModifiedDate |
| Account import | Account | read | read*: Id, Name, LastModifiedDate, picklist property |
| Case escalation | Case | create | edit: Subject, Description, Origin |
| Federated search | Knowledge | read | read: Id, Summary, Title |
Integrating Salesforce and Customer Community
There are two steps that admins must complete before the Salesforce data is available in CC:
- Install the application in Salesforce: Install the application in Salesforce.
- Salesforce application: Install the application in Customer Community.
Install Gainsight CC Data Connector in Salesforce
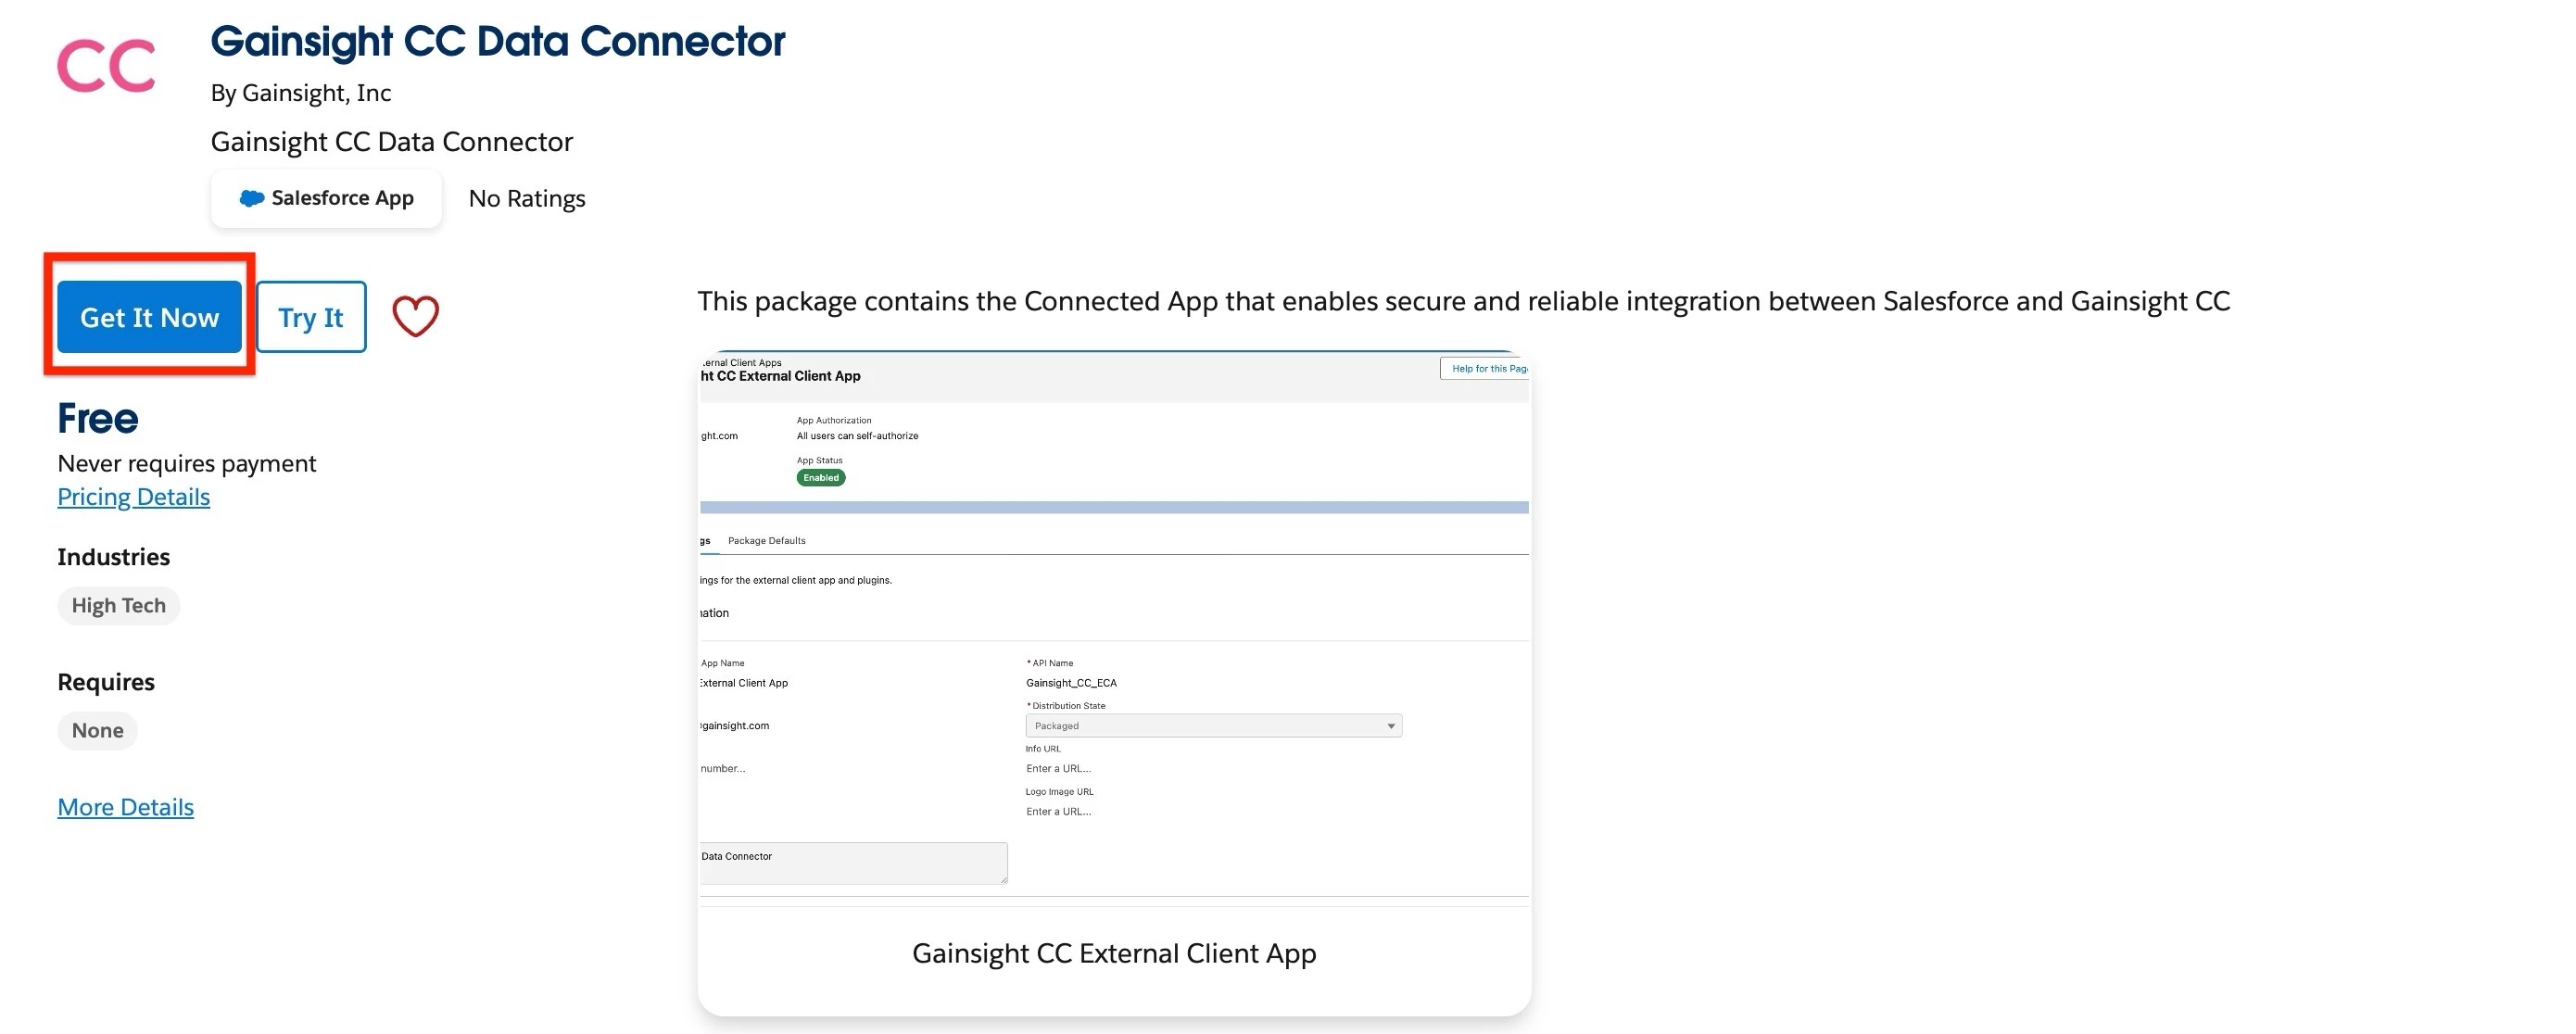
Install the Gainsight CC Data Connector from the Salesforce AppExchange before proceeding to connect the Salesforce app in CC.
To install the Gainsight CC Data connector:
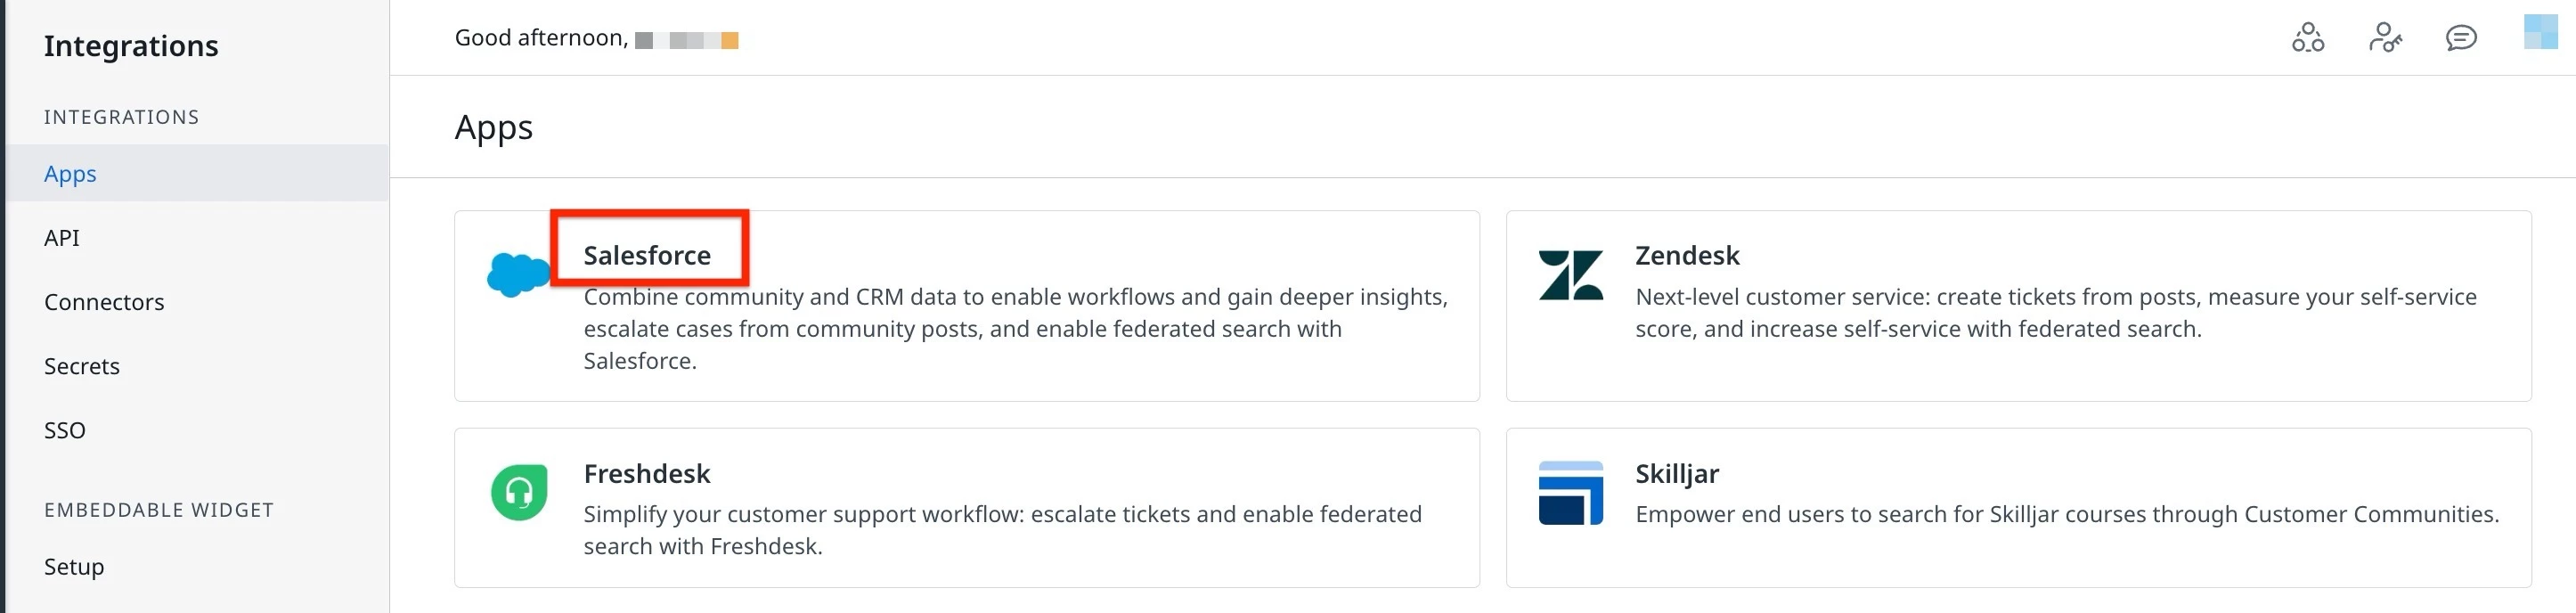
- Log in to Control.
- Navigate to Integrations > Apps. The Apps page appears.
- Select the Salesforce application card. The Salesforce page appears.
- Click the Installation tab.
- Click Go to AppExchange. You are redirected to the Salesforce marketplace.

- Click Get It Now to install Gainsight CC Data Center.
Install the connector and then proceed to install the Salesforce App in CC.
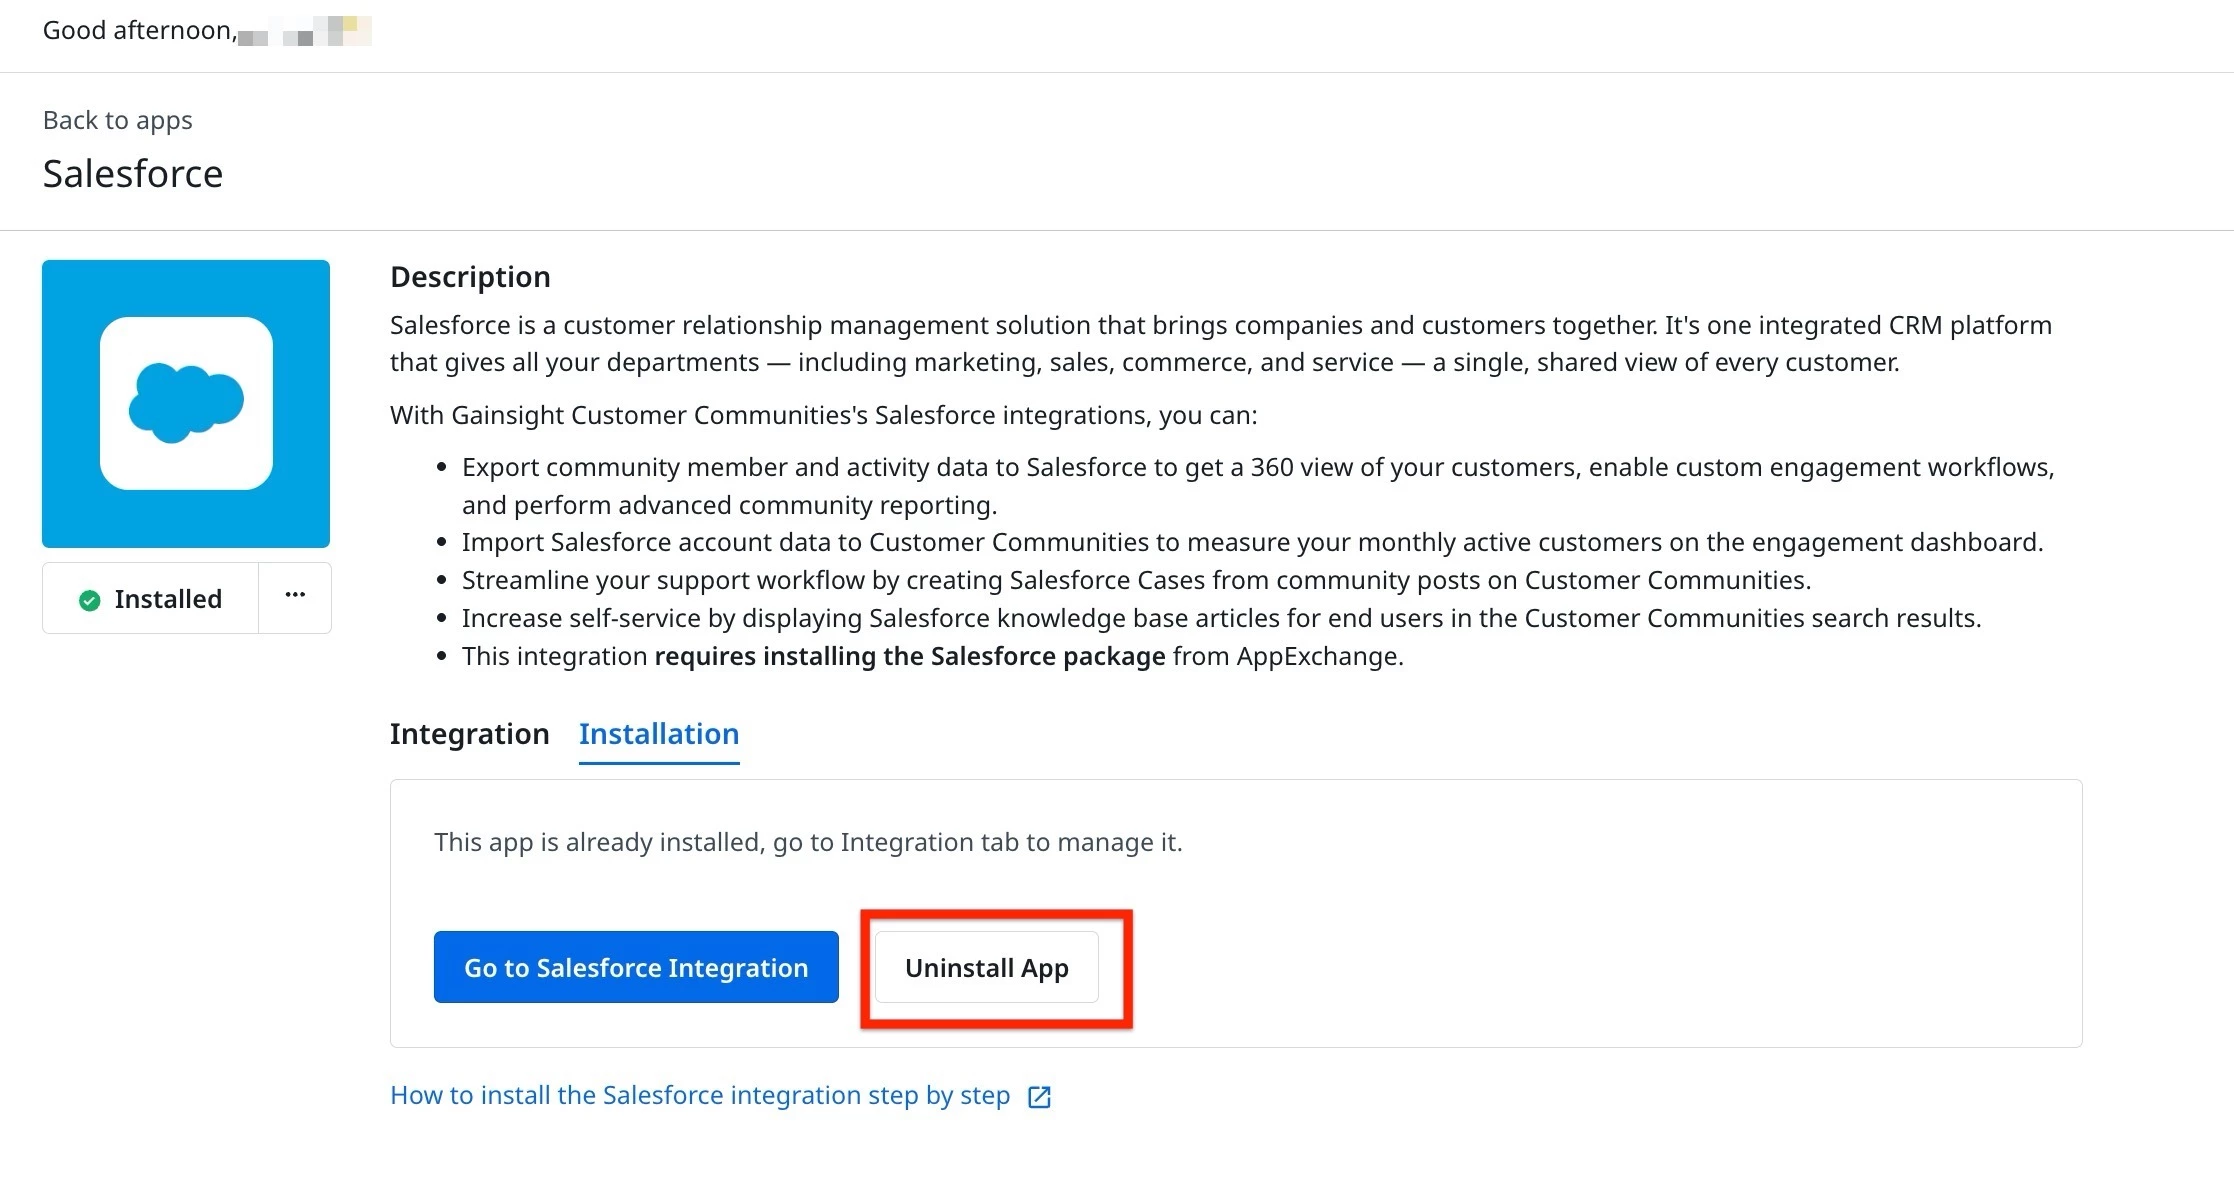
Install Salesforce Application in CC
Once the Gainsight CC Data Connector is installed in Salesforce, admins can now install the Salesforce Application in CC.
Note: If the Salesforce application is already installed in the Customer Community, and the Salesforce card shows an error message, refer to the Reinstallation section in this article.
To install the Salesforce application:
- Log in to Control.
- Navigate to Integrations > Apps. The Apps page appears.
- Select the Salesforce application card. The Salesforce page appears.
- Click the Installation tab.
- Click Install Salesforce Integration. The Salesforce authentication window appears.
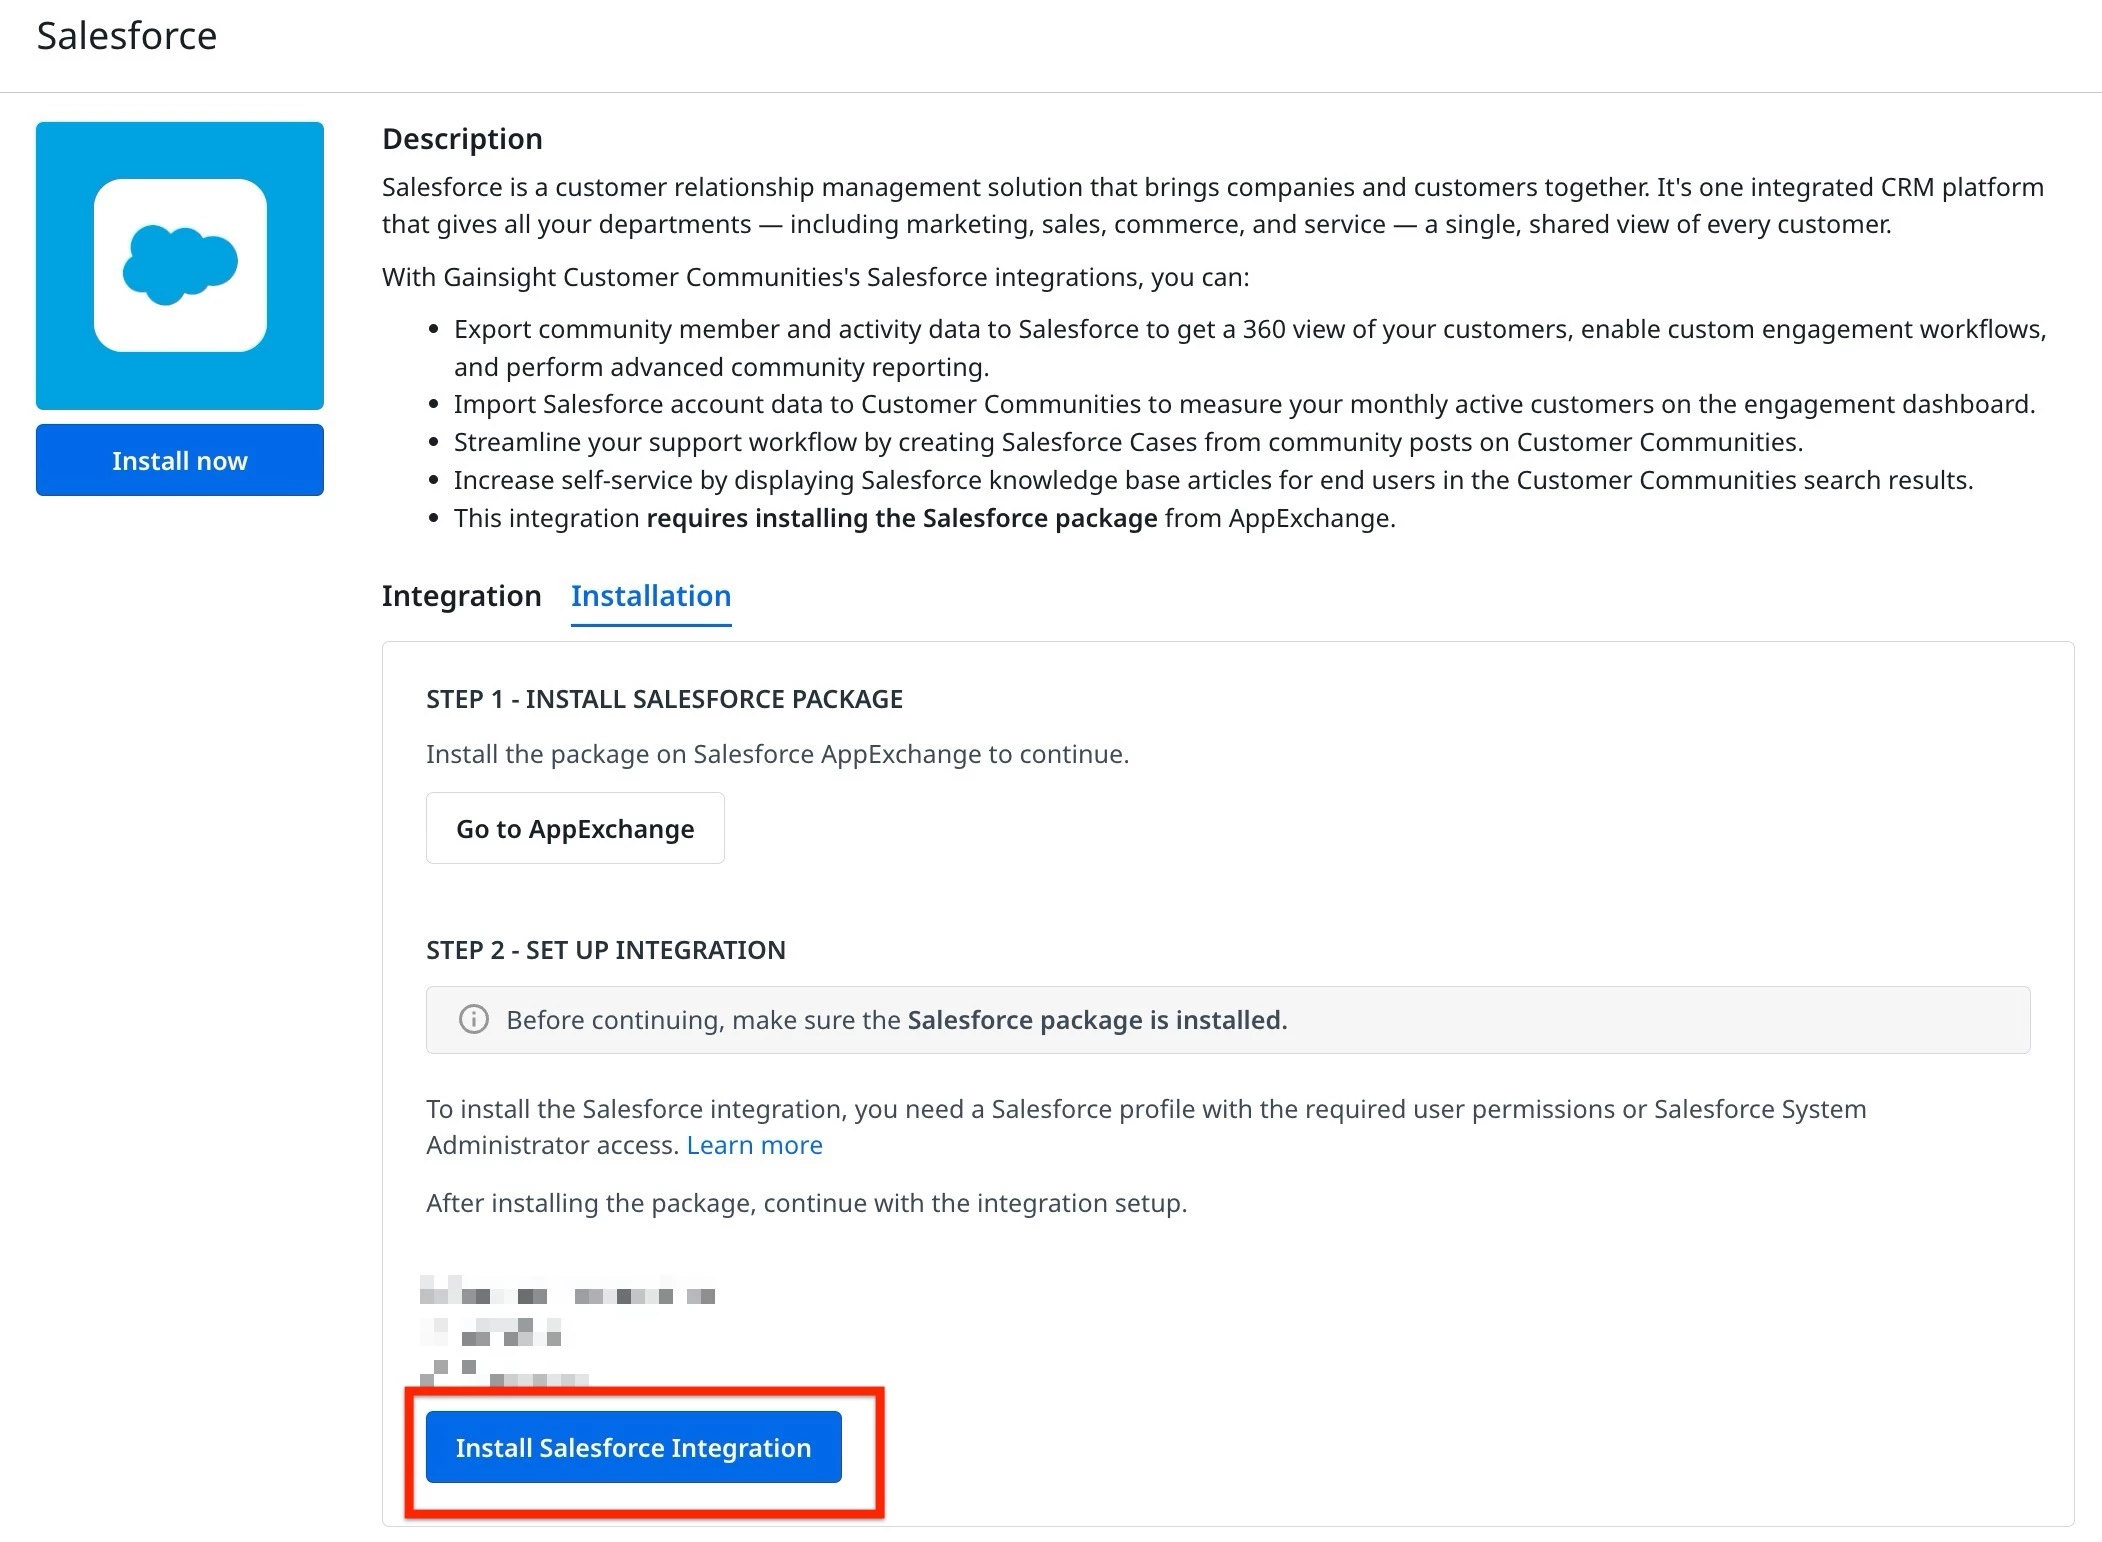
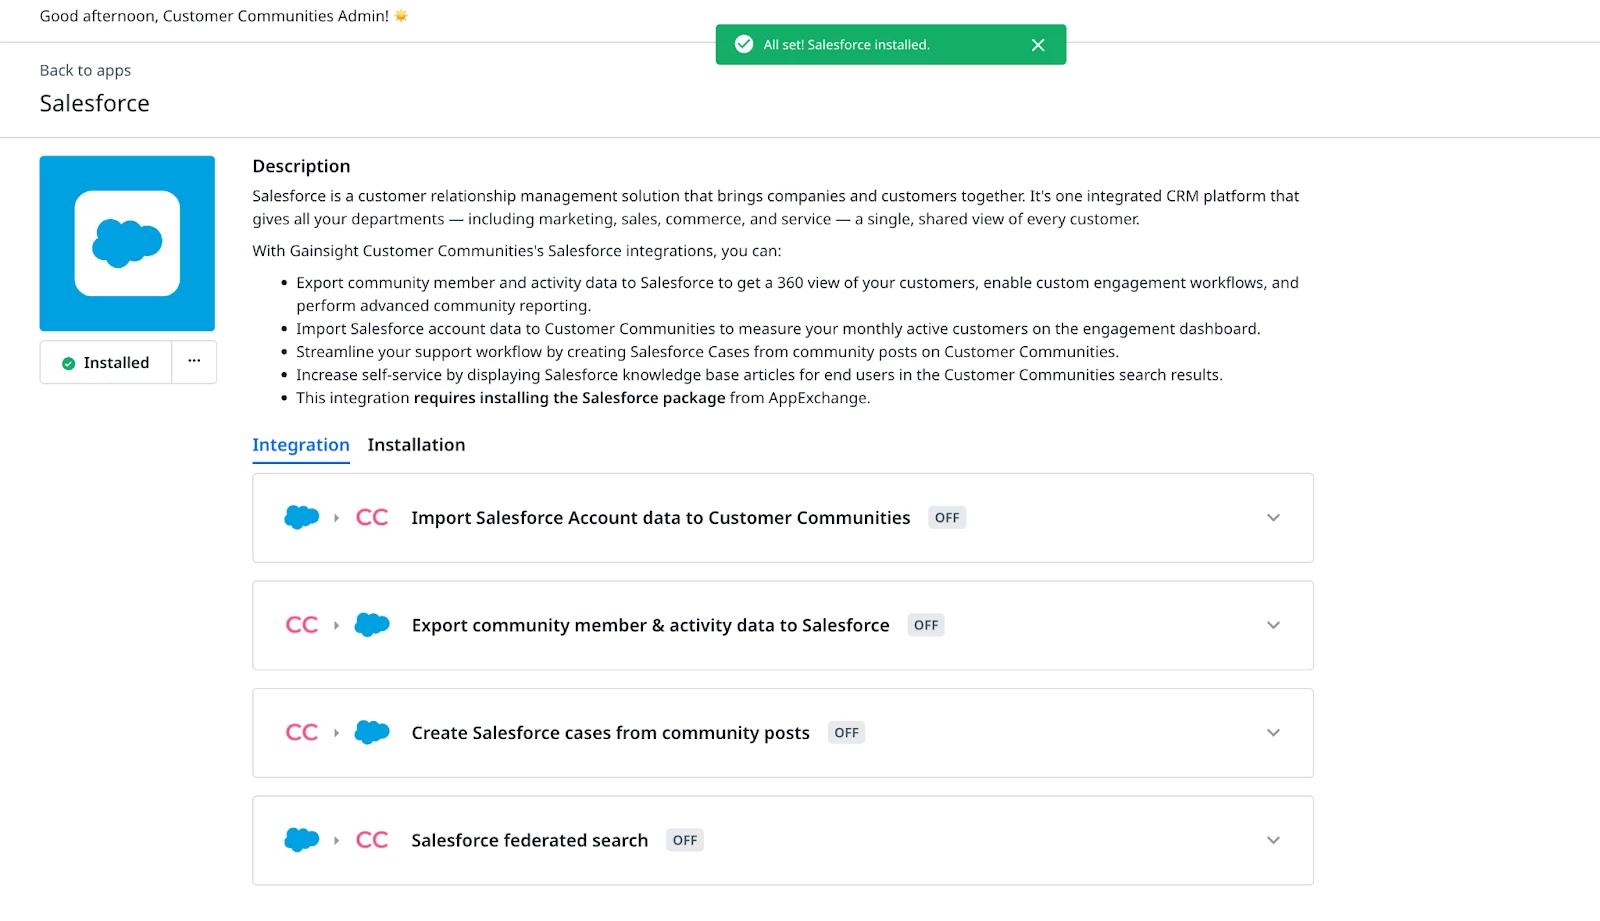
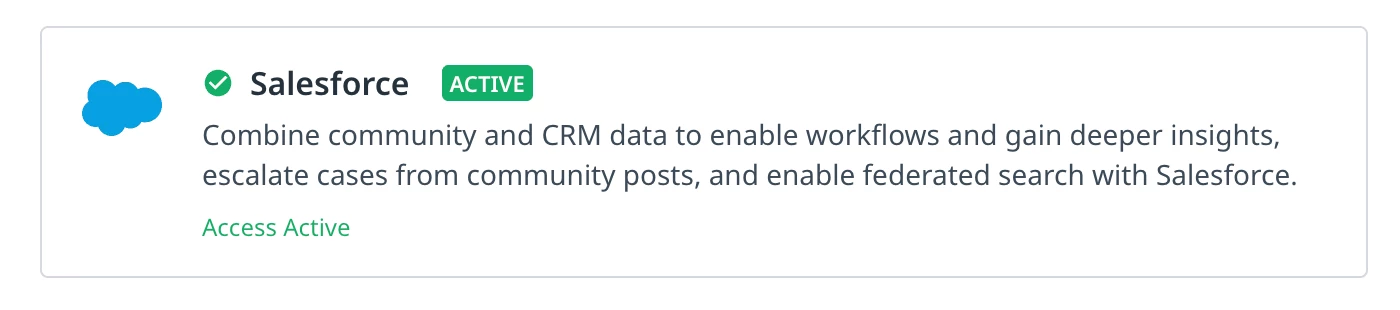
Complete the installation process using your Salesforce authentication. A successful installation of the integration is represented by an Active tag next to Salesforce.
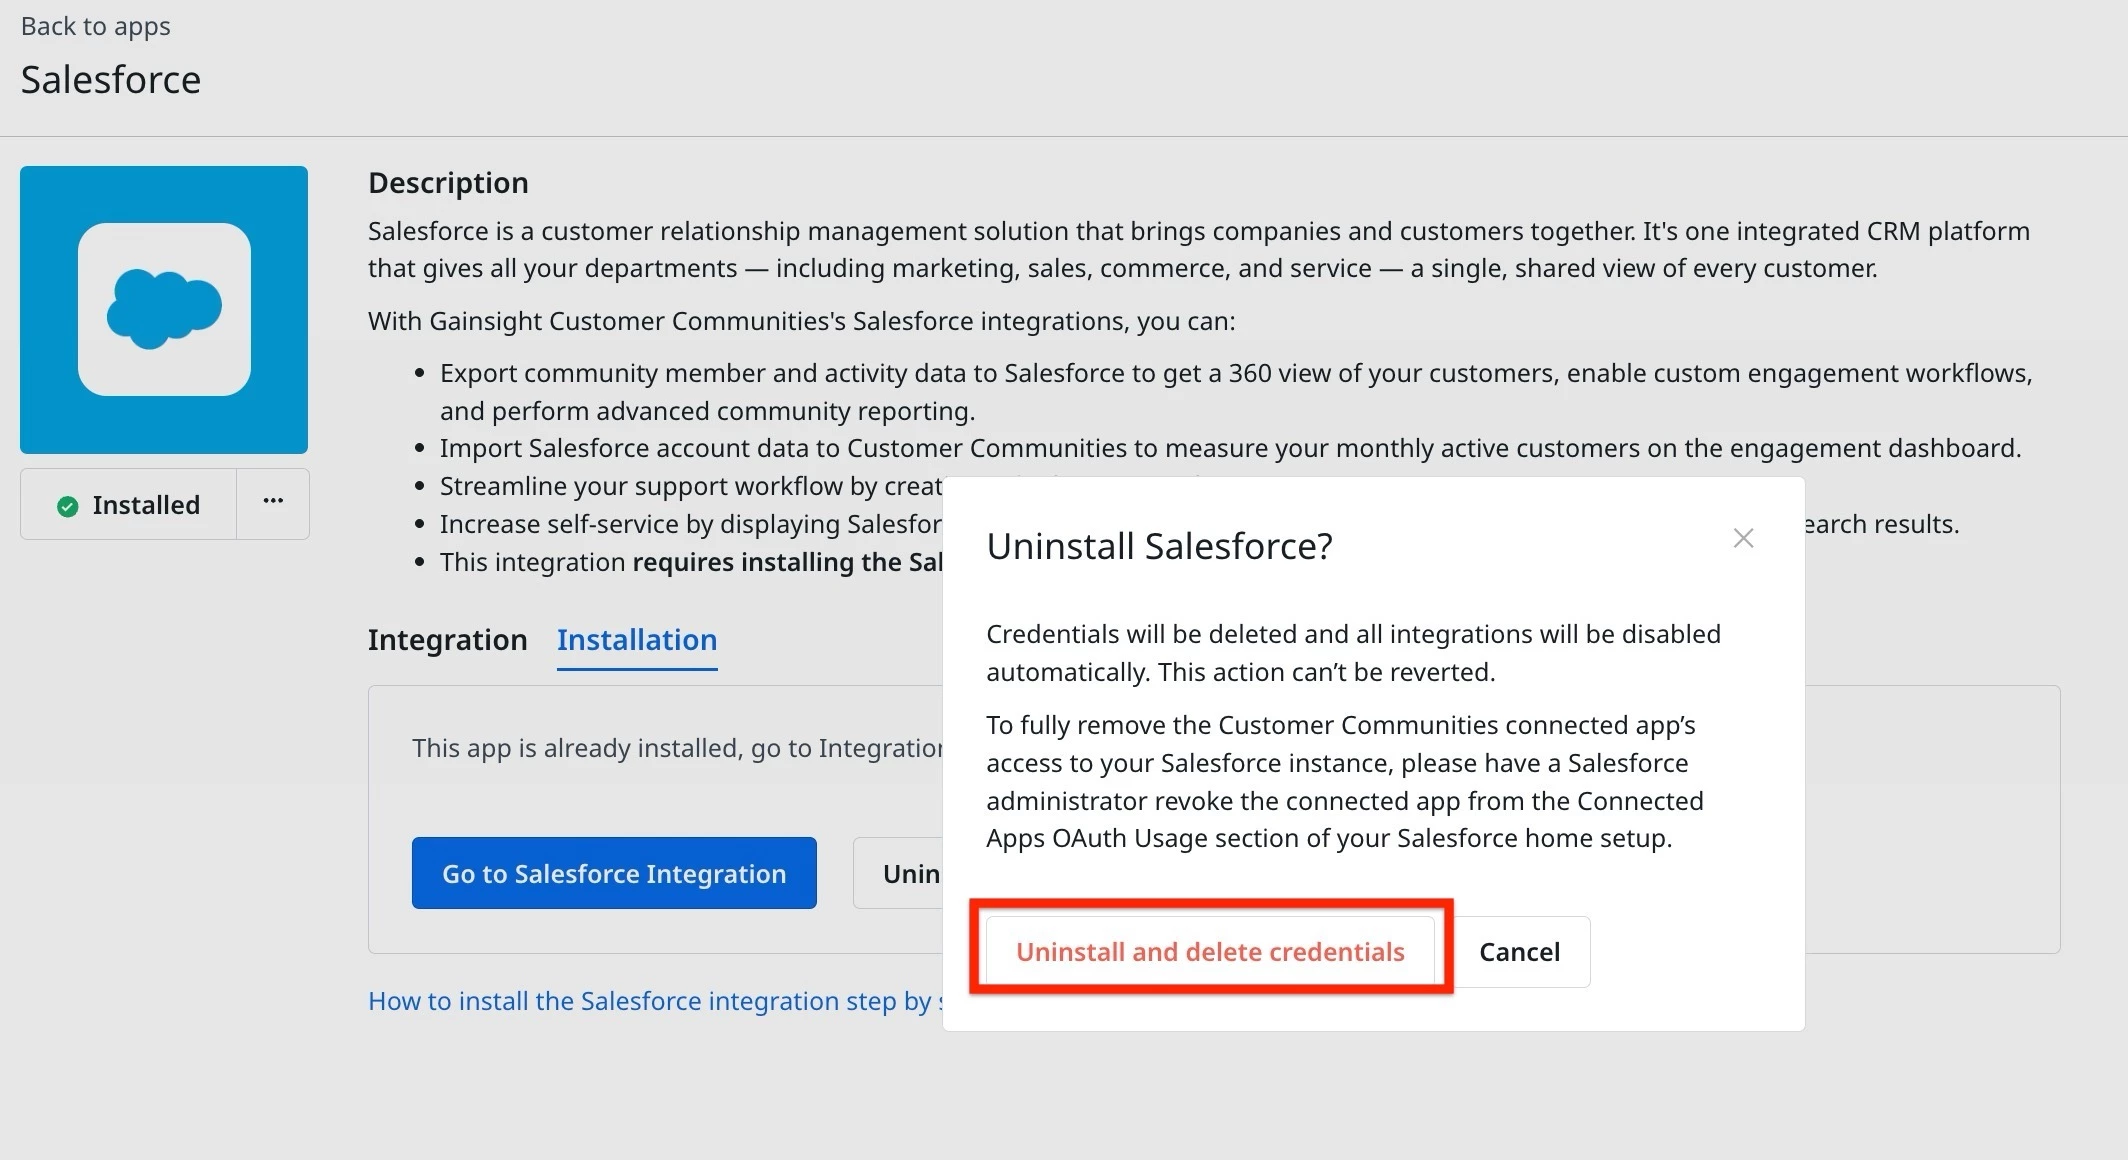
Uninstall Gainsight CC Data Connector
You can uninstall the CC Data Connector app from the control. To uninstall the app:
- Log in to Control.
- Navigate to Integrations > Apps. The Apps page appears.
- Select the Salesforce application card. The Salesforce page appears.
- Click Uninstall App. The Uninstall Salesforce dialog appears.
- Click Uninstall and delete credentials.
Note: When you uninstall the Gainsight CC Data Connector app, CC automatically uninstalls the Salesforce integration.
Salesforce Connection Status and Re-Installation Scenarios in CC
This section explains the different Salesforce connection statuses displayed in CC and the actions required for each scenario. As an admin, you can use this information to determine whether the Salesforce integration is active, whether tokens have expired, or whether reinstallation is required.
Active Connection
This connection indicates that Salesforce is successfully connected to CC, the tokens are valid, and no immediate action is required.
Reinstallation Required
This section explains scenarios where Salesforce requires mandatory reinstallation due to security reasons.
Tokens Active but Re-Auth Required
Tokens are active, but you must reinstall the application.

Tokens Expired and Re-Auth Required
Tokens have expired, and you must reinstall the app.

Additional Resources