
Last Updated On: April 22, 2026
This article helps control users, such as community managers, administrators, to configure multi-language settings in the Destination and Control views.
Overview
Multi-language capability empowers organizations to deliver an end-to-end localized experience to their community end-users by translating system data, such as phrases and metadata, creating localized categories in Knowledge Base, Community, and so on. Control users, such as community managers and administrators, can configure and enable multi-language settings from the Control view. This feature helps organizations drive conversations and boost engagement within sub-communities catering to end-users speaking a particular language.
Business Use Case: Imagine your organization’s community is primarily English-speaking to address a global audience. However, a subset of end-users forms a sub-community to share start discussions in a non-English language. While the content generated by end-users is in their preferred language, the system-generated content, like metadata and phrases, remains in English. The multi-language capability translates and displays all system data in the chosen language, offering a fully localized experience to these end-users.
Configure Language Settings in Control
The languages available in the Destination view depend on the languages you enable and publish in the Control view. You can activate up to 17 additional languages from the list of available languages.
Enable Languages
Enable languages allow you to activate a language in Control and in Destination. However, in Destination, enabled and unpublished languages are not visible to community users except control users. This allows you to completely set up a localized language community before making it available to community users.
To enable languages from the Control view:
- Log in to Control.
- Navigate to Settings > Languages. The Languages page appears.
- From the Enable Language column, turn on the toggle of the desired languages.
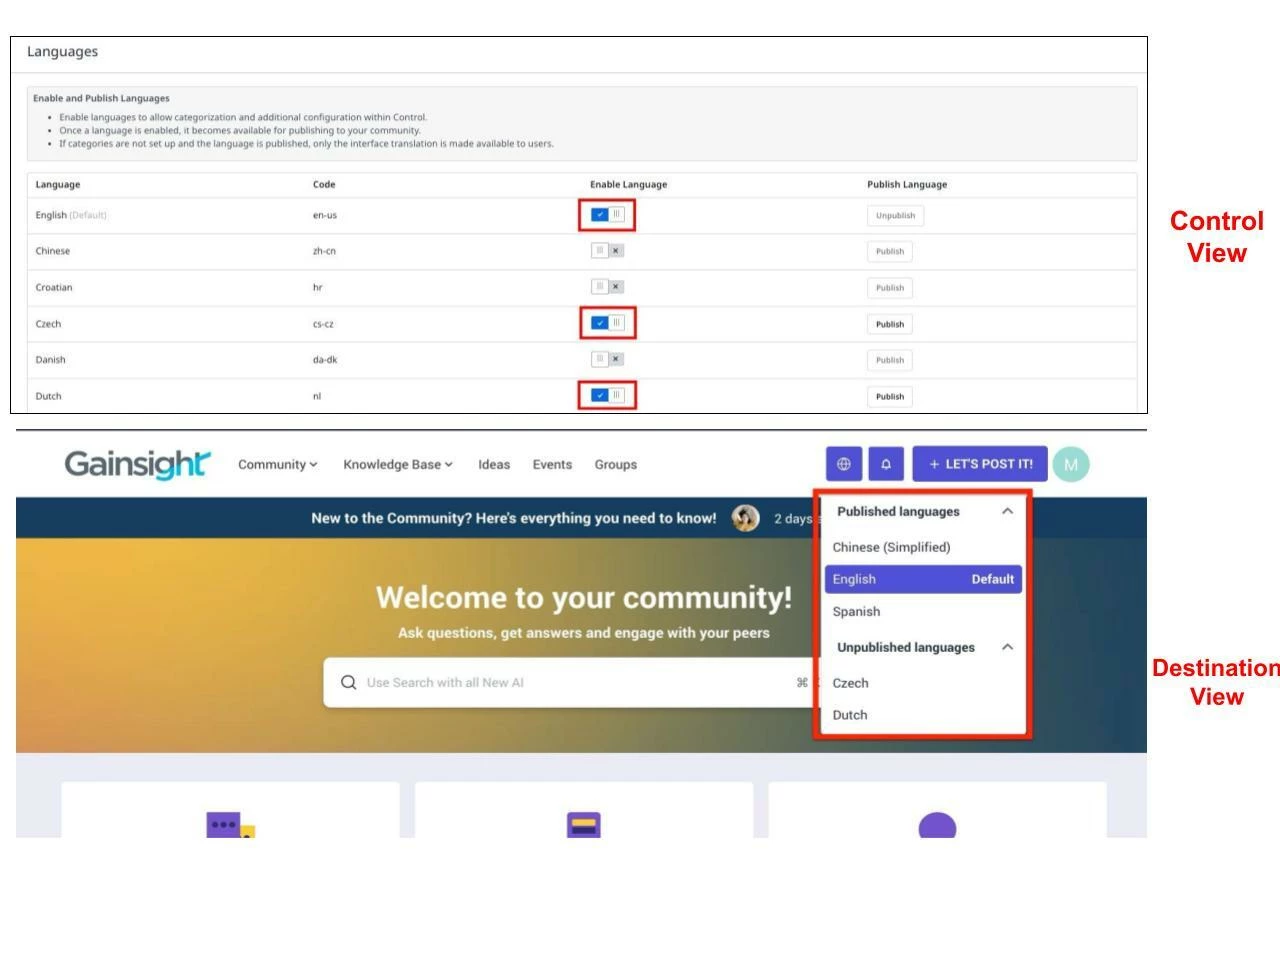
Languages, for which the Enable Language toggle has been turned on, appear in the language picker drop-down list as UNPUBLISHED LANGUAGES in the Destination view.
For example, as shown in the image below, the enable toggle for Czech and Dutch languages are turned on in the Control view, and they appear in the Destination view. English is the default language of which the enable toggle cannot be turned off.
Note:
- The default language is the language in which the community was created. The default language’s toggle cannot be turned off.
- You can enable up to 17 languages. Additional languages cannot be added.
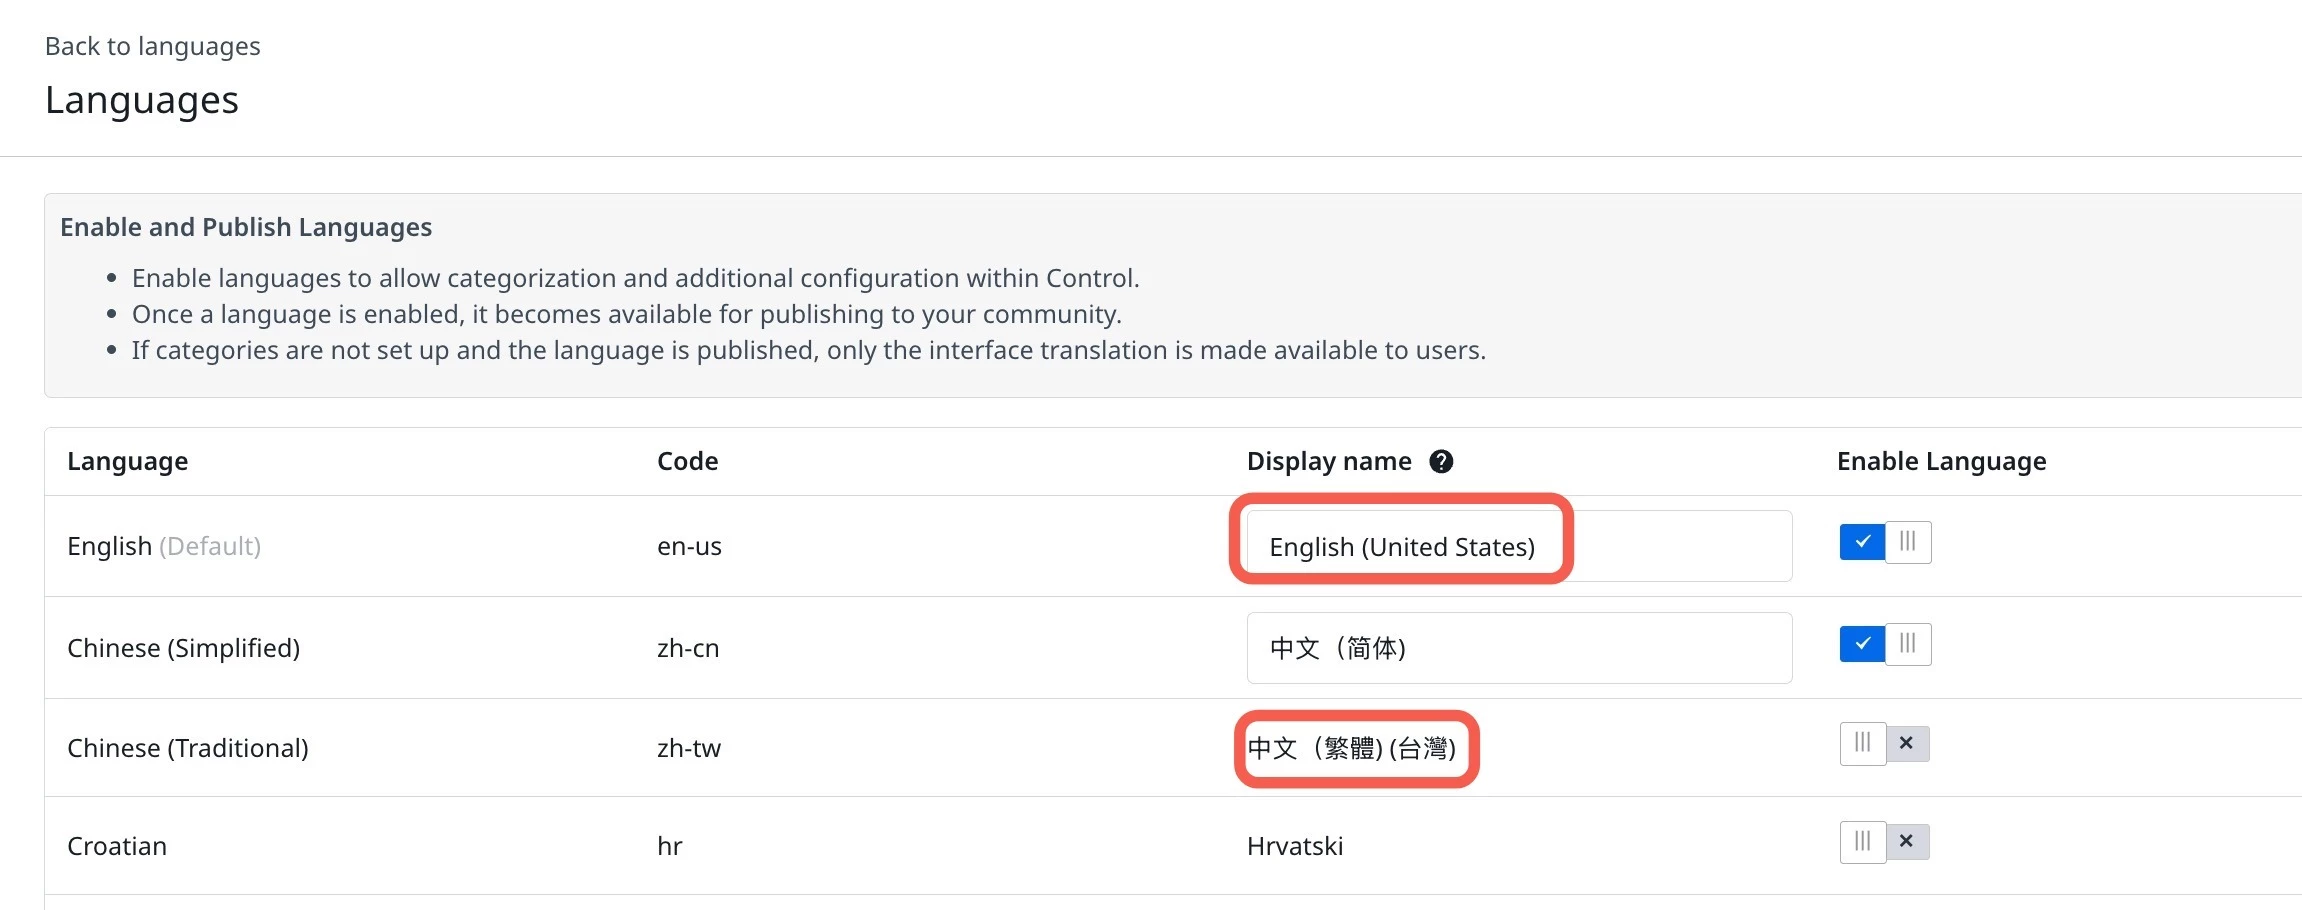
Customize Language Display Names
After enabling a language, you can edit the name that appears in the community language switcher. This is useful when you want to show a regional label, for example, Español (México) instead of Español, without modifying any translated phrases.
To customize a language display name:
- Log in to Control.
- Navigate to Settings > Languages. The Languages page appears.
- From the Enable Language column, turn on the toggle of the desired languages. The language name field becomes editable.
- Click the language Display Name field and enter the custom display name.
Publish Languages
Publish language allows you to make a language available in Destination for community users after completely setting up the localized page.
Note: For a language to be available for community users, both Enable Language and Publish Language toggles should be turned on in the Control view.
To publish languages from the Control view:
- Log in to Control.
- Navigate to Settings > Languages. The Languages page appears.
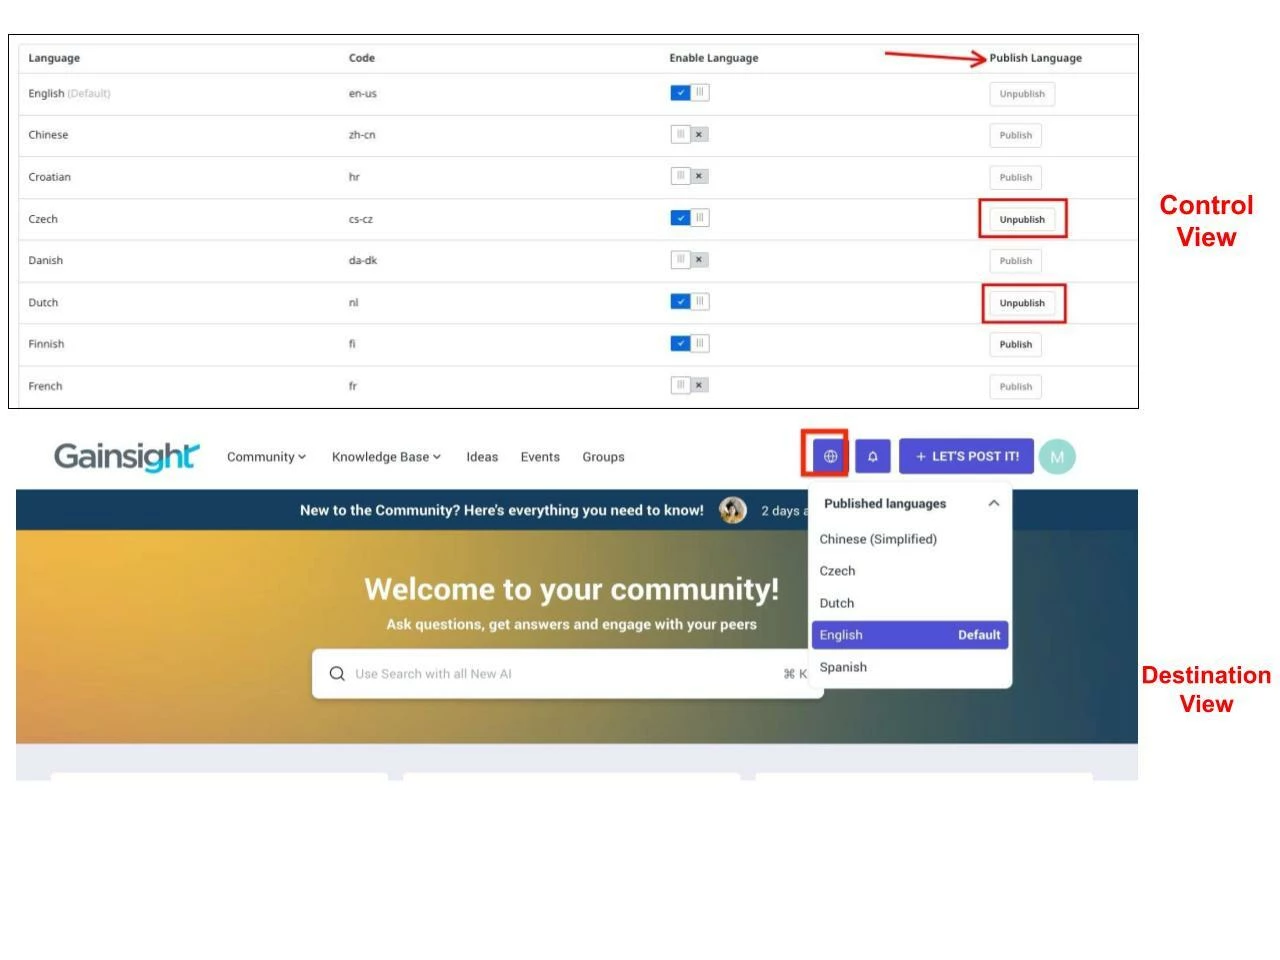
- From the Publish Language column, click the Publish button for languages that you want to make available for community end users and logged out users.
For example, as shown in the image where Czech and Dutch languages are published.
Customize Phrases
Customizing phrases allows you to deliver a localized experience that is more personal and caters to community users speaking a particular language. You can customize phrases from the Destination view as well. However, certain phrases can only be accessed and customized from the Control view. For instance, phrases on the community login page are only accessible when you are logged out, and to edit any phrase, you must be logged in.
For more information on phrases in the community, refer to the Phrases module in the Knowledge Base.
To customize phrases in the Control environment:
- Log in to Control.
- Navigate to Customization > Phrases. The Phrases Overview page appears.
- From the language picker drop-down list, select the preferred language for which you want to customize the phrase.
- Navigate to the phrase that you want to customize.
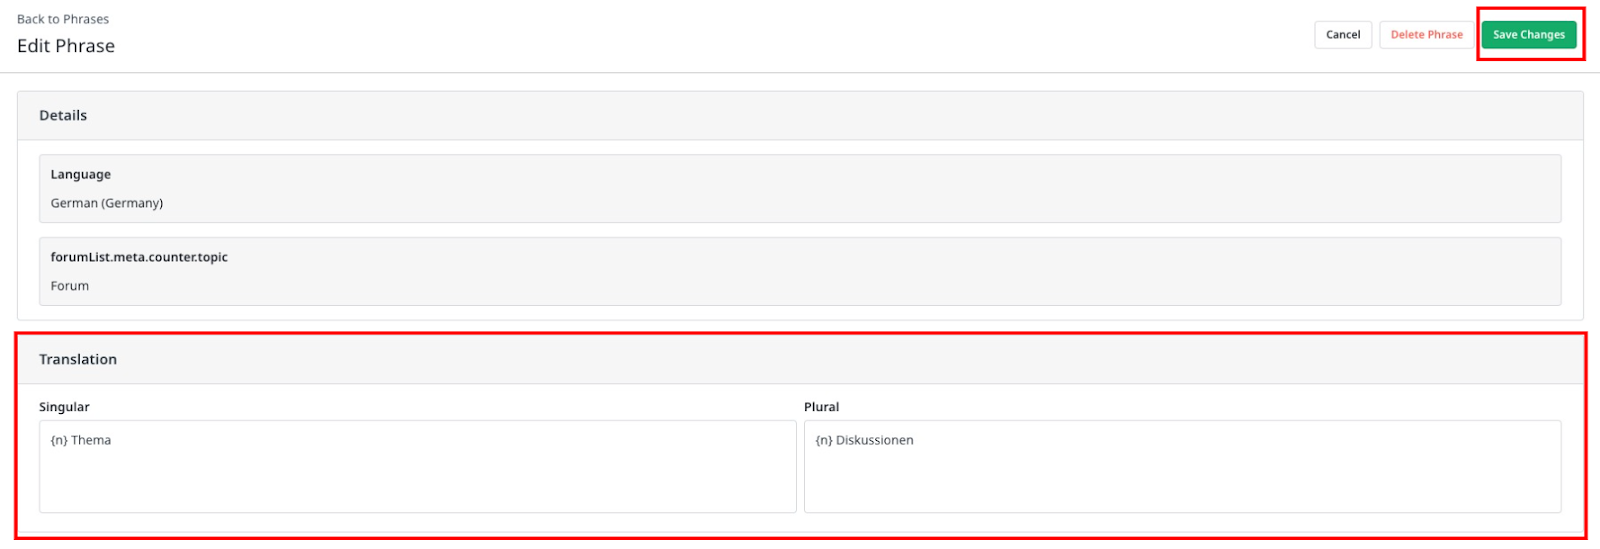
- Click Edit. The Edit Phrases screen appears.
- In the Translation pane, enter the new Singular and/or Plural phrase.
- Click Save Changes. The customized phrase appears in Destination.
Configure Language Settings in Destination
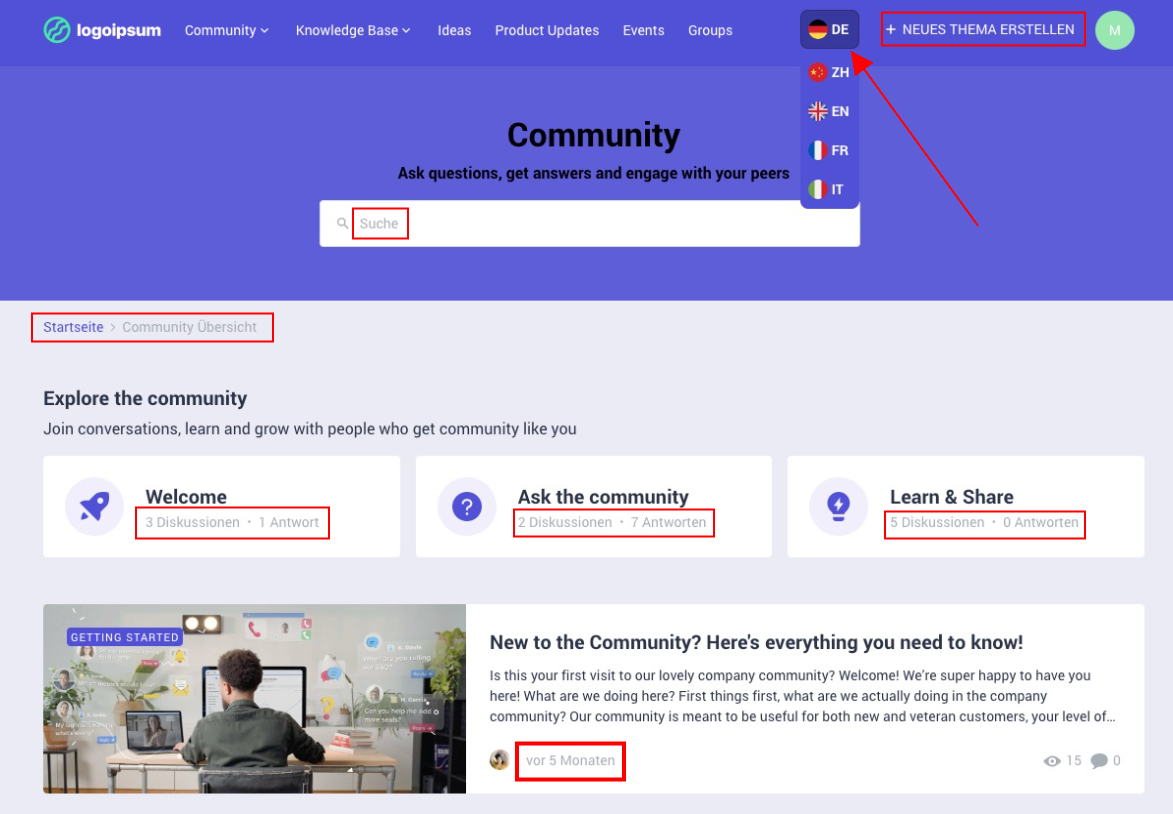
Language settings in the Destination view allow you to see and verify how customizations appear to end-users. You can select the language from the language picker drop-down list. The system text on the interface changes to the selected language.
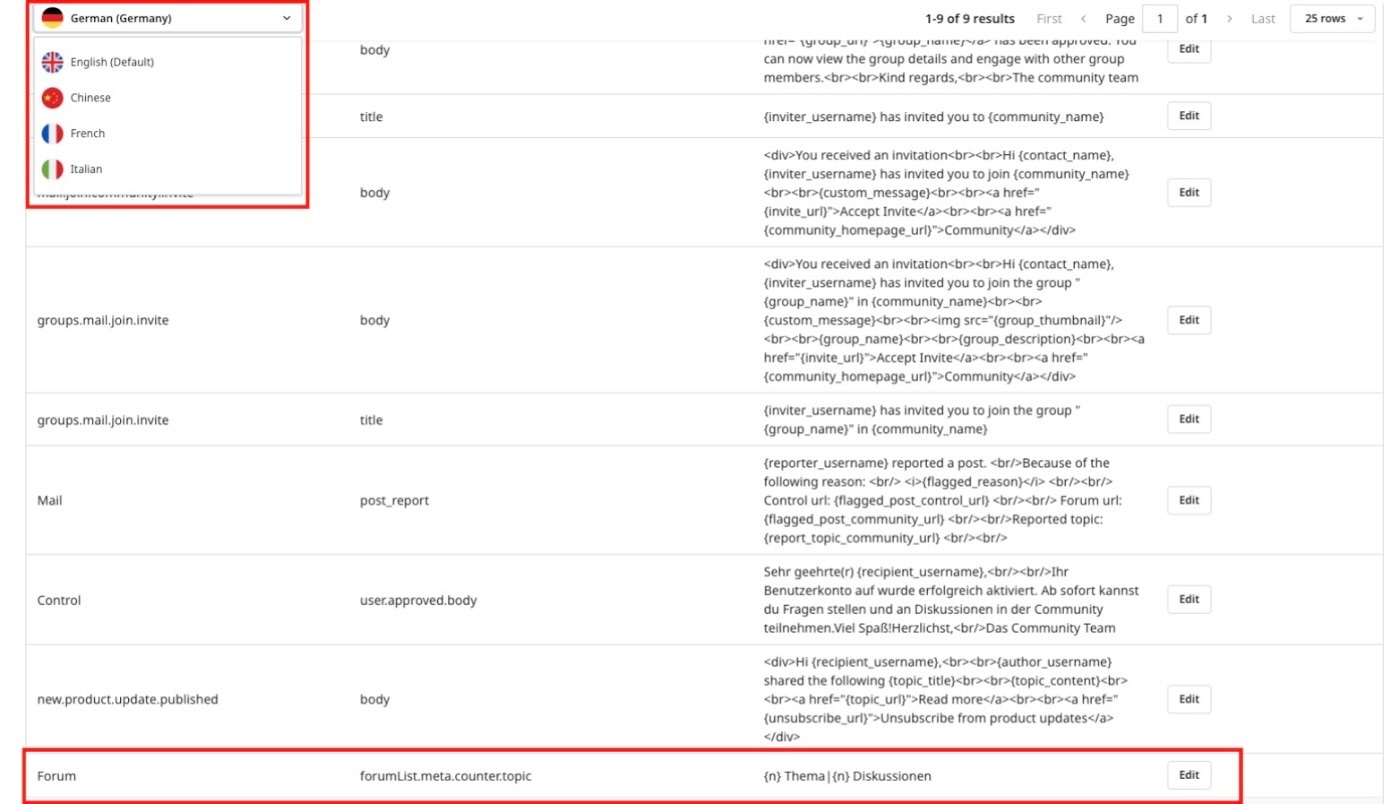
Below is an image where the German language is selected from the drop-down list. Consequently, all phrases and metadata (highlighted in red) are displayed in German.
Customize Phrases
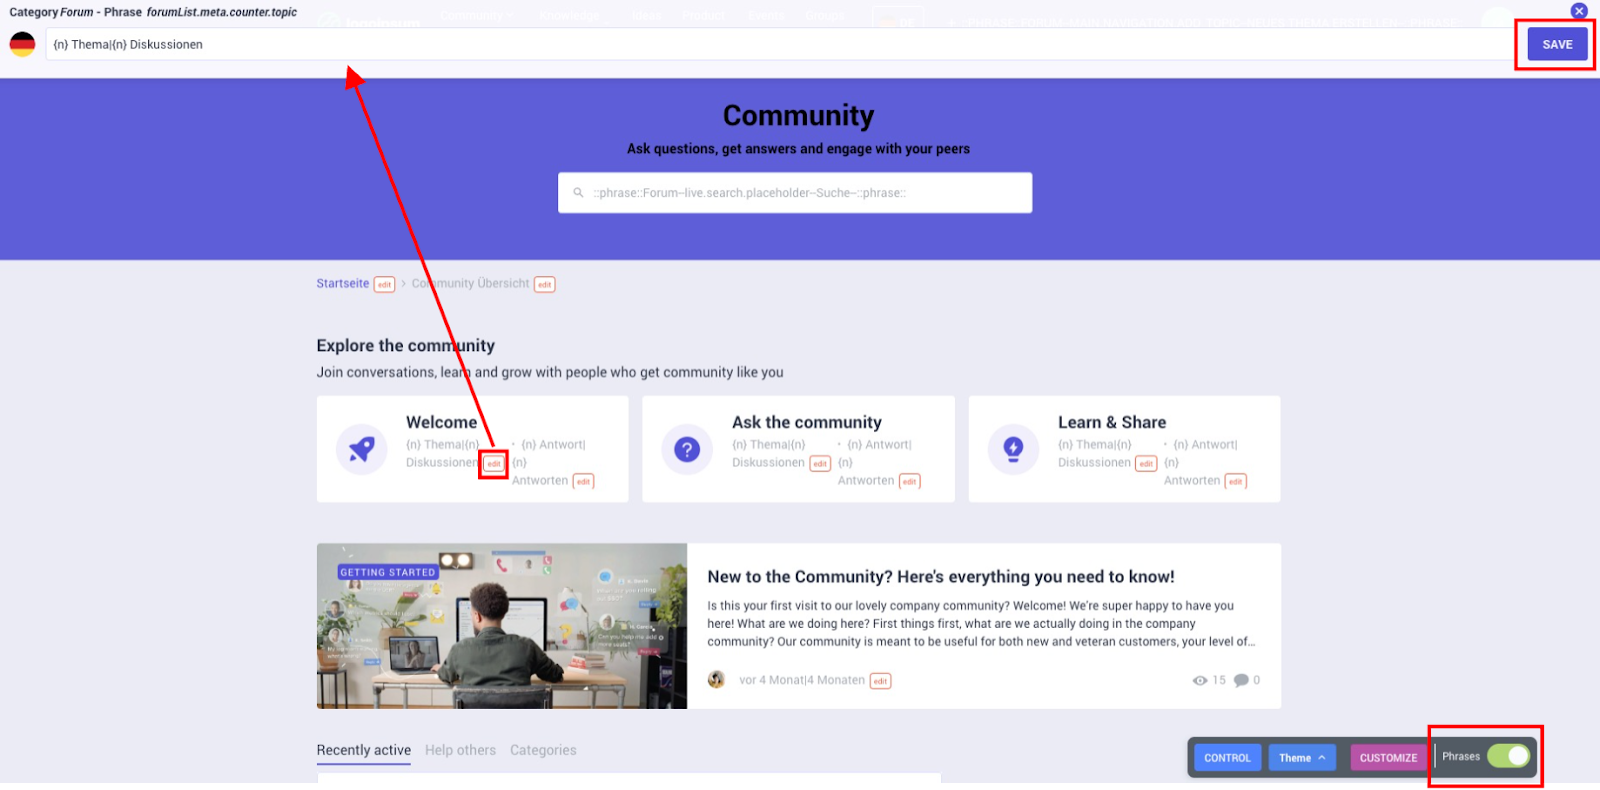
To customize phrases in the Destination environment:
- Log in to Destination.
- From the language dropdown list, select the language for which you want to customize phrases.
- Turn on the Phrases toggle.
- Click the edit button. A header field appears.
- Enter the new phrase.
- Click SAVE.
- Turn off the Phrases toggle. The phrase is updated successfully.
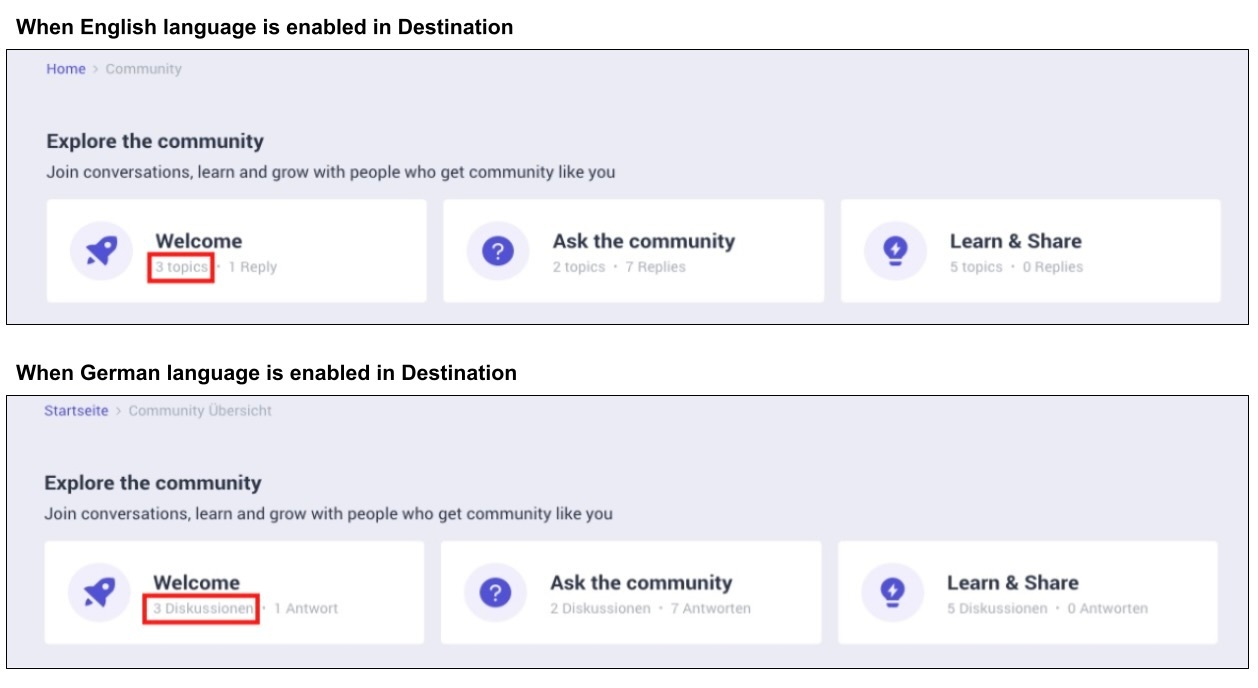
Note: Phrase customization is limited to the particular language and does not impact phrases in other enabled languages. In the example below, the phrase topics in English is customized to Diskussionen in German. The term Diskussionen translates to Discussions in English. However, this customization does not impact phrase topics when English language is enabled.
If you have any queries or feedback, please drop an email to docs@gainsight.com or post a reply to this article.