This article helps community managers and administrators learn how to create and manage sections in Knowledge Base.
Overview
Sections are the home for articles in Knowledge Base (KB). They allow you to organize articles, helping community users to easily browse the content and find what they are looking for.
Note:
- We recommend having a KB structure in place before you start creating articles.
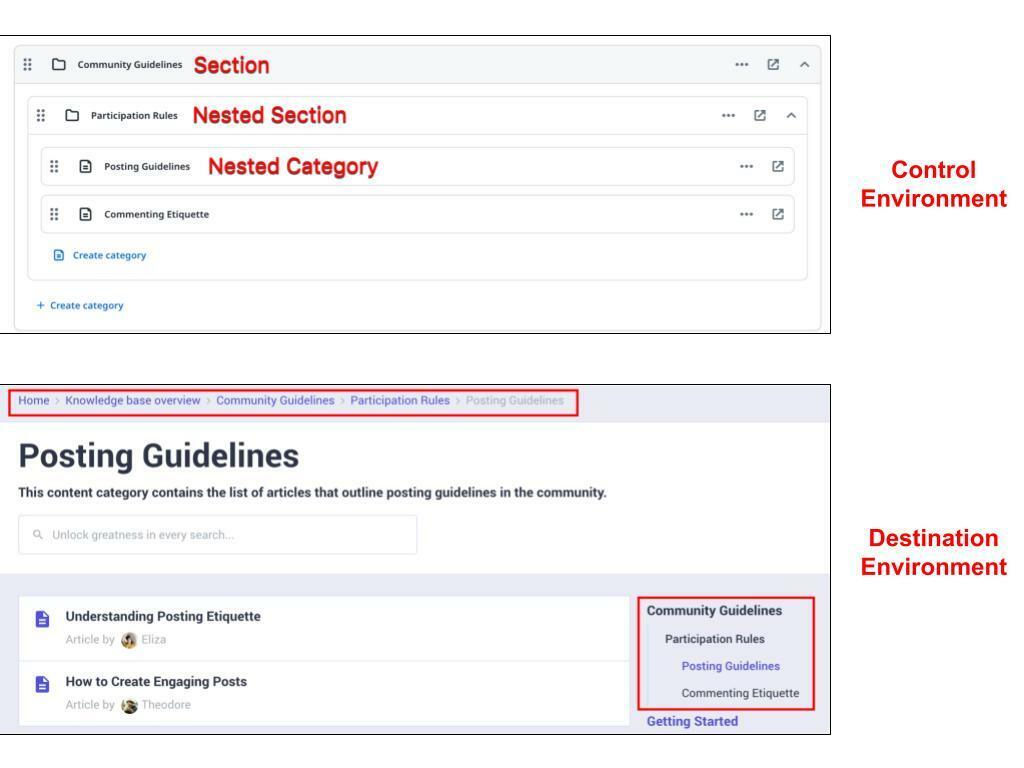
- You can create up to three hierarchies in your KB structure: Section > Nested Section > Nested Category.
- You can add a section (known as a nested section) and a category under a section. You can further add a category under a nested section.
In the image below, Community Guidelines is a section, Participation Rules is a nested section, and Posting Guidelines is a nested category. Furthermore, articles Understanding Posting Etiquettes and How to Create Engaging Posts are published in the nested category.
Create Section
A section is the primary level in the Knowledge Base. You can further create a section within a section, also known as a nested section, or you can create a category that holds content in the form of articles or topics.
To create a section:
- Log in to Control.
- Navigate to Platform > Knowledge Base. The Knowledge Base page appears.
- Click + Create section. The Create section screen appears.

- Provide the required information in the Section details pane:
- Title: Enter a title for the section.
- Description: Enter a description of the section.
- (Optional) Hero image: Upload a hero image as per the defined criteria.
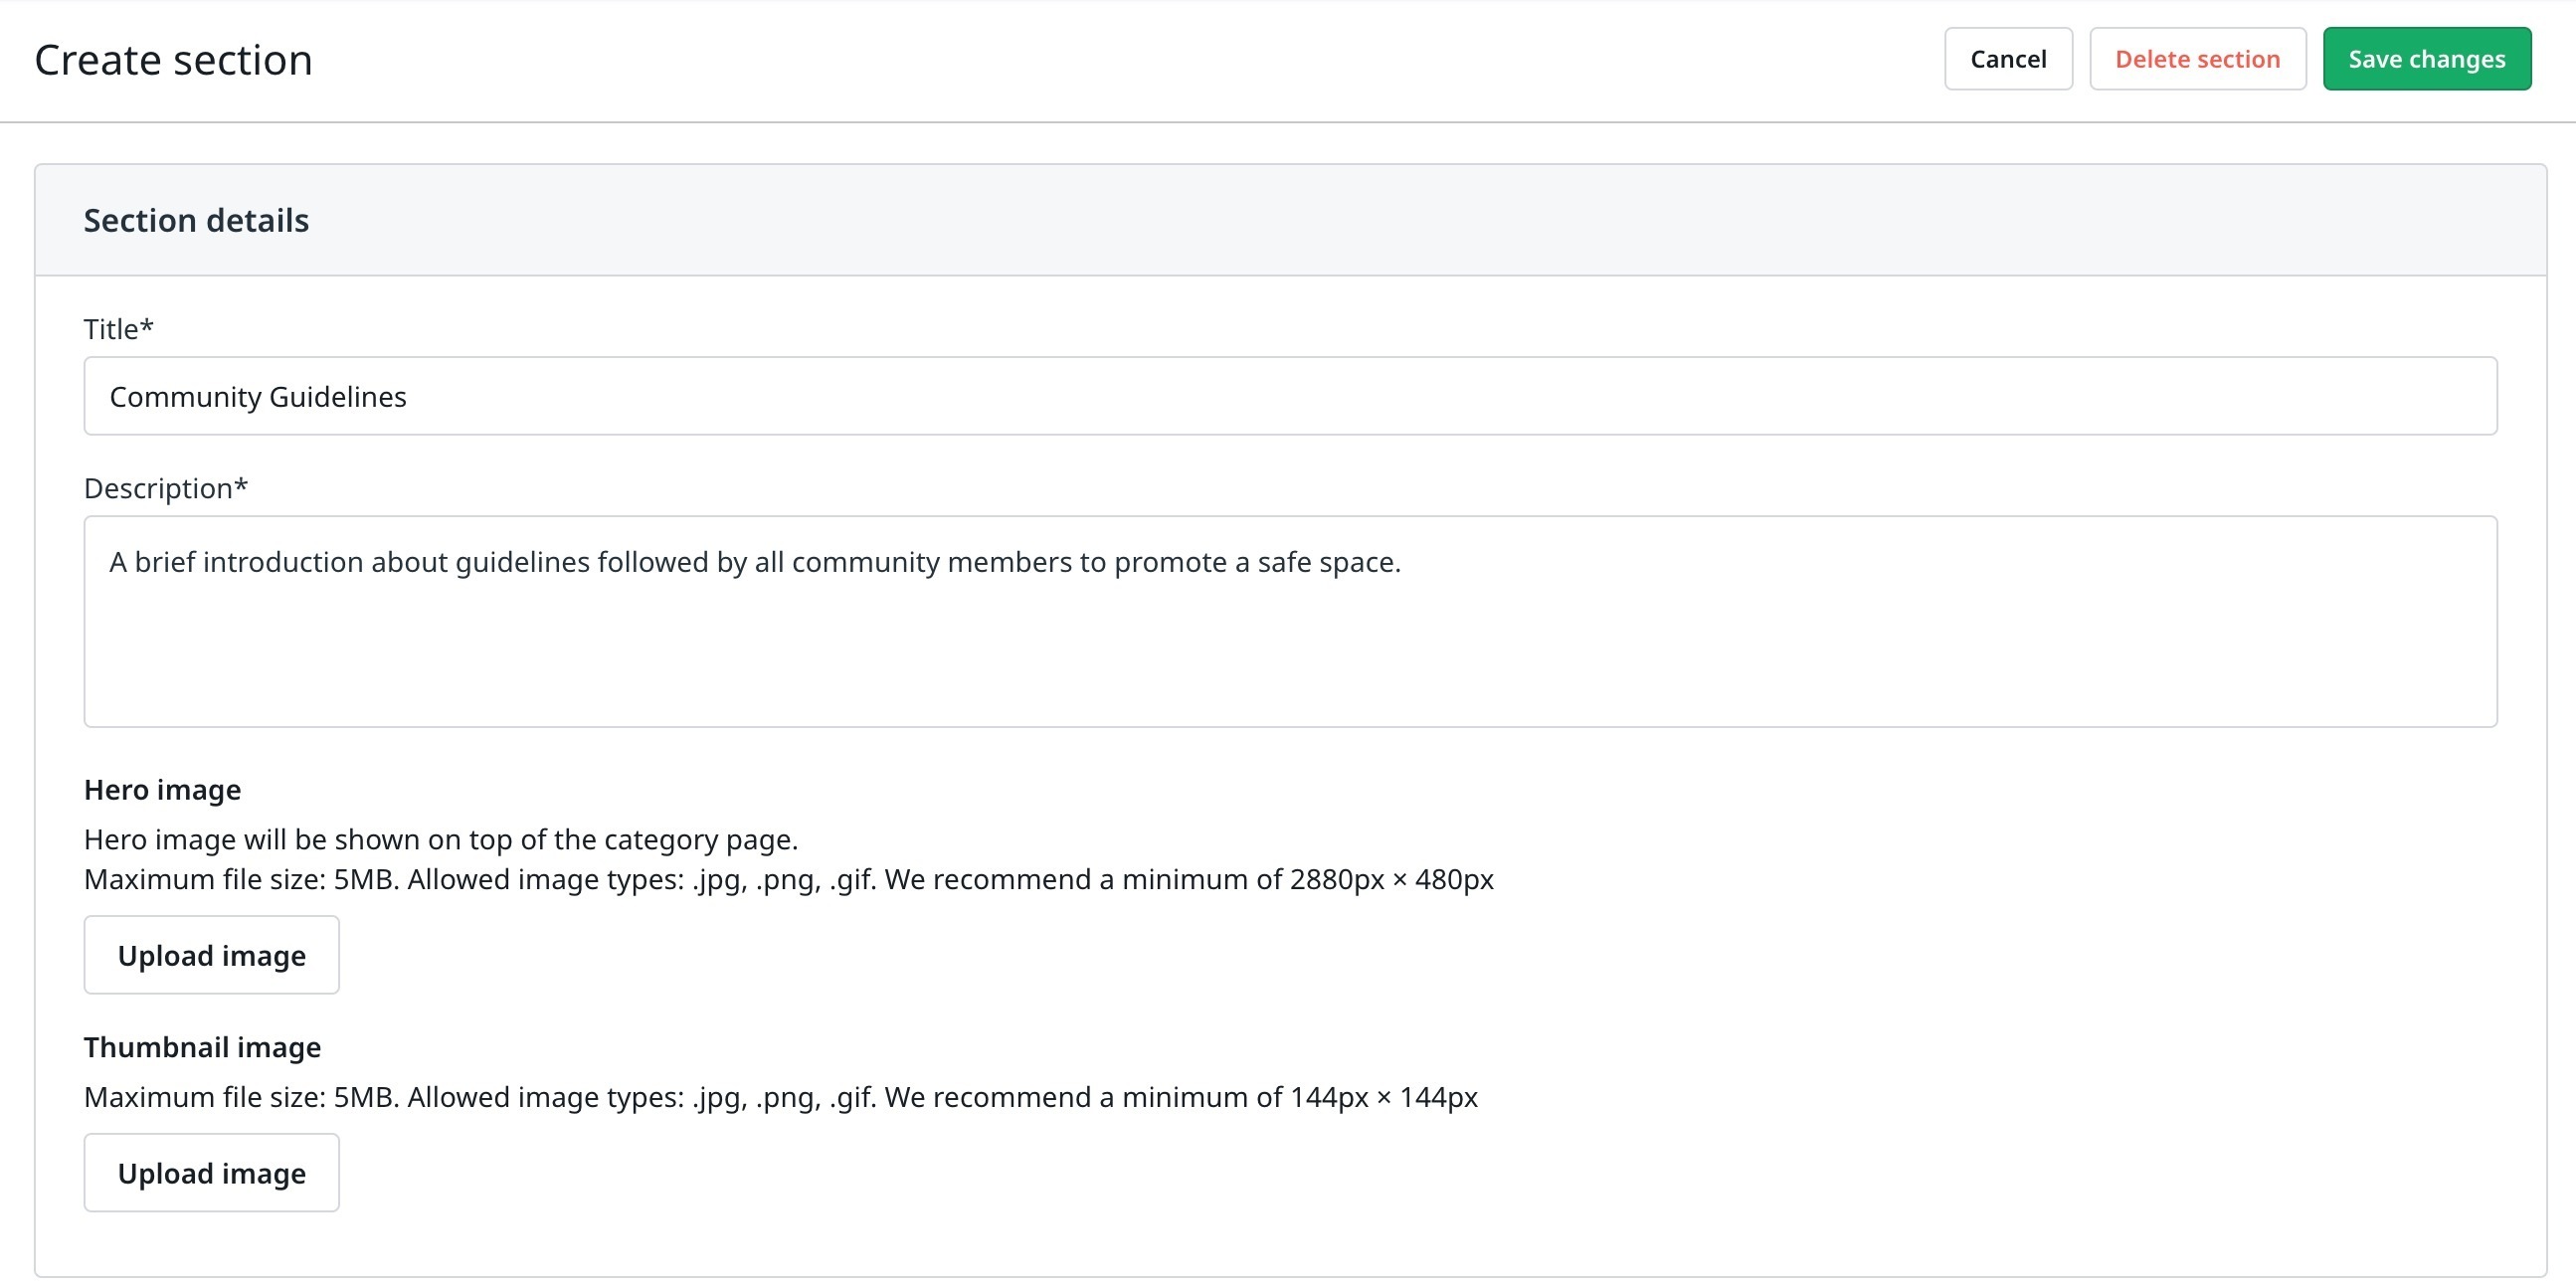
- (Optional) Thumbnail image: Upload a thumbnail image as per the defined criteria. In the image below, Community Guidelines is the new section being created.
- Provide the required information in the SEO settings pane:
- (Optional) Title: Enter a search optimized title for the section.
- (Optional) Description: Enter a search optimized description of the section.

- Click Save Changes. The Community Guidelines section appears in the Knowledge Base page.

Create Nested Section
A nested section is a section within a section. It helps to add a new hierarchy or level in your Knowledge Base structure.
To create a nested section:
- In the Knowledge Base page, navigate to the section in which you want to create a nested section.
- Click + Create category.
- Select Section. The Create section screen appears.

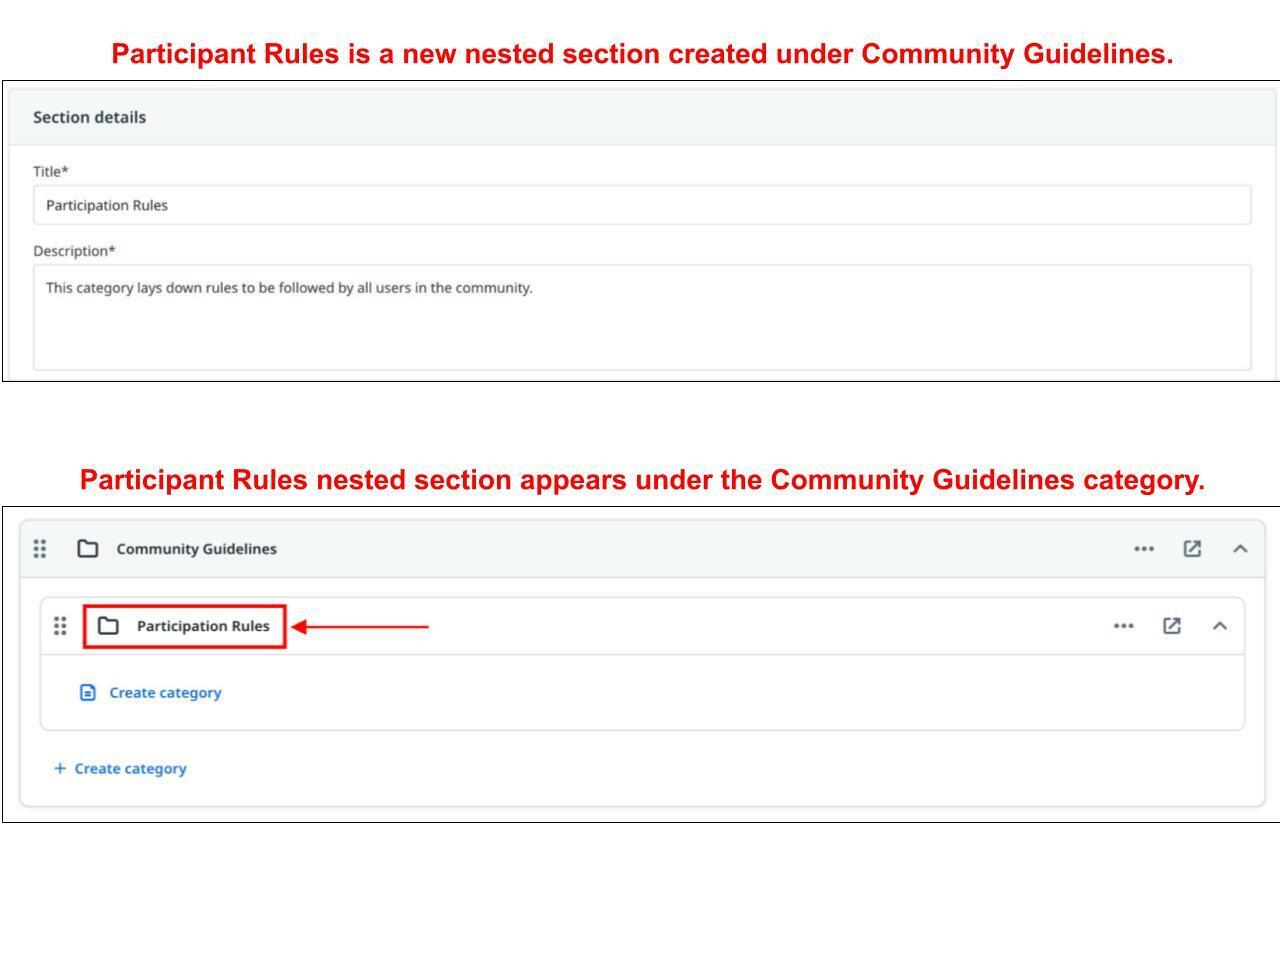
- Follow from Step 4 of the Create Section part. In the image below, a nested section Participation Rules is created and it appears under the section Community Guidelines.
Create Category
A category serves as a repository for articles in the Knowledge Base. You can create a category within a section or a nested section.
Create Nested Category
To create a category within a nested section:
- In the Knowledge Base page, navigate to the nested section in which you want to create a category.
- In the nested section, click Create category. The Create category screen appears.

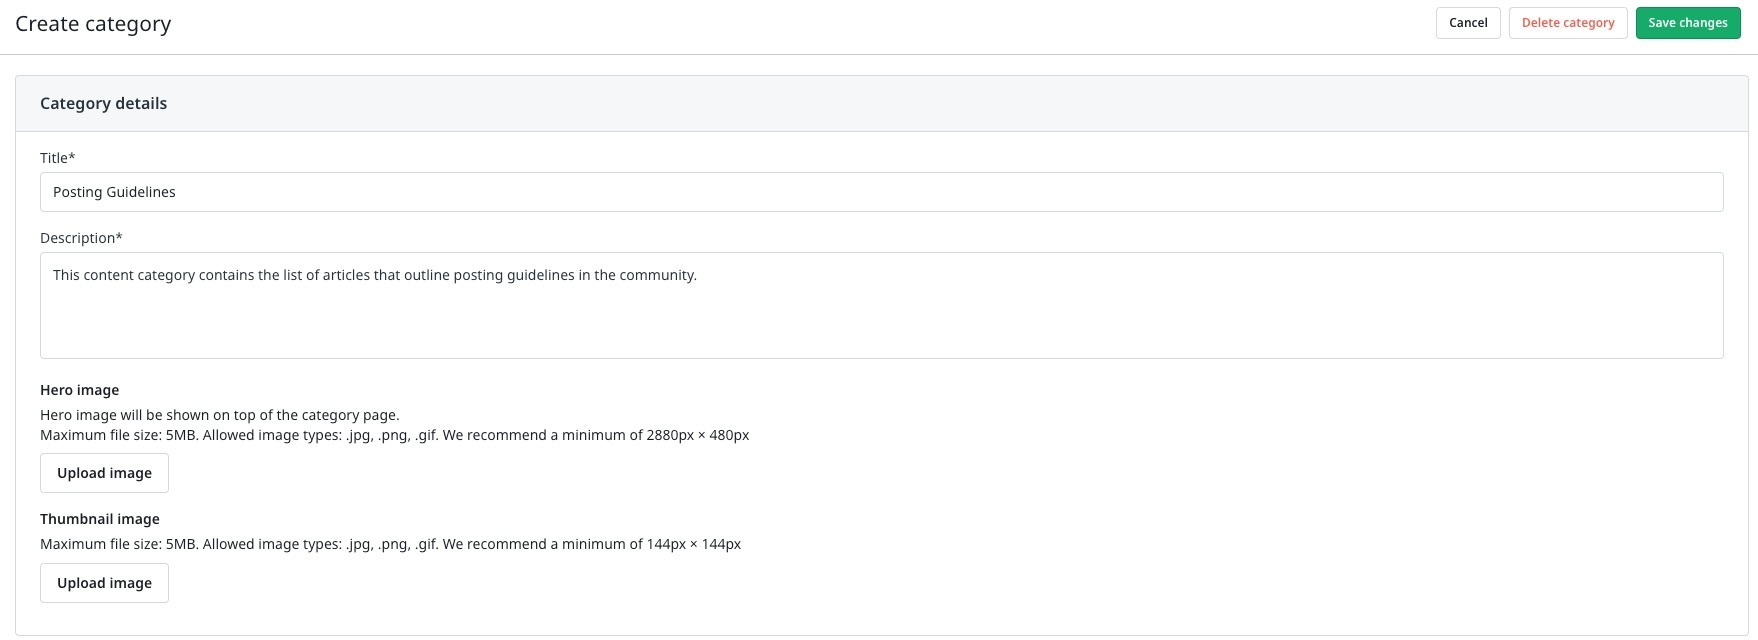
- Provide the required information in the Category details section:
- Title: Enter a title for the category.
- Description: Enter a description of the category.
- (Optional) Hero image: Upload a hero image as per the defined criteria.
- (Optional) Thumbnail image: Upload a thumbnail image as per the defined criteria. In the image below, Posting Guidelines is the new category being created.
- Configure the following toggles in the Settings section:
- (Optional) Turn on the Hide category and topics from platform search toggle to prevent a category from appearing in the community search results.
- (Optional) Turn off the Activity contributed towards user statistics and ranks toggle to use activity in a category to determine user statistics and ranks. This toggle is turned on by default.

- Provide the required information in the SEO settings section:
- (Optional) Title: Enter a search optimized title for the category.
- (Optional) Description: Enter a search optimized description of the category.
- Meta Robots: Select whether the category should be indexed or not by web crawlers. The index, follow option is selected by default. For more information on different options, refer to the Configure SEO Settings article.

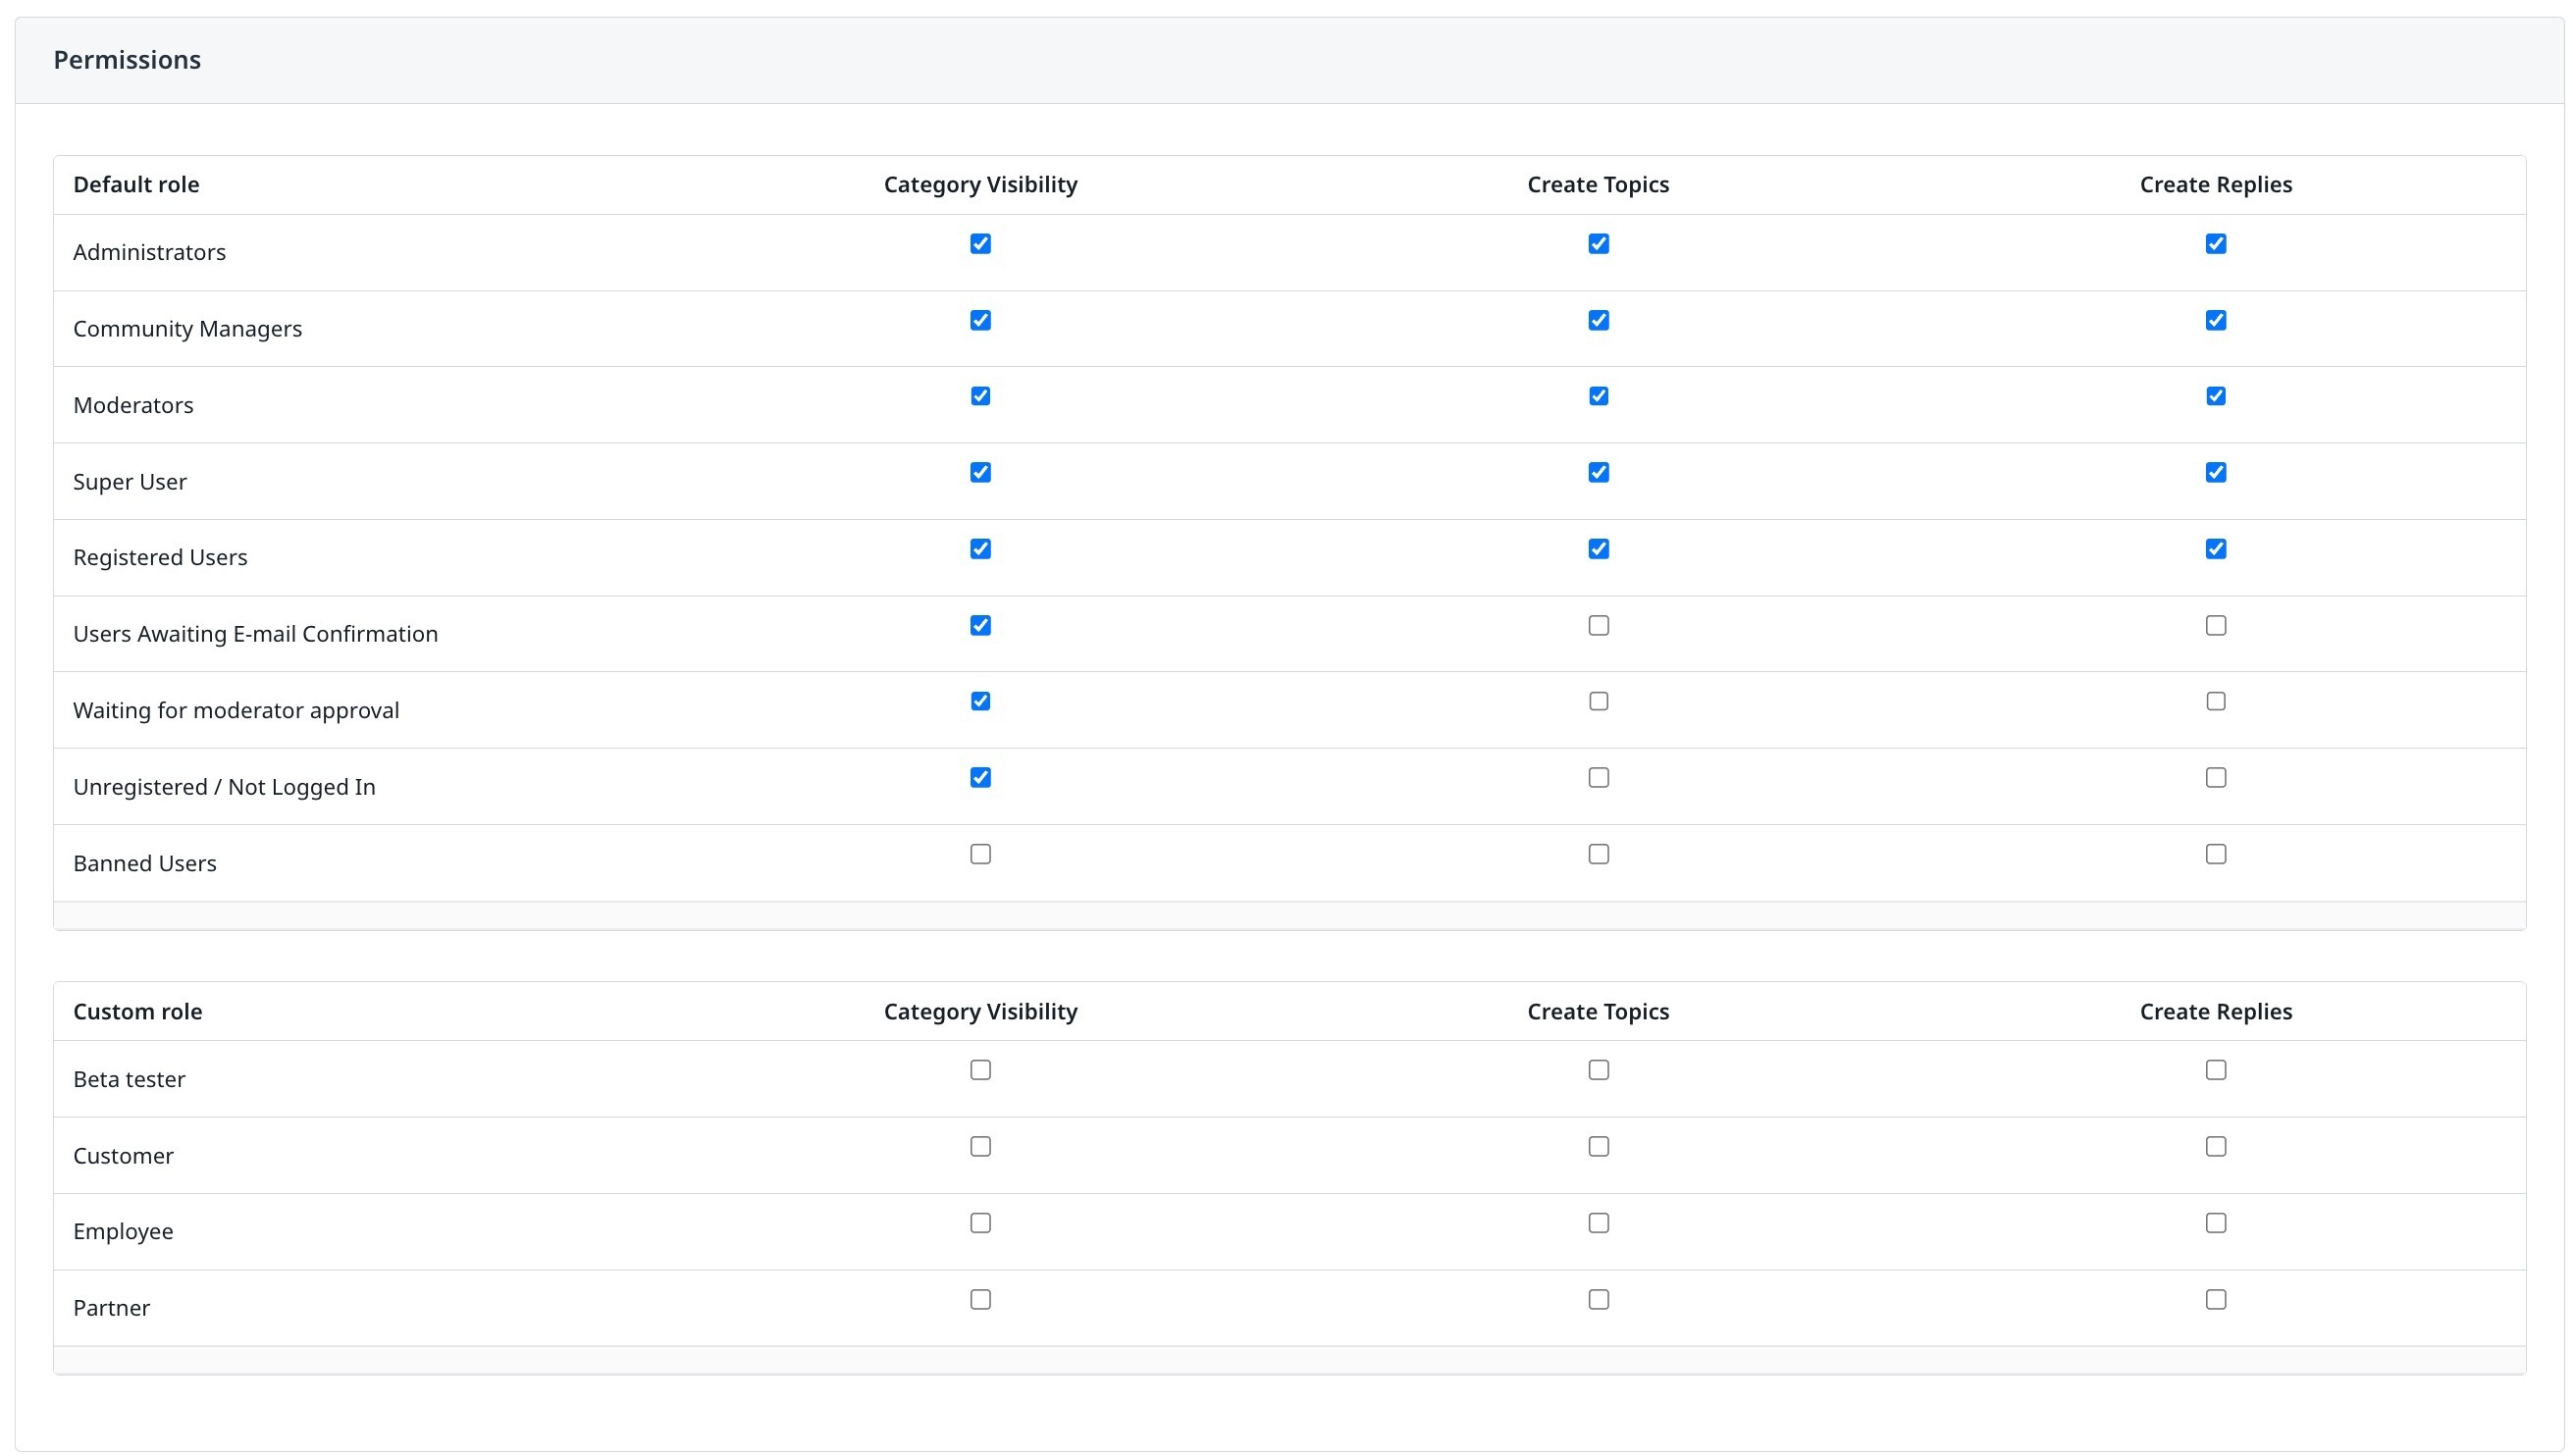
- Configure accessibility of a category in the Permissions section based on the default and custom user roles. The following accessibility options are available:
- Category Visibility: Select the checkbox to allow the user role to access a category.
- Create Topics: Select the checkbox to allow the user role to create topics in a category.
- Create Replies: Select the checkbox to allow the user role to post replies to topics in a category.
- Click Save Changes. In the image below, a nested category Posting Guidelines is created and it appears under the nested section Participation Rules.

The process of creating a category within a section is the same as above. To create a category within a section:
- In the Knowledge Base page, navigate to the section in which you want to create a category.
- In the section, click + Create category. A drop-down list appears.
- Select Category. The Create category screen appears.

- Follow from Step 3 of the Create Nested Category part.
Reorder Topics
You can change the order of appearance of articles or topics in a category. This allows you to keep the most relevant articles towards the top, providing easy access to community users.
To change the order of topics:
- In the Knowledge Base page, navigate to the category in which you want to change the order of topics.
- From the three-horizontal dots menu icon, select Edit category. The Edit content screen appears with Category and Order Topics tabs.

- (Optional) In the Category tab, you can make configuration changes in the content category.
- Click the Order Topics tab. The list of articles in the category appears as following:
- Pinned Topics: Lists pinned articles in the category. Use a drag-and-drop operation to change the order of pinned articles.
- All Available Topics: Lists all articles in the category. Click the pin icon to move an article to Pinned Topics.

- (Optional) Click Rest to Default. This option automatically sorts articles based on their publication date where the latest published articles come to the top. All pinned topics are also removed.
- (Optional) Click Reset Order. The article list is sorted.

- Click Save Changes. The changes are saved and visible to users in Destination.
Edit Section
You can make changes to any existing section to accommodate changes in your Knowledge Base structure.
To edit a section:
- In the Knowledge Base page, navigate to the section in which you want to make changes.
- From the three-horizontal dots menu icon, select Edit section. The Edit section screen appears.

- Make the required changes.
- Click Save Changes.
Reorder Section
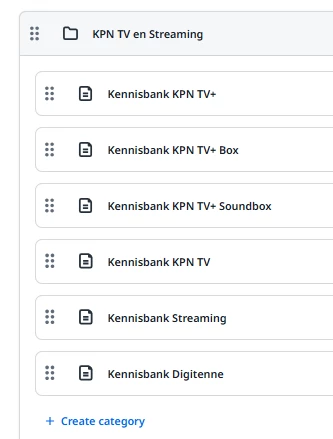
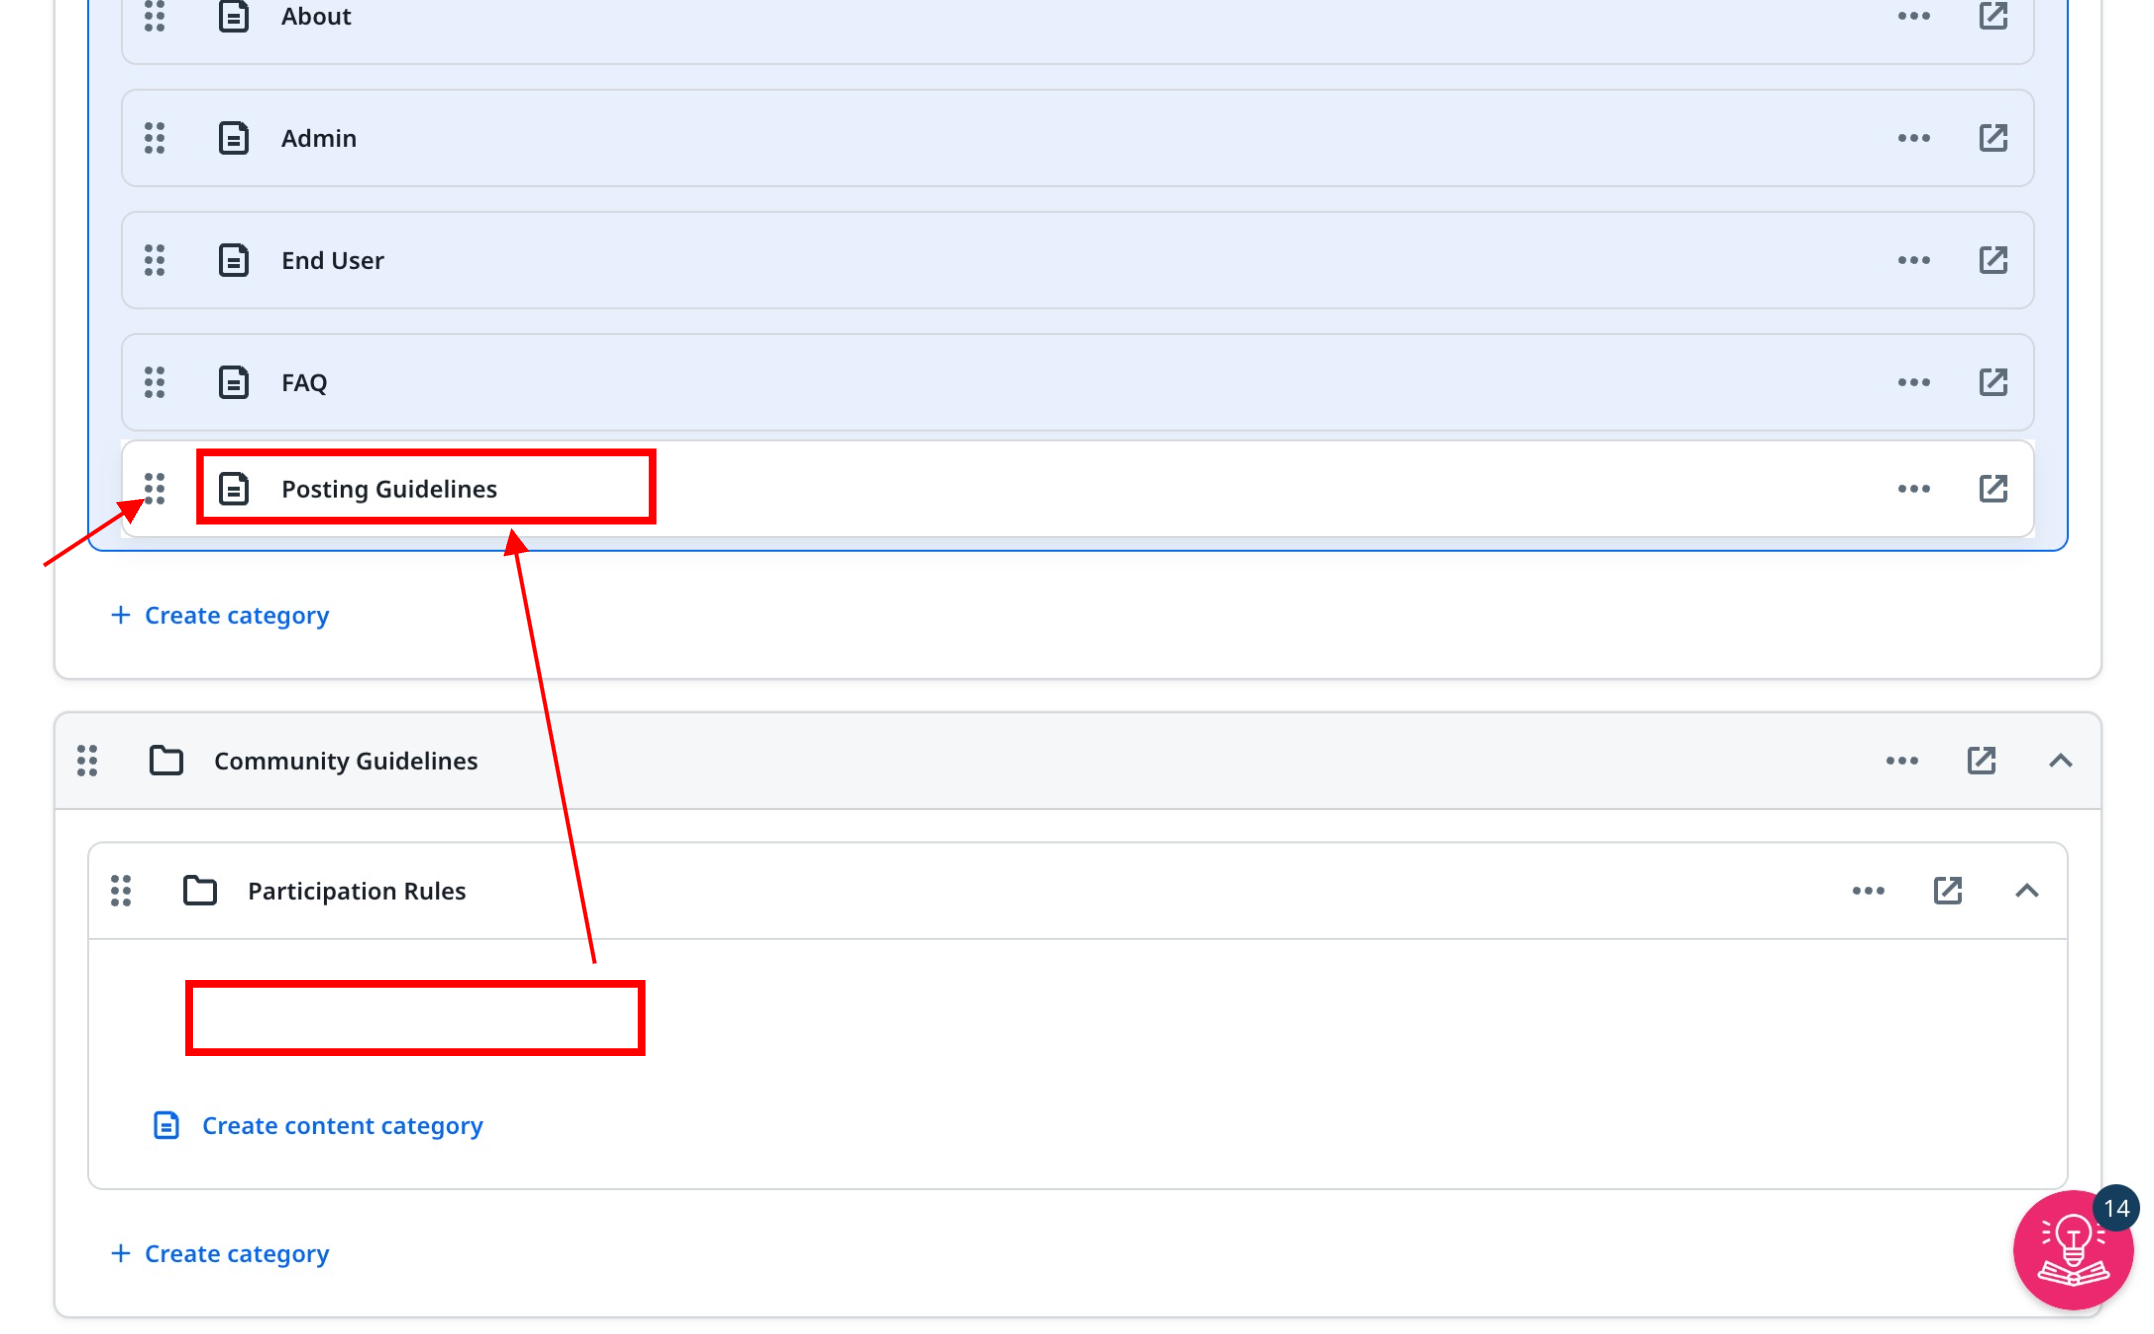
You can change the order of appearance of a section or category in the Knowledge Base using a drag-and-drop operation. Additionally, you can change the section of a nested section or a category using a drag-and-drop operation. In the image below, a category Posting Guidelines is dragged and dropped from a nested section Participation Rules to another nested category.
Note: You cannot perform a drag-and-drop operation on a section that contains a three-level hierarchy. In the image below, you cannot move Community Guidelines (a section) to another section as it already contains three-levels.
If you have any queries or feedback, please drop an email to docs@gainsight.com or post a reply to this article.


