This article guides community managers and administrators to set up the Header widget in Destination.
Overview
The Header widget sits above the Mega Menu widget and is widely used to create consistency across different company websites. It helps maintain a cohesive brand experience by featuring elements like the company logo, key navigation links, and important messages.
Additionally, organizations use it to showcase promotions, events, or updates that align with the brand’s overall communication strategy. It ensures that users can easily navigate between various sections while keeping the brand identity front and center.

Configure Header Widget
IMPORTANT: The Header widget configuration settings are currently available in both Control and Destination. Based on the feature adoption in Destination and customer feedback, this widget configuration will be deprecated from Control in the future. The exact timeline for deprecation is still under review and will be communicated as soon as it is determined to ensure a seamless transition.
Your community platform comes with a standard header that can be configured. This header consists of a logo, in the upper-left corner, that will link back to your community and a text link, in the upper-right corner, that can point to any URL of your choice. Most often this is the link to the general website of your company.
Before you configure the Header widget, it is important to check the widget’s visibility. To manage visibility of the Header widget:
- Log in to Destination.
- (Optional) Click Customize.
- (Optional) Hover over the widget and click the eye icon to make the Header widget visible in your community. With this icon you can manage the header visibility, when you don't want the community users to see it while it is being worked on.

- (Optional) Click Publish. The header widget appears.
To configure the Header widget:
- From the Settings dropdown list, select Header. The HEADER configuration slide-out panel appears.
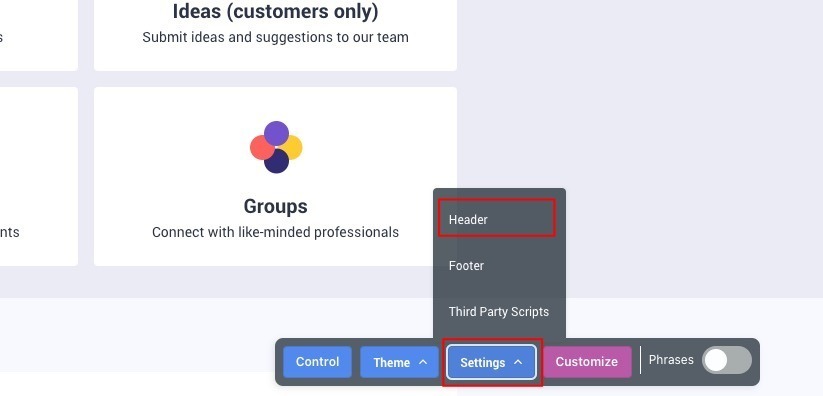
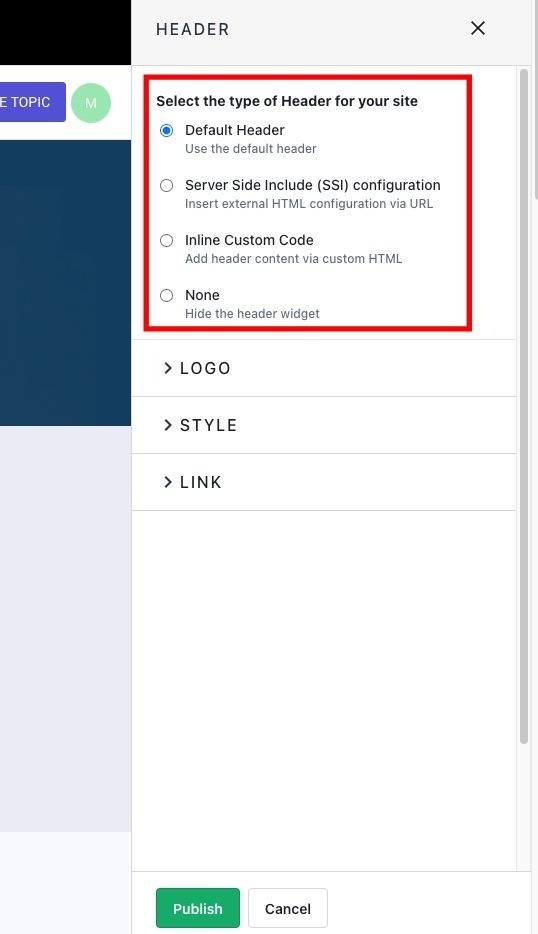
- Select and configure the Header widget option that you want to set up in your community. The following options are available:
- Default Header - This is the default header configuration available for your community. You can change this configuration based on your requirements. For more information on how to change this default configuration, refer to the Configure Default Header section of this article.
- Server Side Include (SSI) Configuration - This option allows you to include your company header using SSI files. You can inject a
header.htmland ahead_include.htmlfile into the Customer Communities platform. For more information on adding SSI files, refer to the How To Include SSI Files On Your Community article. - Inline Custom Code - This option allows you to recreate your company header using custom HTML code.
- Note: We recommend involving a professional web developer for custom code. Insert code at your own risk and proceed with caution, as Gainsight support cannot assist with custom code issues. To test your code before publishing, use your staging environment.
- None - This option allows you to remove the header widget from your community.
- Click Publish. The Header widget is published successfully.
Configure Default Header
To change the default Header widget settings:
- In the HEADER widget slide-out panel, select Default Header.
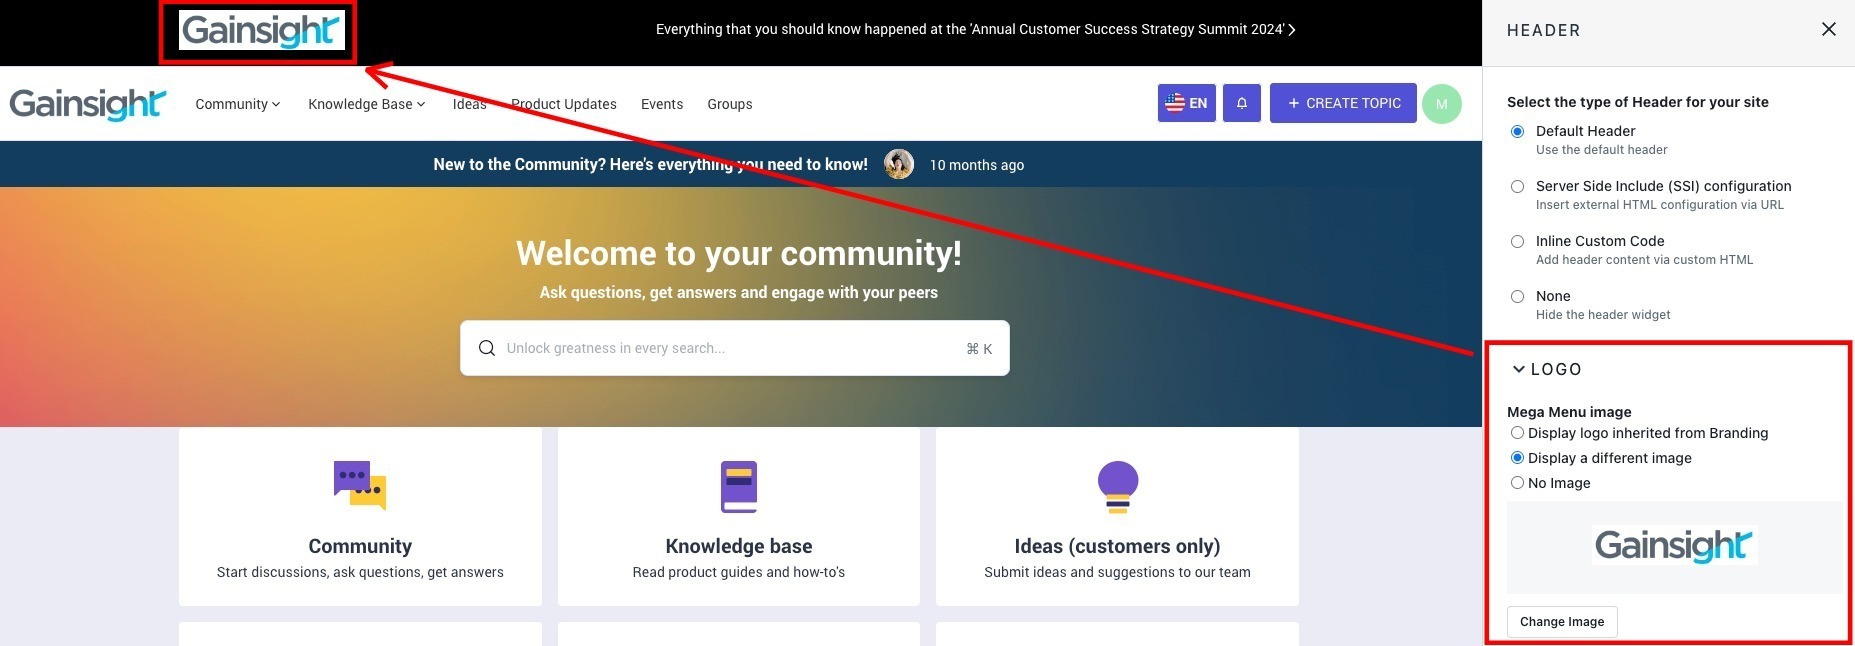
- In the LOGO section, select one of the following options:
- Display logo inherited from Branding: Uses the logo uploaded in the Branding elements configuration.
- Display a different image: Uploads an image from a local drive.
- No image: Removes the image from the widget.
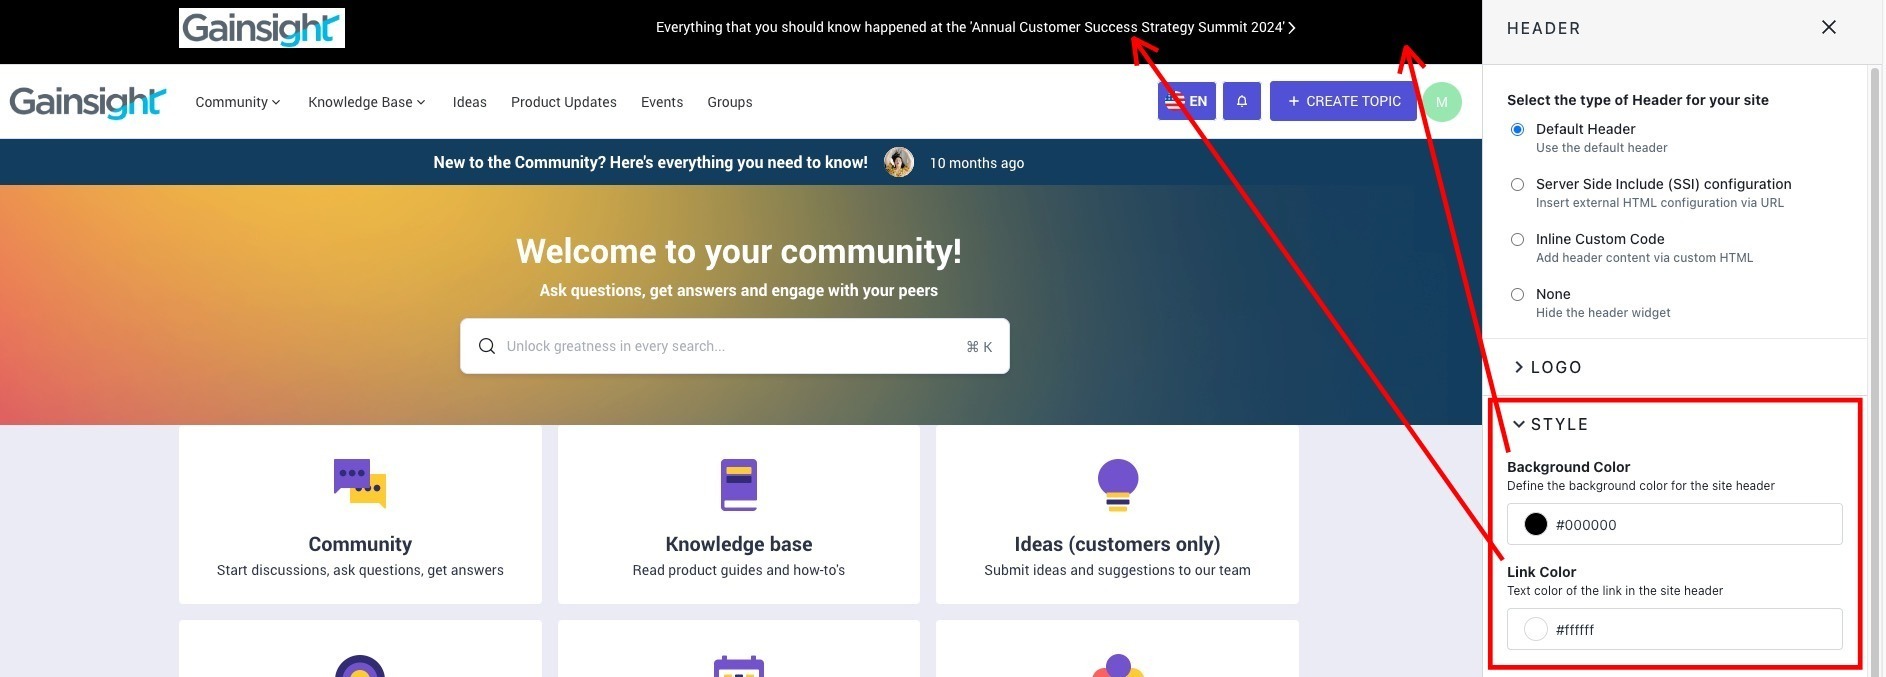
- In the STYLE section, select one of the following options:
- Background Color: Changes the background color of the widget.
- Link Color: Changes the color of the link configured in the LINK section.
- In the LINK section, select one of the following options:
- URL Label: Defines the label text for the link.
- URL: Provides space to enter the outgoing link to which the label text is linked.
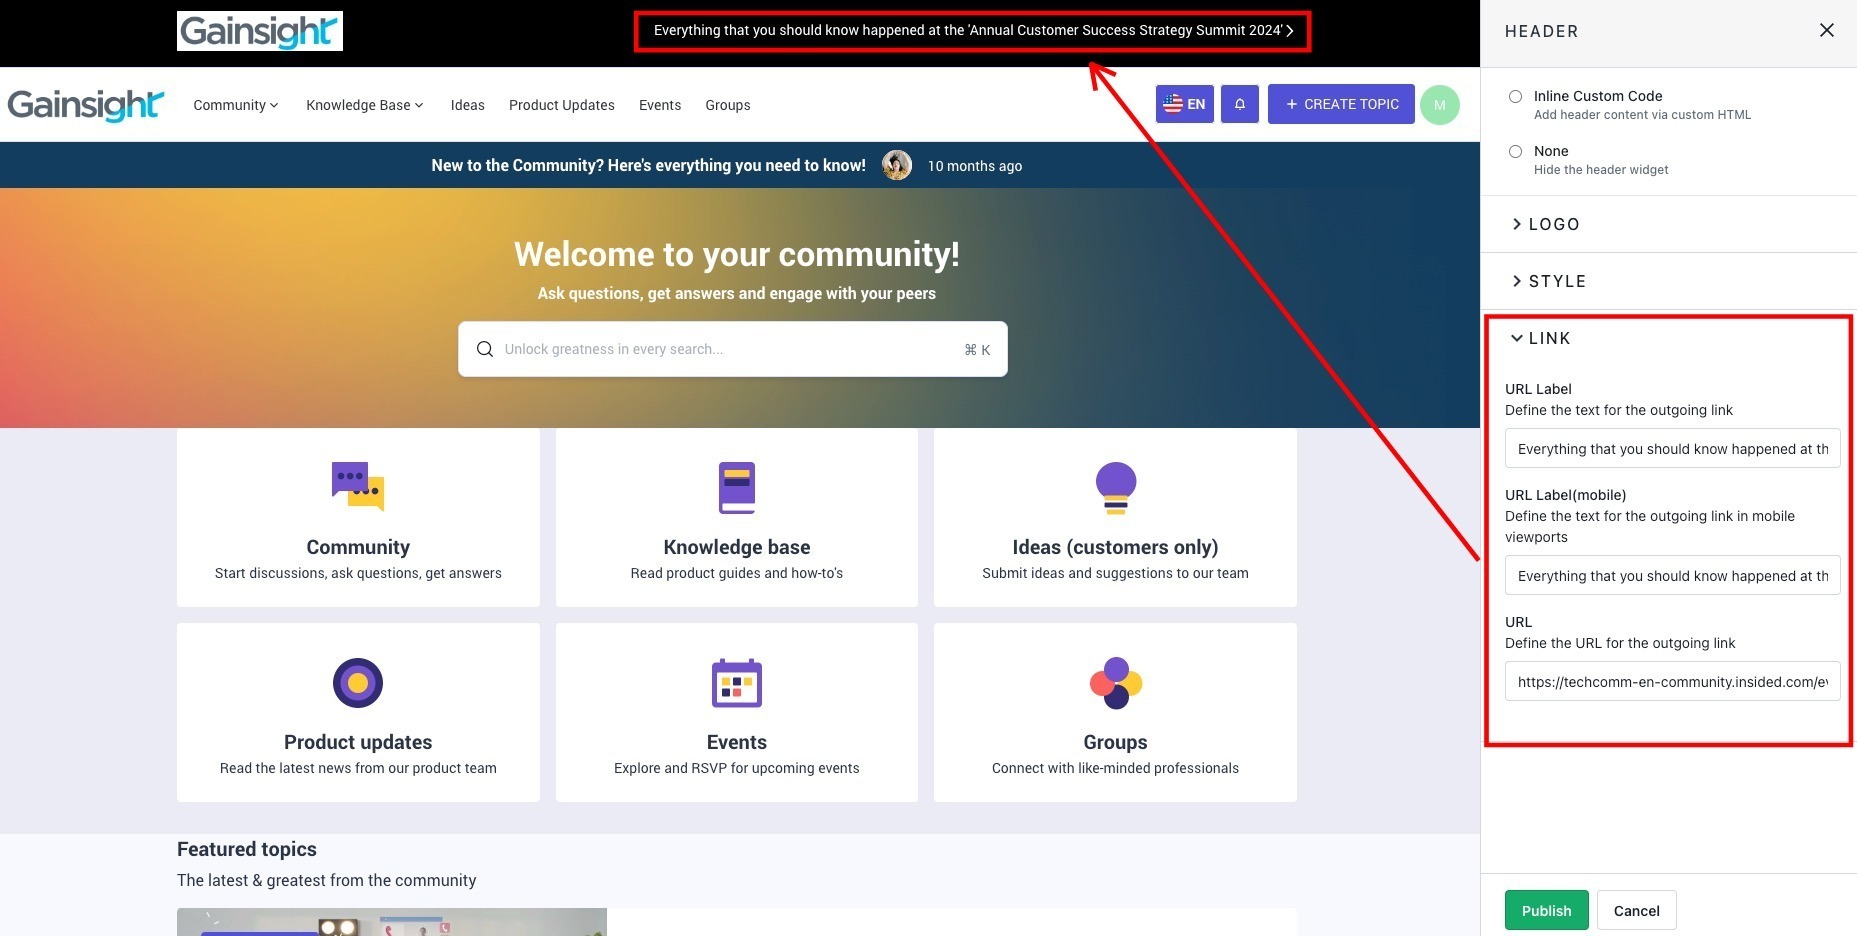
- Click Publish. The default Header widget is published successfully.
If you have any queries or feedback, please drop an email to docs@gainsight.com or post a reply to this article.
