Greetings!
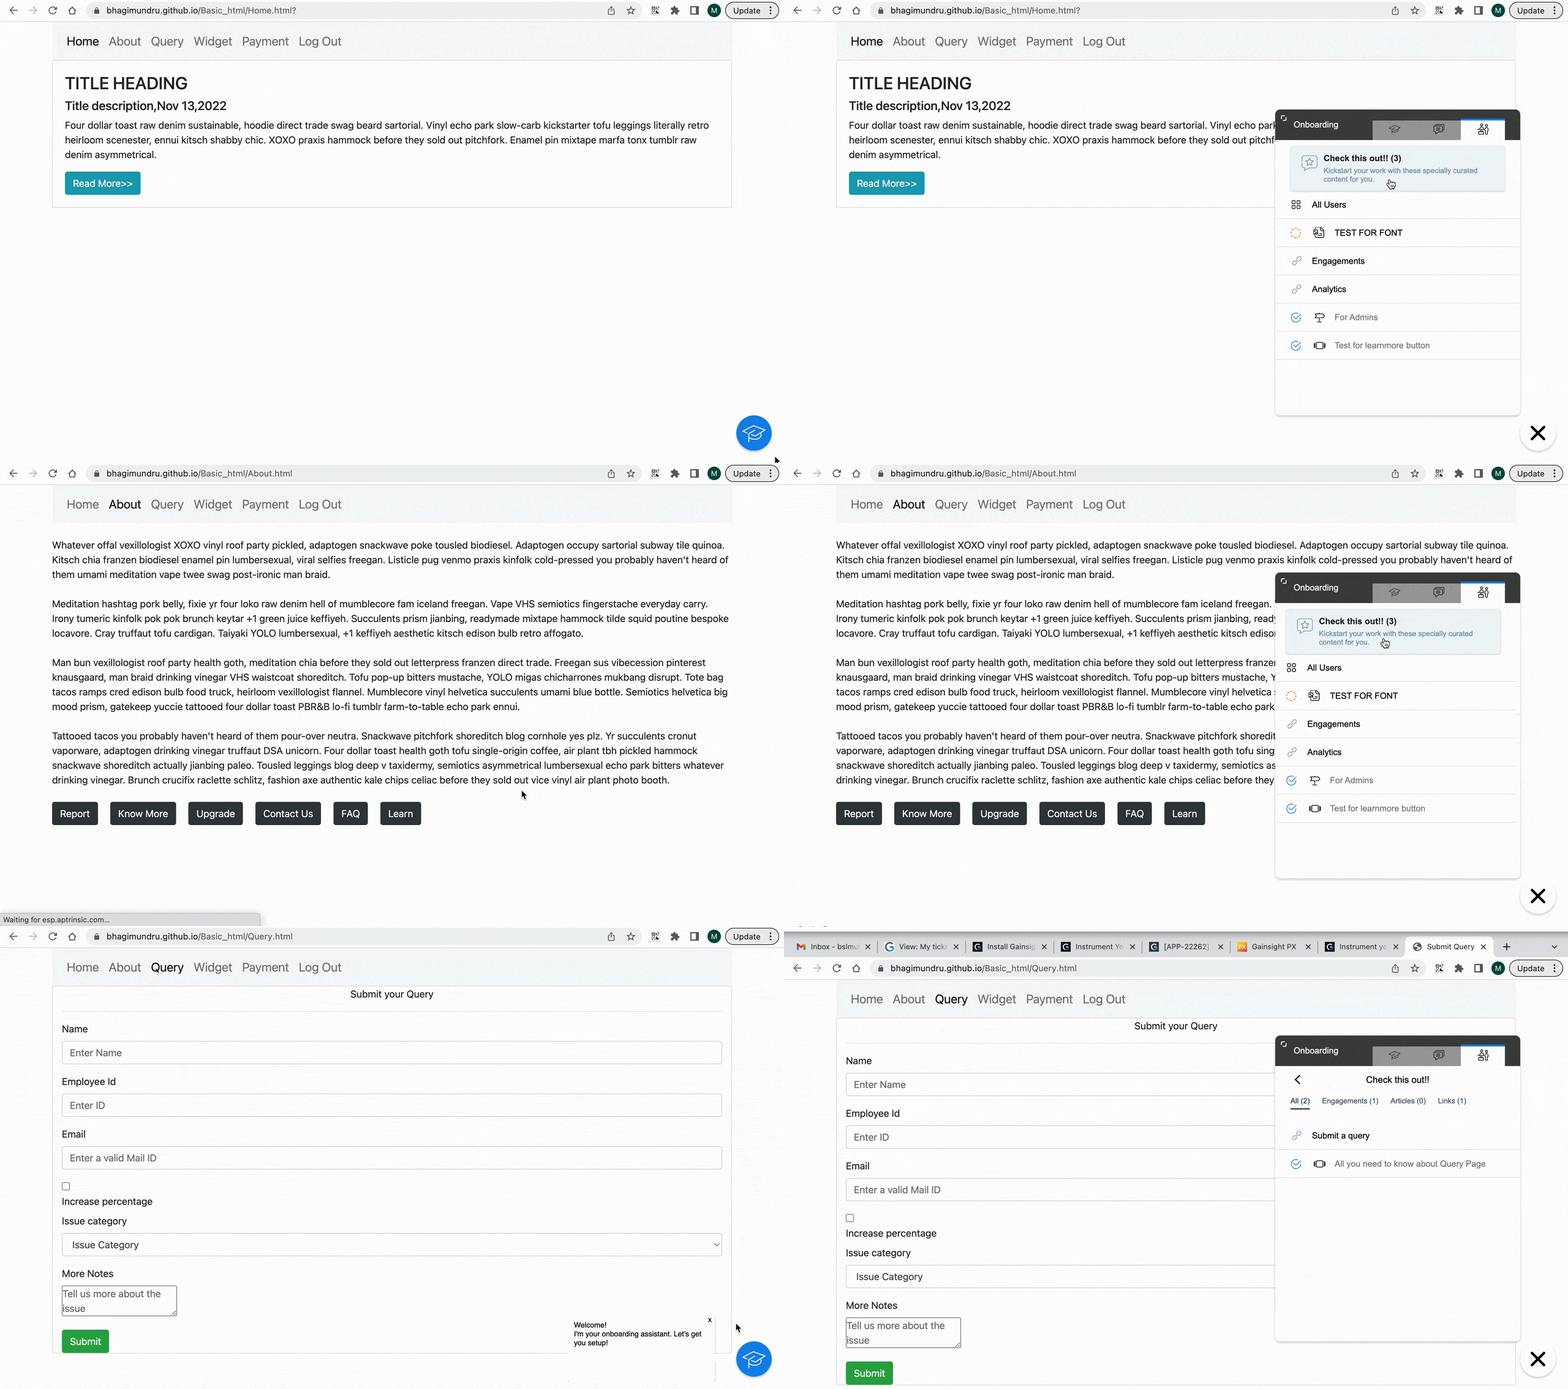
Onboarding new users or educating existing users with the content in the KC Bot can be quite challenging at times especially when there is a vast amount of content to showcase. This overwhelming situation often leads users to miss out on crucial content that could greatly assist them on the current page.
How do we solve this?

Displaying content specific to each URL in a KC Bot can be a game-changer. And the key to achieving this lies in utilizing recommendations.
Let me walk you through a step-by-step guide to setting up recommended content that will keep your audience engaged:
- Dive into your KC Bot, whether it's an existing one or a new one.
- Navigate to Content > Recommendations tab > Create.
- Set the details by selecting the audience for a specific URL.
- Select and add the captivating content you want to display exclusively on that URL.
- Turn ON the toggle for the recommended content to be available on the bot
- Navigate to the Editor and head over to the Onboarding Tab to enable the Show recommendation checkbox.

Check the doc on Recommended content for more detailed information.
Outcome achieved:https://share.getcloudapp.com/z8ub6WW6

Pro Tip: You can also showcase content based on the user's Role and Stage, creating an experience that speaks directly to their needs and aspirations.
Now, what if you have an abundance of customized content to showcase on each page, but you don't want it to appear cluttered under a single tab?
Fear not! we got you covered. You can display a customized KC Bot on each individual page.
Let me guide you through the process:
But first, let's make sure we have everything in place. Here are the prerequisites you'll need:
- A Custom user Attribute: This attribute will hold the URL or Page title where your user currently finds themselves.
- Keep it Up to Date: Ensure that this attribute is consistently updated whenever the user navigates from one page to another.
For more information on how to use the Set function to update an attribute, refer to the Update User Attributes section of the Track your Users and Accounts article.
function HomePageload(){
    aptrinsic('set', 'user', {'URL' : 'Home'});
  }
function AboutPageload(){
    aptrinsic('set', 'user', {'URL' : 'About'});
  }
function QueryPageload(){
    aptrinsic('set', 'user', {'URL' : 'Query'});
  }
Now, let's dive into how this can be accomplished. By following these steps, you'll be on your way to a seamless and customized experience:
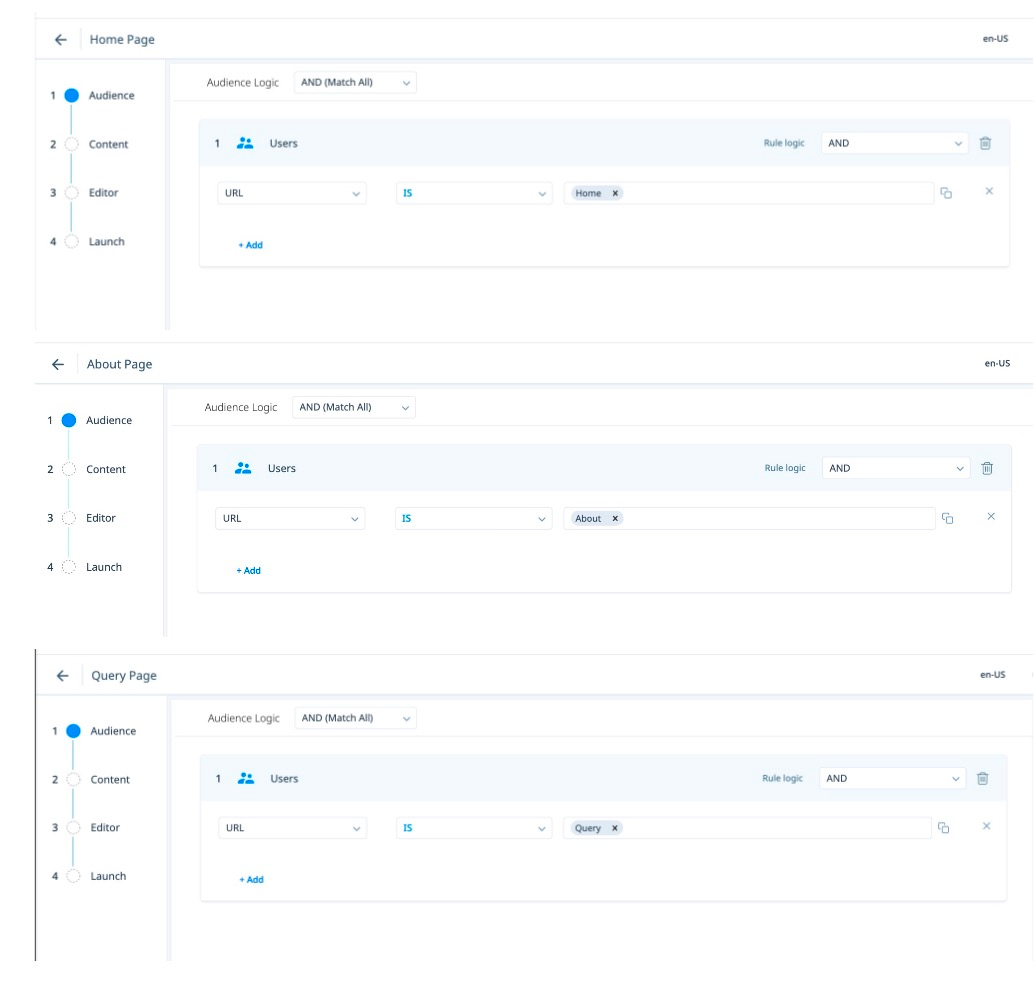
- Create a KC Bot for Each Page: Start by creating a unique KC Bot for each page where you want to display customized content.

-
Configure the Audience logic with the Custom Attribute: Within each KC Bot, configure the Audience logic with the custom attribute you created to capture the URL or page title. This will allow the KC Bot to recognize and adapt to the specific page it's being displayed on.

- Tailor the Content: Customize each KC Bot individually, adding the specific content you want to display on the corresponding page. This way, you can ensure that the right information is delivered to the right place.
For more information, Check the doc on How can I trigger customized bots to users based on the URL? in Knowledge Center Bot FAQs.
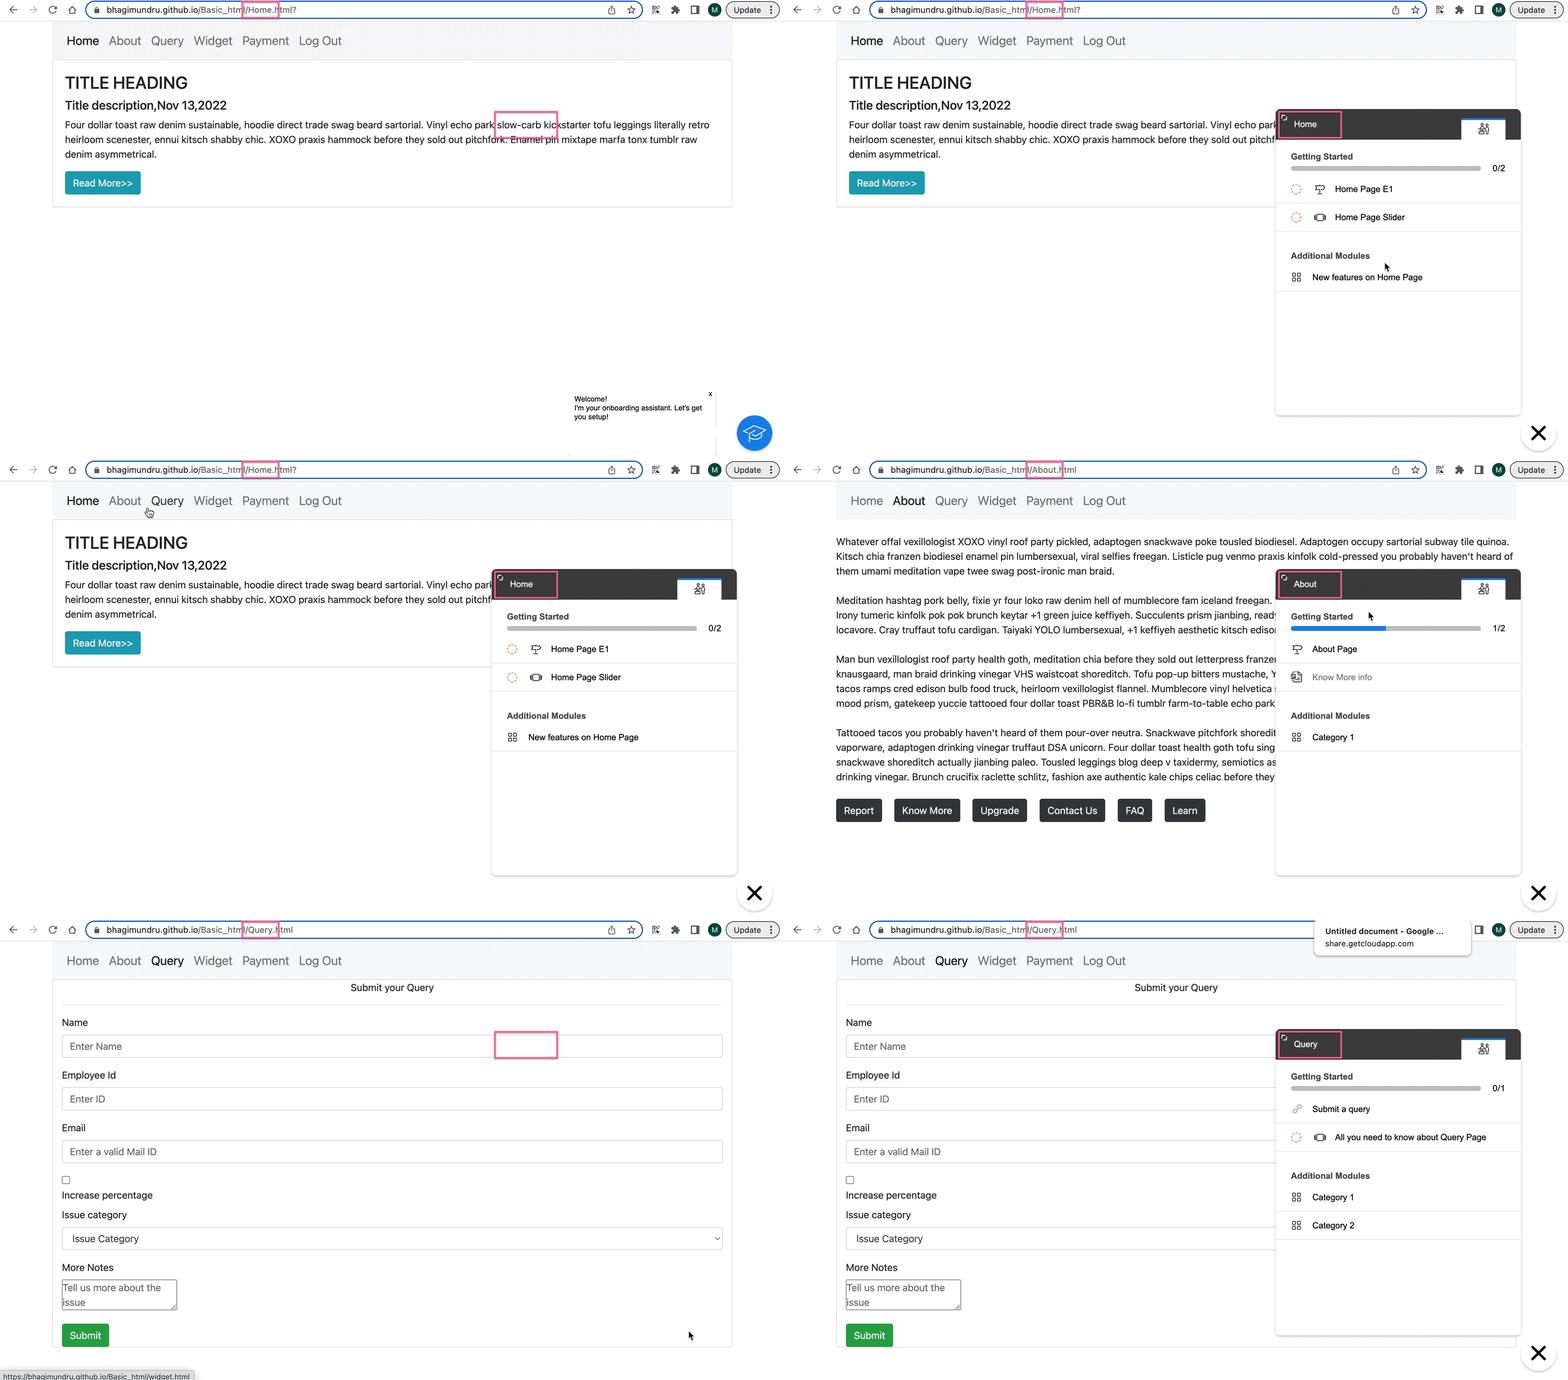
You can engage your audience with a seamless, clutter-free display of custom content across every page.
Outcome achieved: https://share.getcloudapp.com/bLuZAOzR

Thank you,
Bhagya Sri.