

TOTW : Personalise user experiences like never before using Gainsight PX
Hello PX-Rockstars!
What I am going to share with you all today is so close to my heart 🫶
If you have attended our recent office hours (Recording here), you already know what I am sharing today from the title itself. But for those who could not make it - here you go; this post is a recommended guide on personalising user experiences by capturing user inputs.
Over the last few months, we have seen significant updates to our V2 editor templates. Thanks to Abhilash (
Let’s get to the basics of “User profiling.”
“User profiling” is the process of improving the user profile data so that we can group them into specific groups on various metrics and personalize their reach outs and engagements in multiple ways.
So user profiling is the first step you need to focus on to personalize user experiences.
How do we do this in PX today?
You can build some onboarding questionnaires into the product to get started. Still, if you don’t want to waste your engineering efforts in this process, I recommend you try our V2 engagement dialogs to do the same.
Step 1: Select a default template from the V2 editor templates
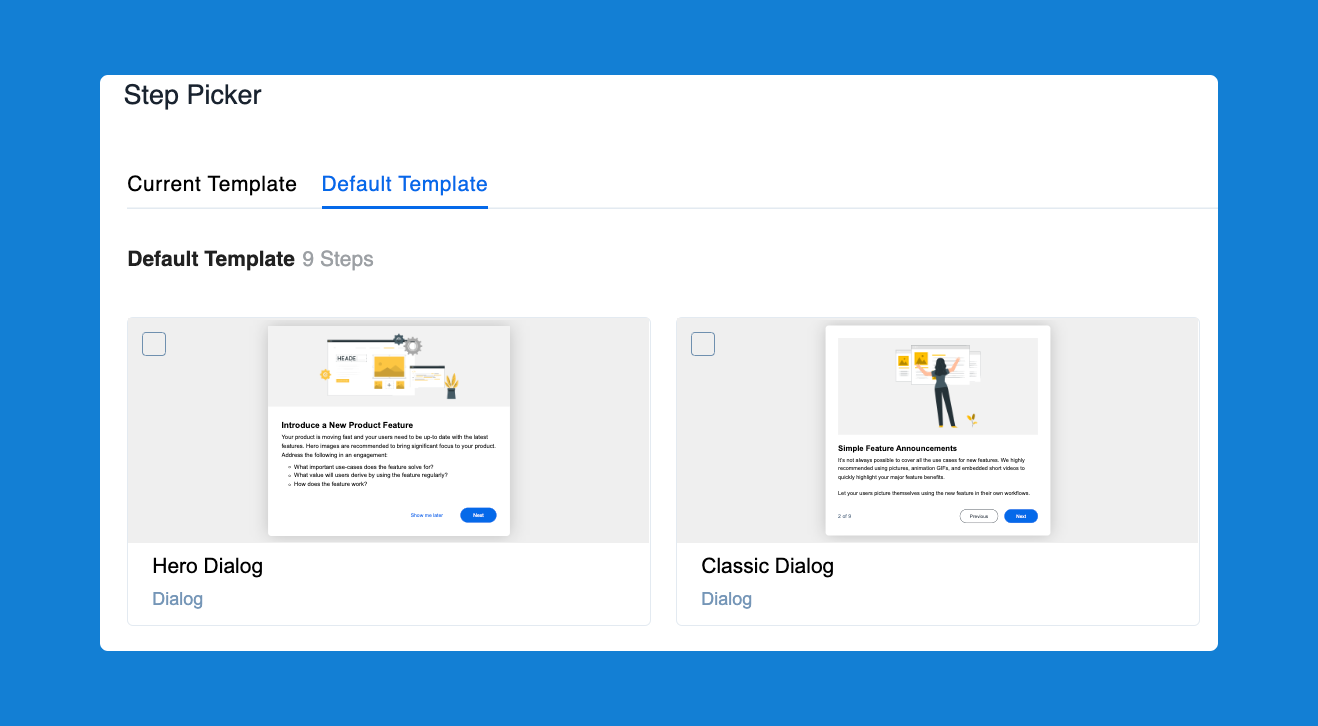
Step 2: We will add and edit the existing cells from this template to achieve what we want. When you hover over any section in the template, you see two symbols + and recycle bin.
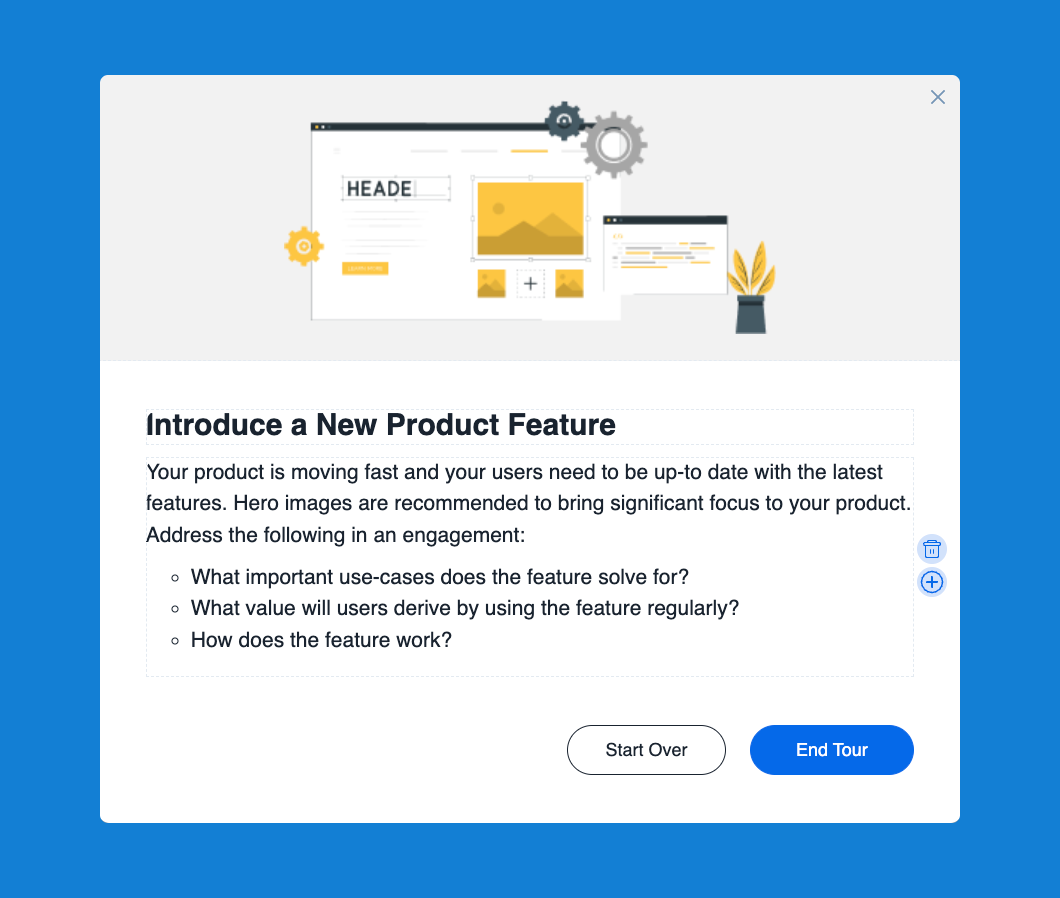
Step 3: Remove all cells except the header by clicking on the “recycle bin” icon on each cell
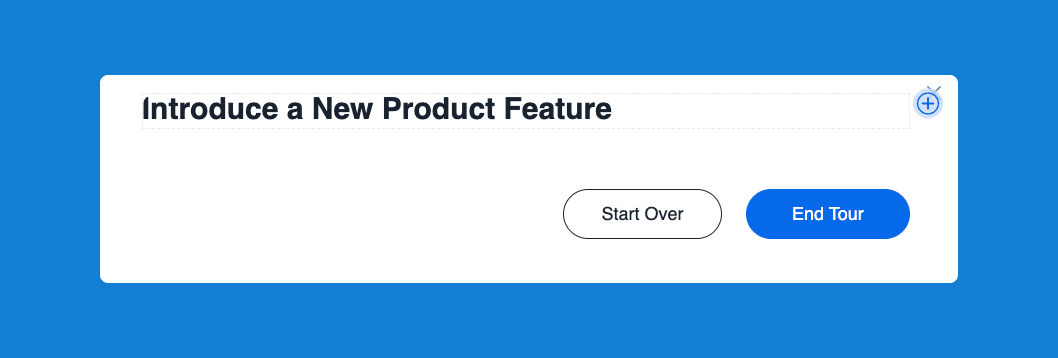
Step 4: Now let’s add a three-partition cell below this header cell by clicking on the plus icon
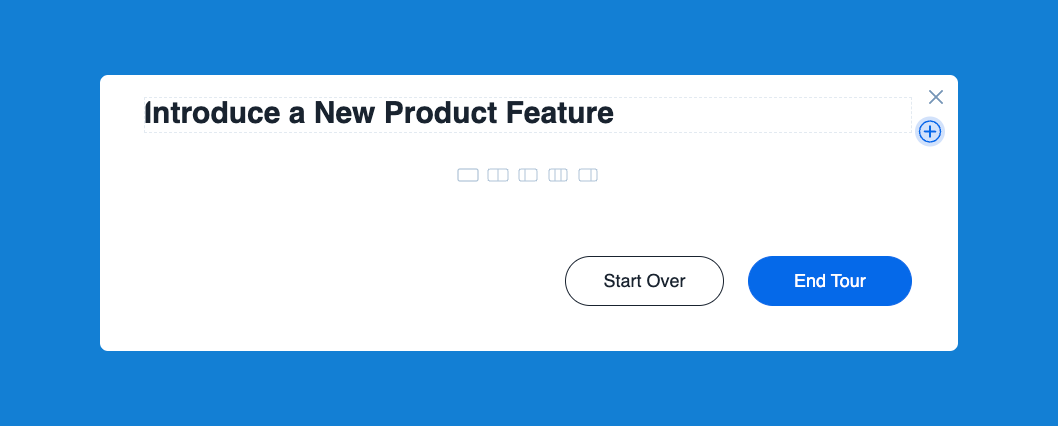
Step 5: Add a custom button to each of the three partition cells, which will look like the one below.
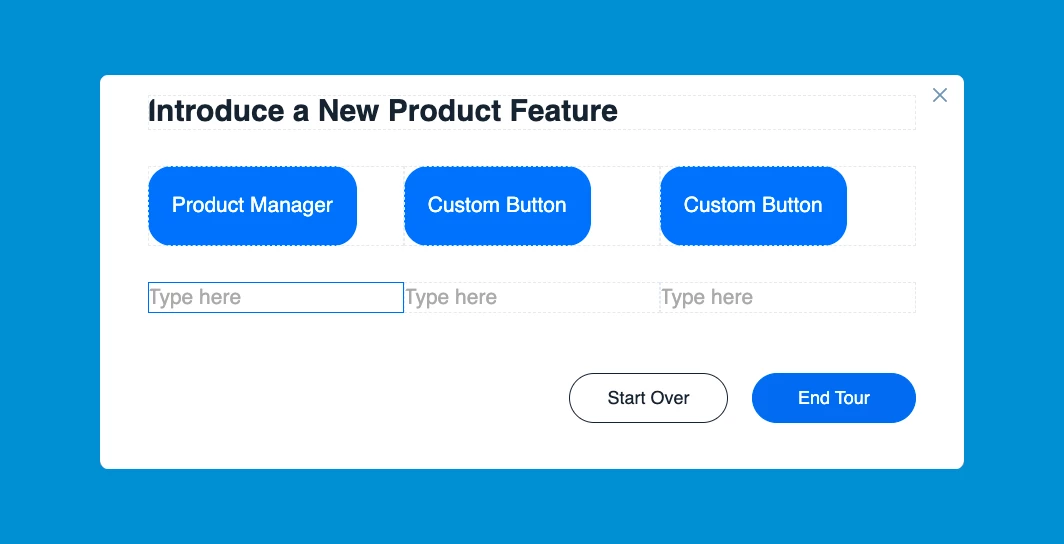
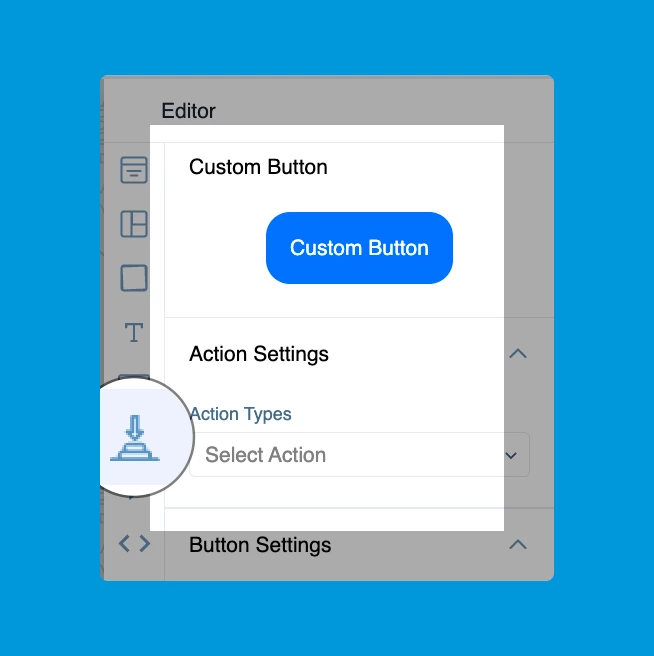
Step 6: To add the custom button, you need to add it by clicking the “insert custom button” on the editor pane.
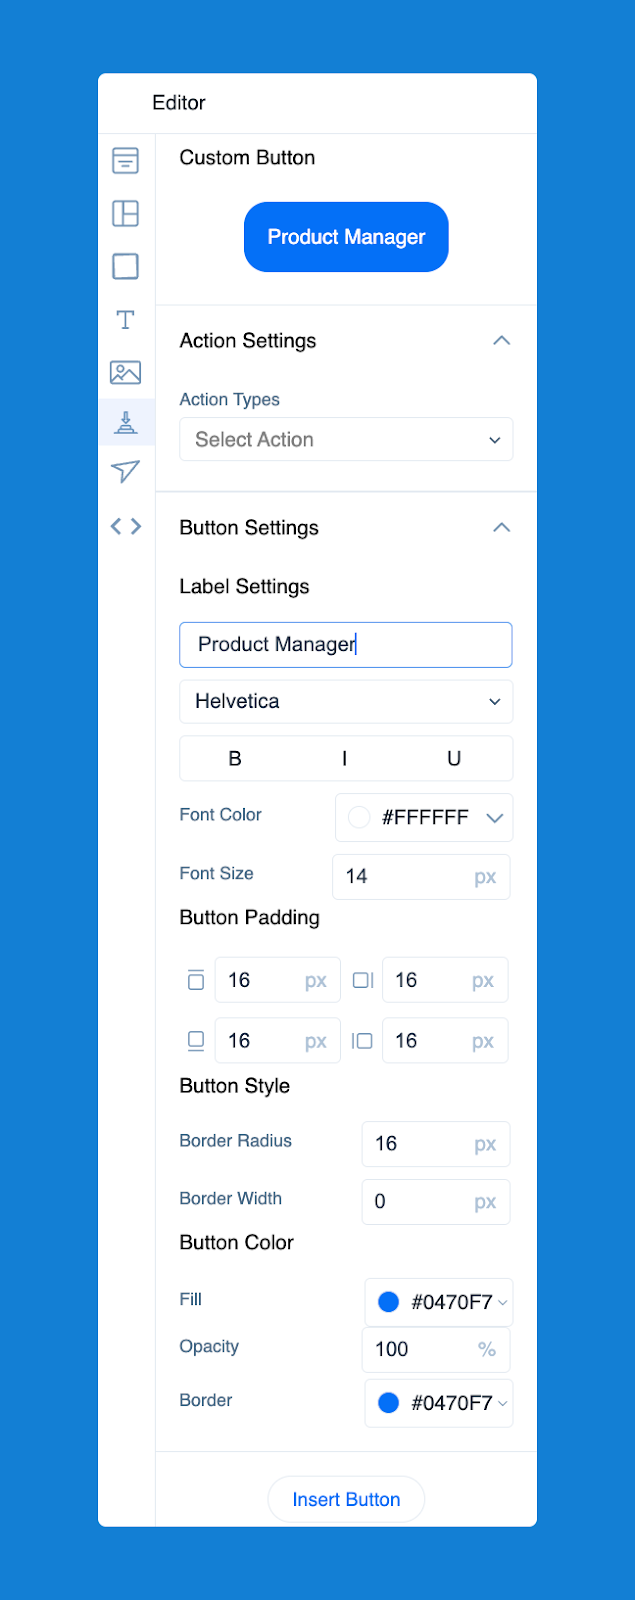
Step 7: Now edit each custom button in “Button Settings”
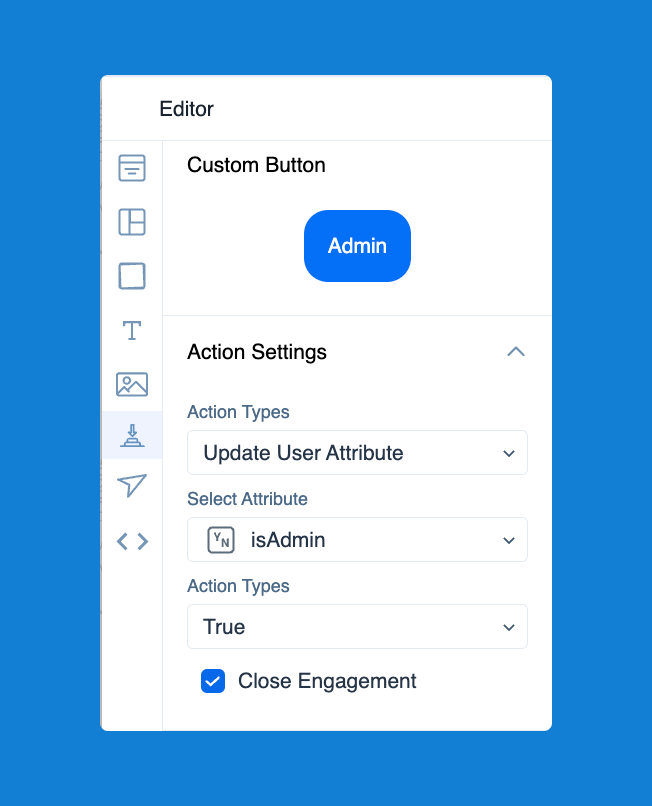
Step 8: Set an action for the button, defining what a click on the button should do
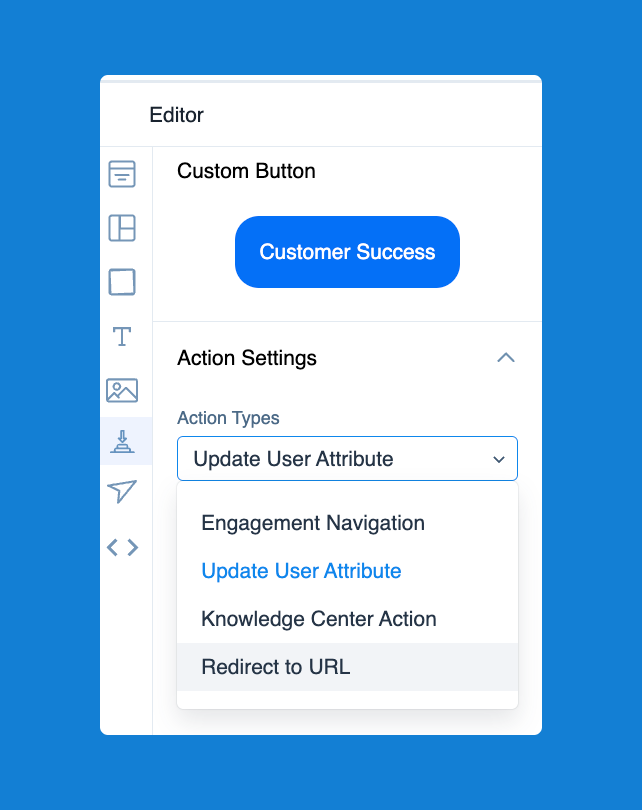
Step 9: In our case, it is “Update user attribute,” so choose that field from the drop-down list.

Step 10: Now define what value the button should update in the user profile by giving a value to the user attribute as above and do the same for the rest of the buttons.
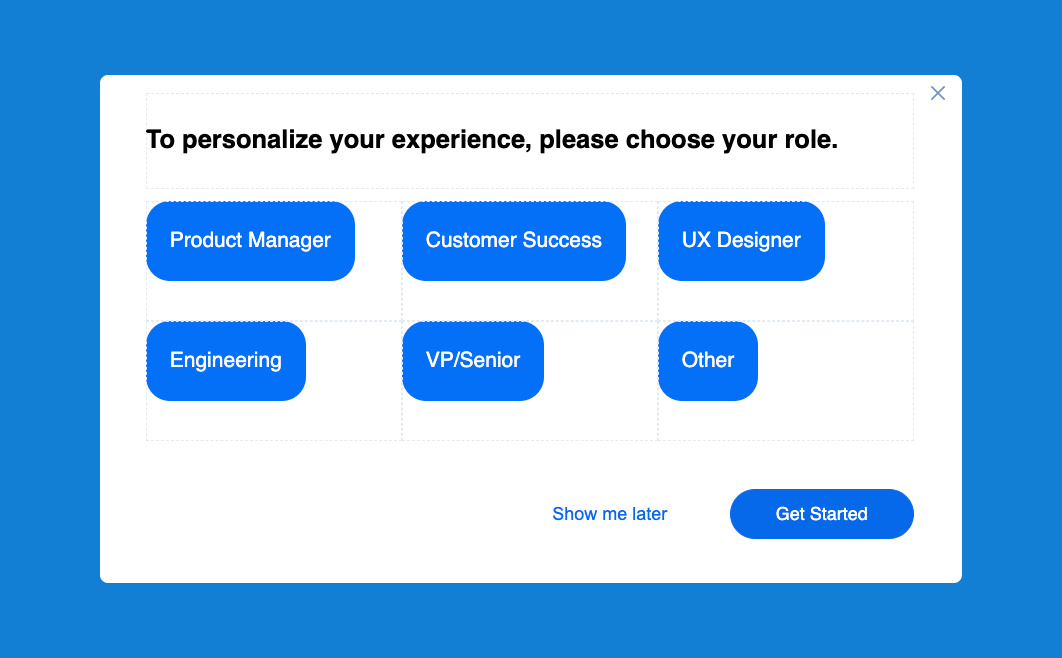
Step 11: You can update the boolean fields of a user profile using the same logic as below
Amazing isn’t it?
User profiling is bliss to business owners and campaign strategists who wants to drive adoption using personalized journeys. This exercise will help you for sure!
Happy PX-ing!
(Did I say, FOLLOW ME for more -instead of Bye!😉)