
This article guides Moderators, Community Managers, and Admins on how to manage and moderate community content using the Moderation Overview page.
Overview
A community is a shared space where users engage in discussions, exchange knowledge, and connect over common interests, products, or services. In digital platforms, maintaining a positive, respectful, and relevant environment is critical to ensure members feel safe and encouraged to participate.
This is where moderation plays a vital role. Moderation ensures that conversations stay on-topic, community guidelines are followed, and inappropriate or harmful content is promptly addressed. Whether it is handling spam, reviewing flagged posts, or assigning ownership to discussions, moderation helps uphold the quality and integrity of the community.
To support these responsibilities, Moderation Overview provides a centralized interface for Moderators, Community Managers, and Admins. It enables them to:
- View and manage community topics at scale.
- Filter content to quickly identify topics that need attention.
- Perform bulk actions, such as marking posts as read or assigning moderators.
- Create and reuse custom views tailored to specific workflows or community goals.
Access Moderation Overview
Moderators can access the Overview page from Control to view content, apply filters, and manage community discussions.
To access the Overview page:
- Log in to Control.
- Navigate to Content > Moderation, then click Overview. The Overview page appears.
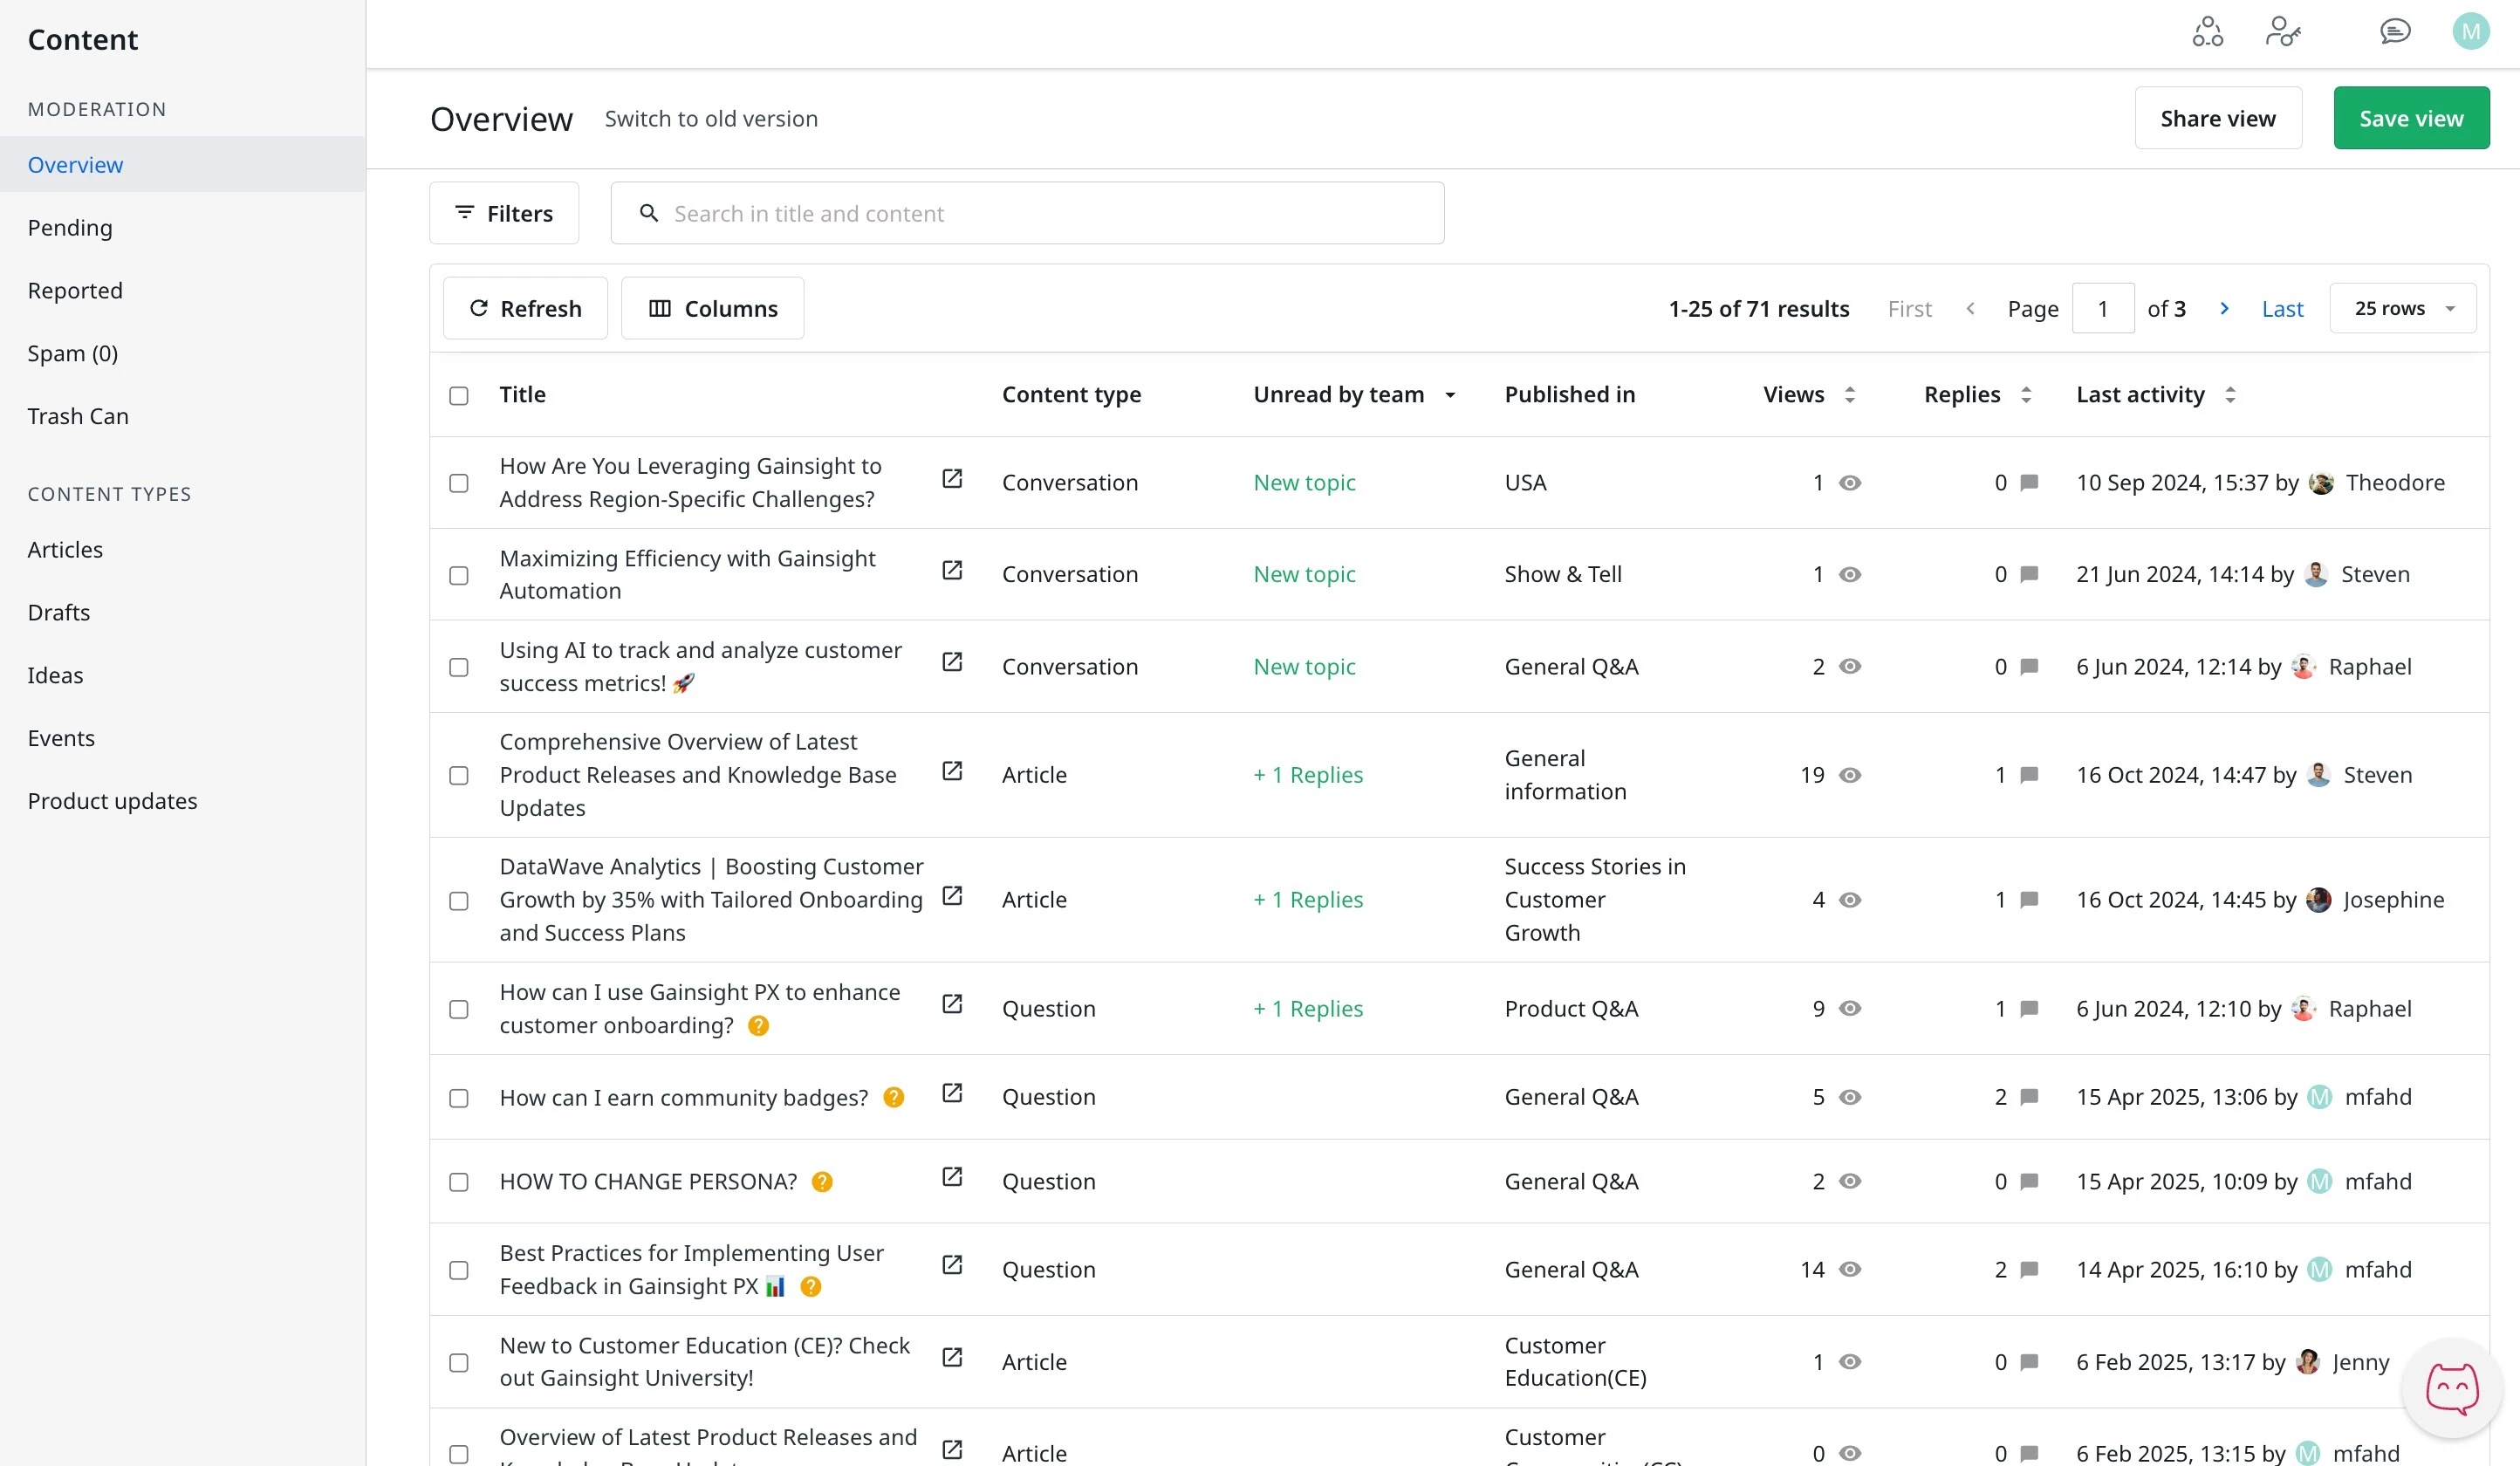
The Overview page displays a list of all content types available in the community. From here, moderators can apply filters, customize views, and take moderation actions such as marking posts as read or assigning topics to team members.
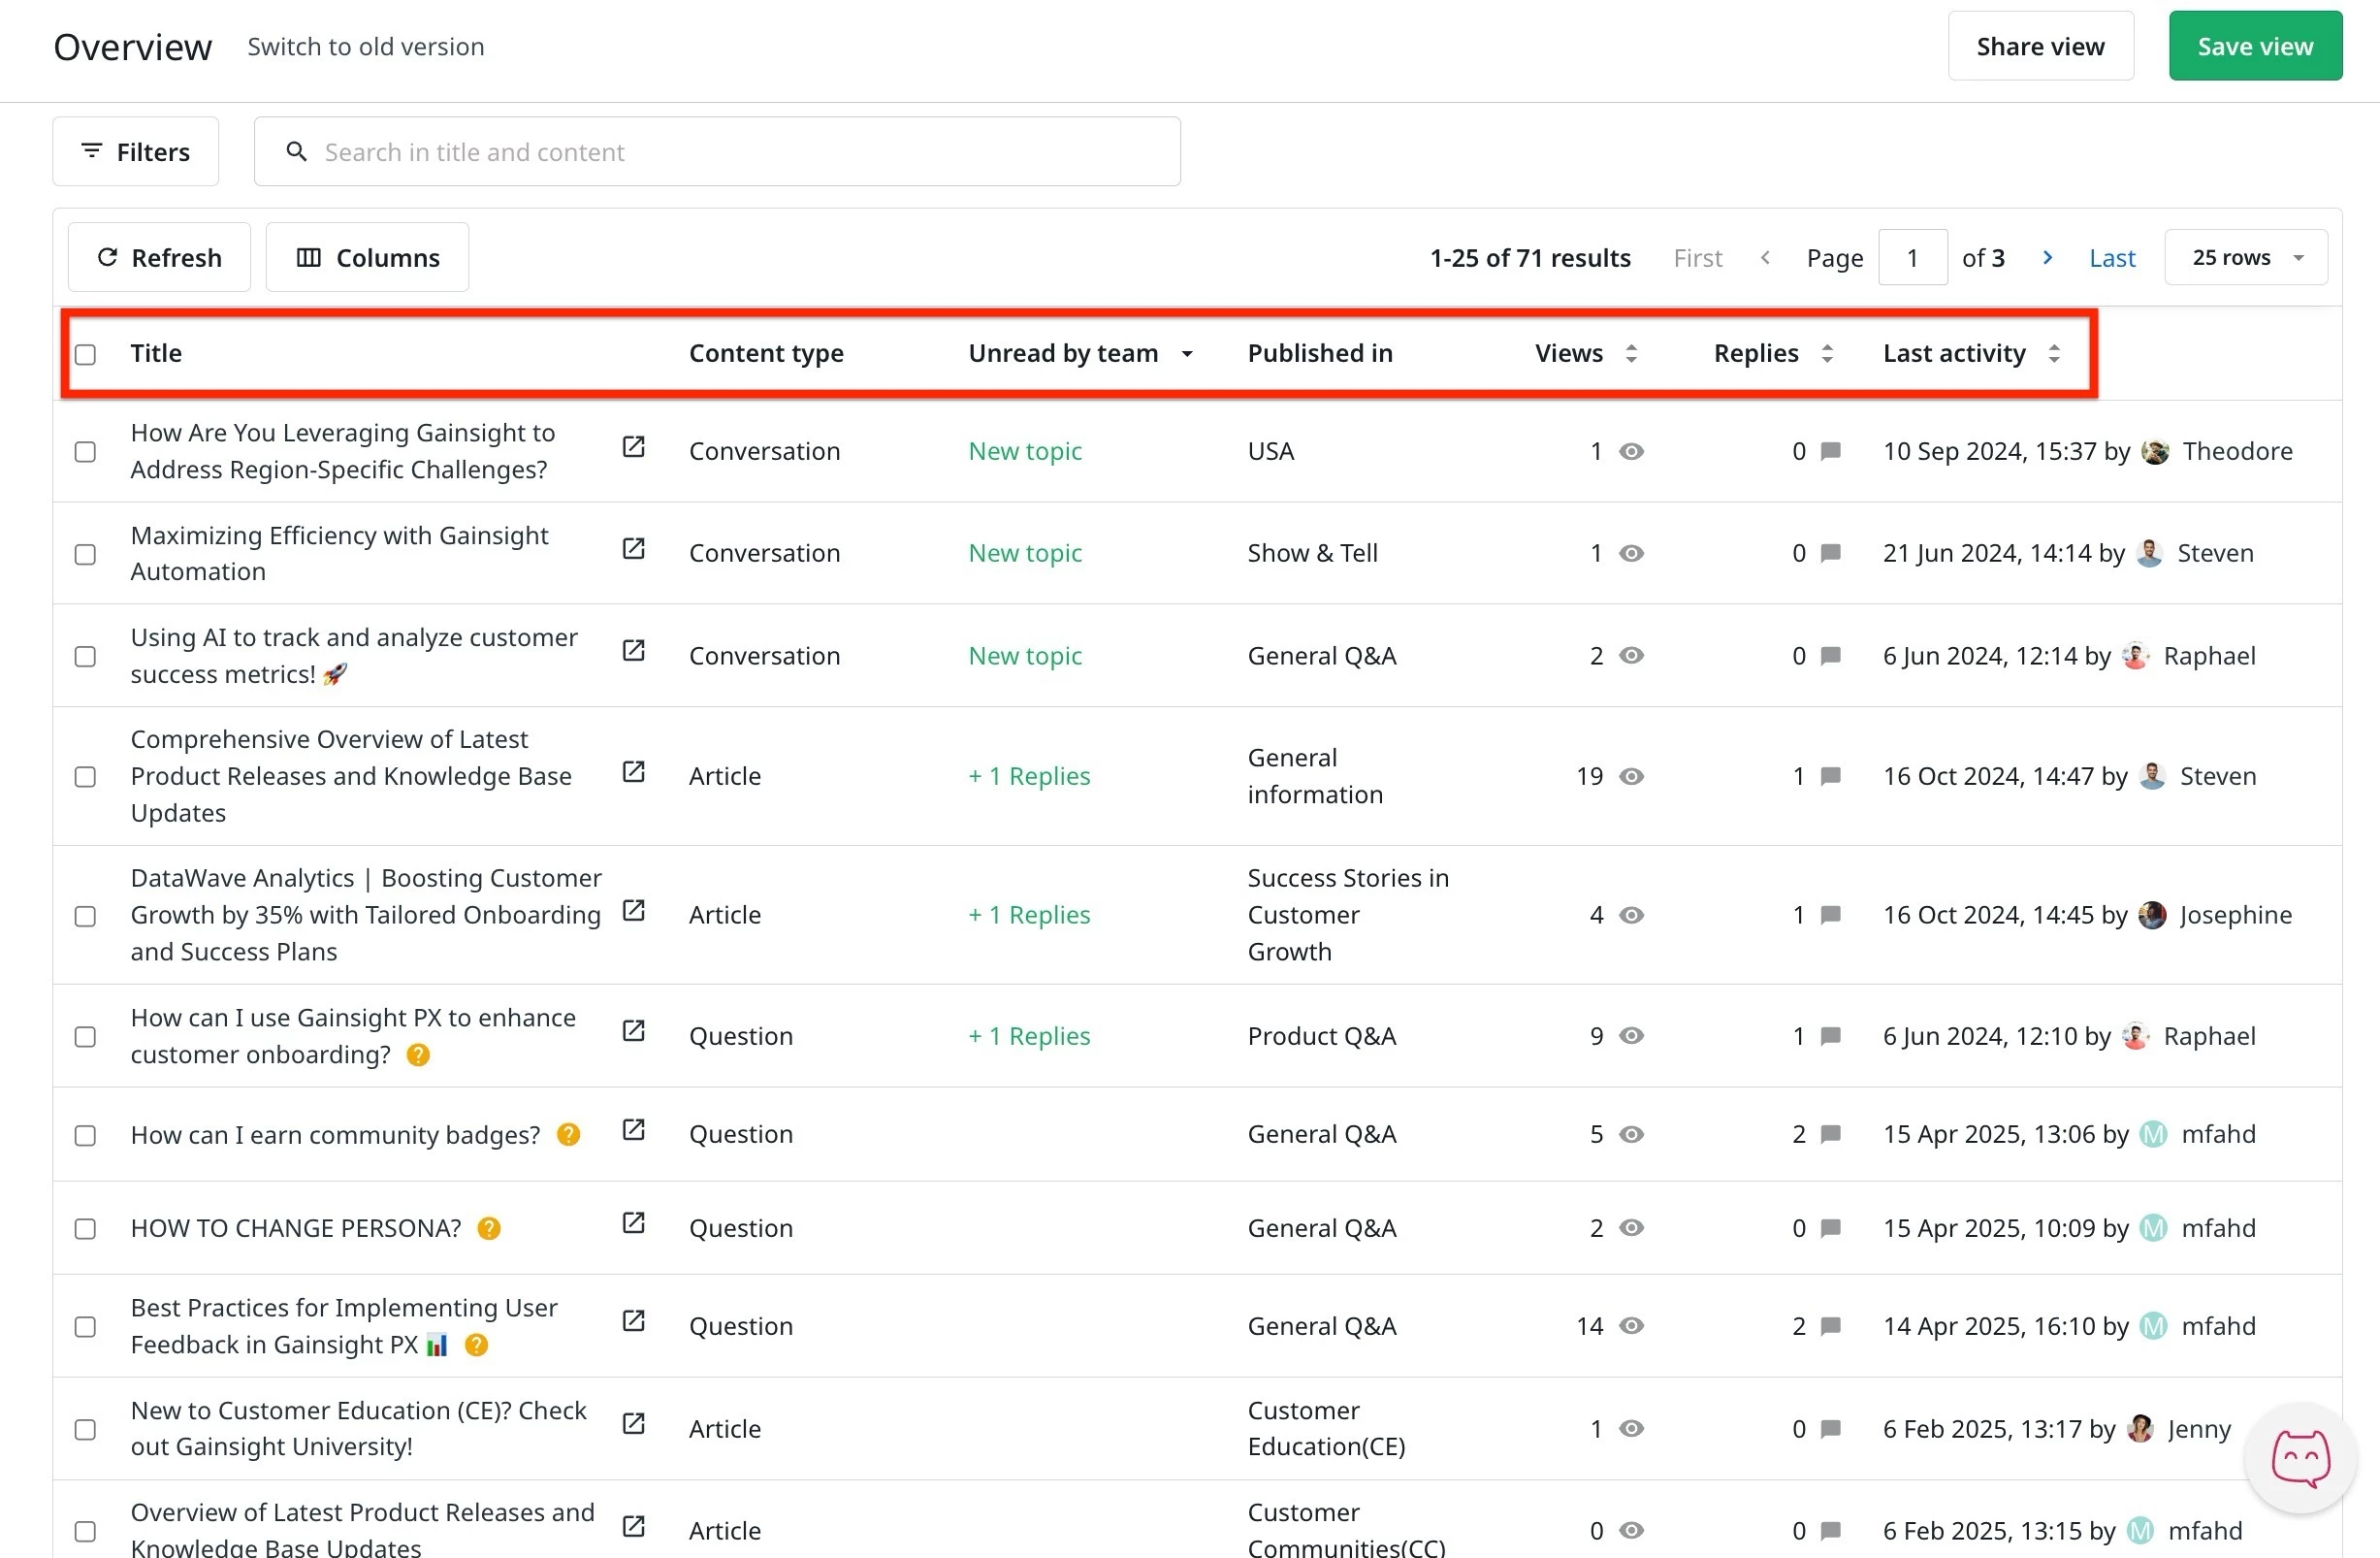
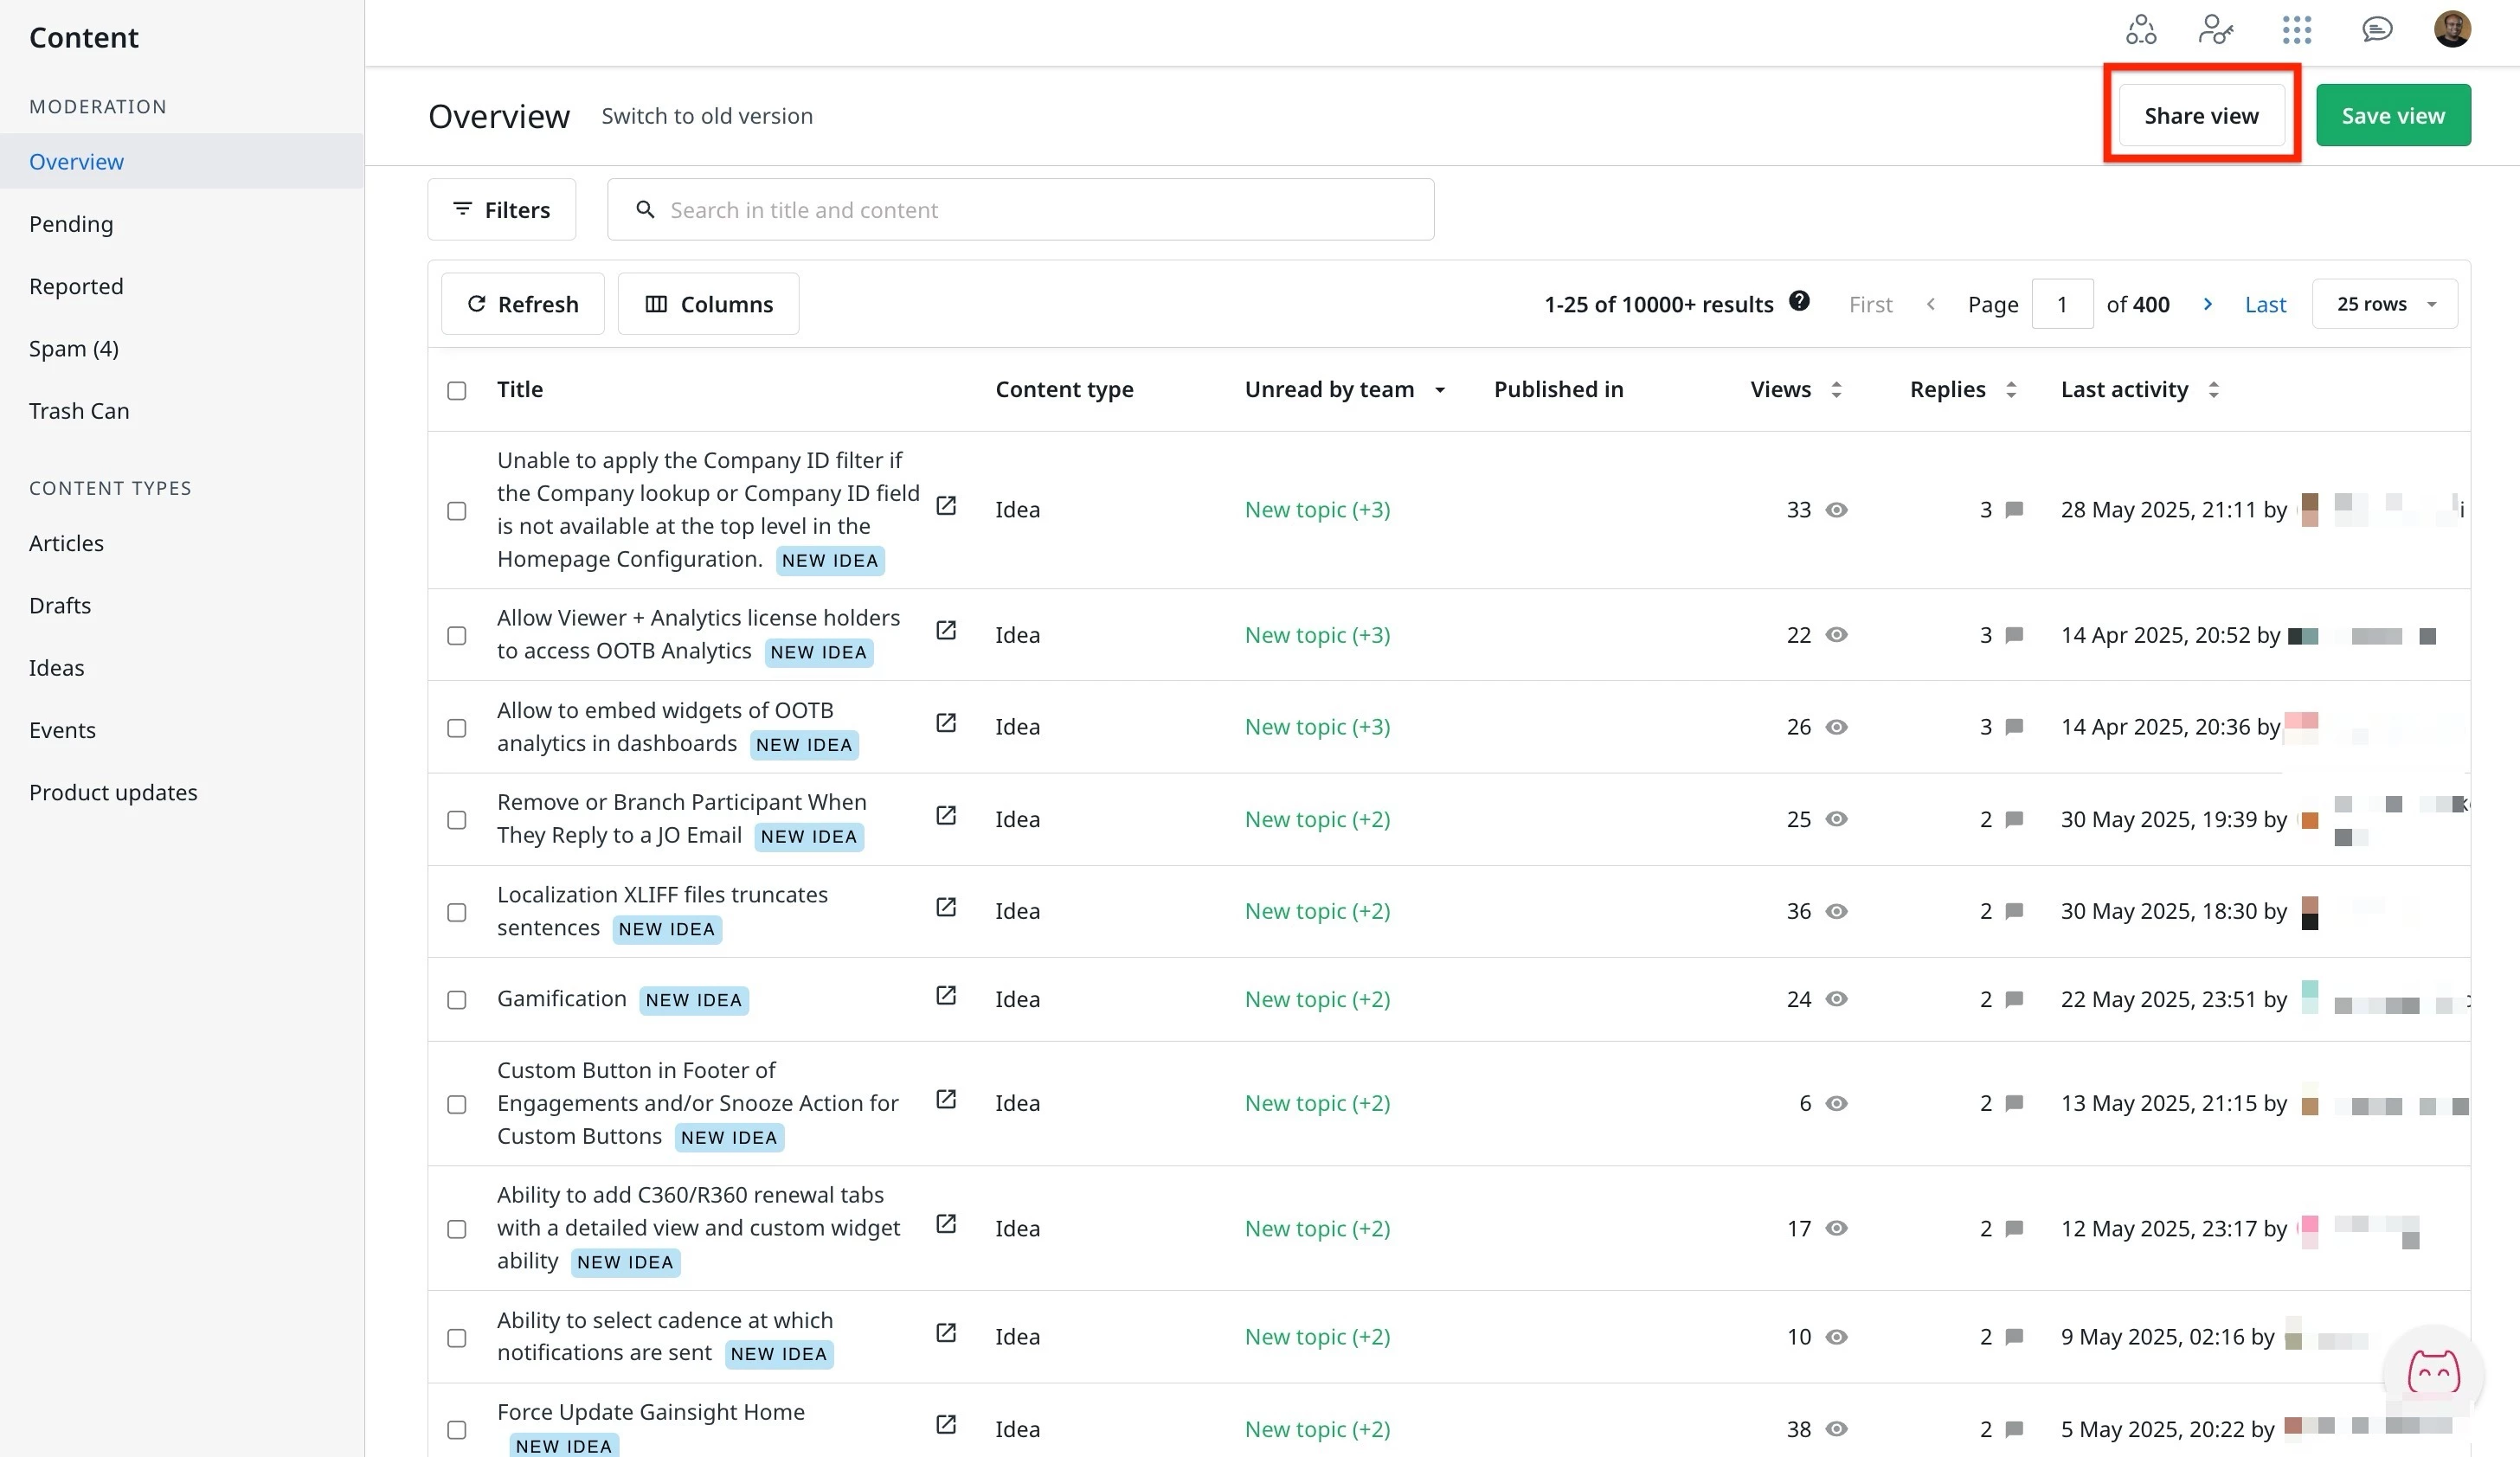
Understanding the Overview Table
When moderators access the Overview page, they are presented with a default table layout that includes several pre-selected columns. These columns help moderators quickly assess community content and take appropriate actions.
The default columns include the following:
- Title: Displays the subject or heading of the content.
- Content Type: Indicates whether the content is a conversation, article, question, or idea.
- Unread by Team: Indicates whether a topic or any of its replies remain unread by the team.
- Published In: Identifies the section of the community where the content has been posted.
- Views: Indicates how many times the content has been viewed.
- Replies: Displays the total number of responses the content has received.
- Last Activity: Displays the most recent update on the content, including the date, time, and name of the contributor.
These columns provide a high-level view of activity across the community. You can further customize the table by adding or removing columns based on their review and workflow needs.
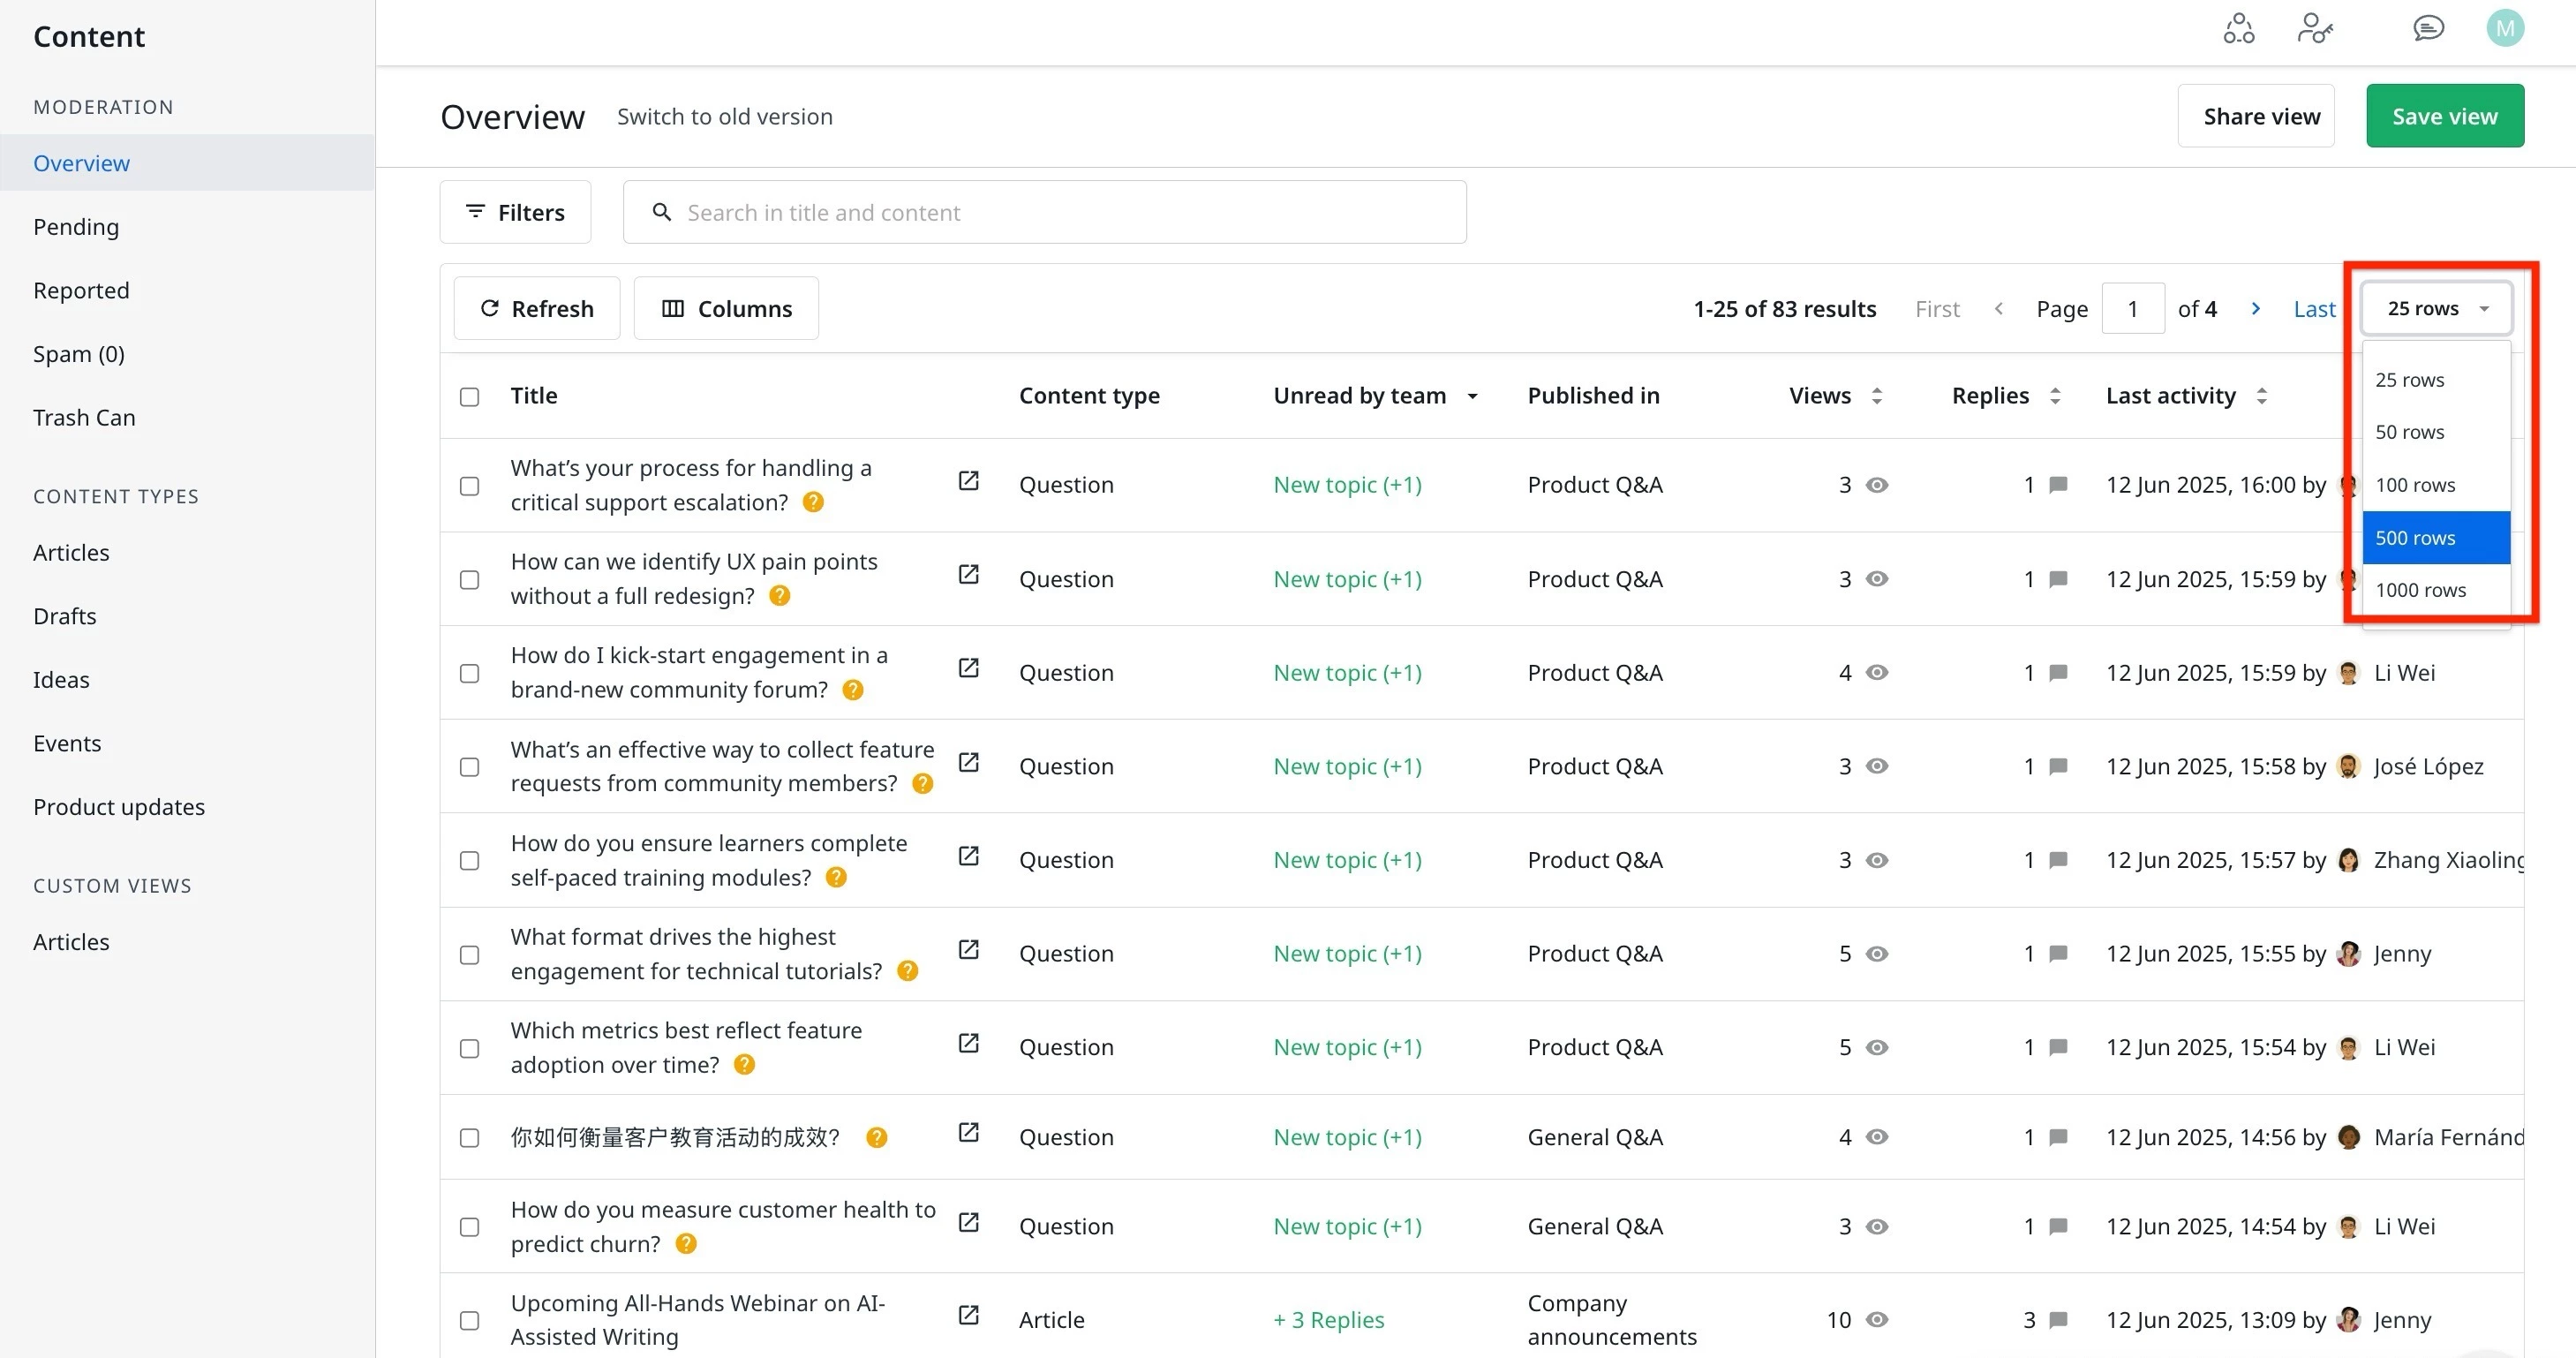
You can also change the number of rows of topics that are visible on the overview table from the drop-down next to pagination.
Customize the Overview Table
You can personalize the Overview table to suit your specific moderation needs. This includes adding or removing columns, applying filters such as Published In or Author, and saving customized views for future use.
Perform the following actions to customize the table:
- Add or Remove Columns: Choose which columns to display or hide based on your workflow.
- Filters: Apply filters to narrow down content by attributes such as category, author, or publish date.
- Save Custom Views: Save a personalized table layout for quick access and reuse.
Add or Remove Columns
You can customize the Overview table by selecting which columns are displayed, allowing you to tailor the view to specific workflows or review needs.
To add or remove columns:
- On the Overview page, click Columns. The Custom table view dialog appears.
- Select or delete the columns you want to include.
- Click Apply.
The Overview table is updated with the selected columns and reflects the latest configuration.
Filters
You can apply filters to the Overview table to view specific content based on selected attributes. This helps focus on relevant topics such as content by a particular author, publish date, or community section.
To filter the table:
- Click Filters. A drop-down list of all available filters appears.
- Select the attributes you want to apply.
- Click Apply.
To remove all filters and return to the default view, click Clear All. The table reverts to the original state before filters were applied.
Save Custom Views
You can personalize and save the Overview table with applied filters and selected columns for quick access in the future.
To save a custom view:
- Click Save View. The Save view dialog appears.
- In the Custom view name field, enter a name for the view.
- Click Save view. The saved view appears under Custom Views in the left navigation panel.
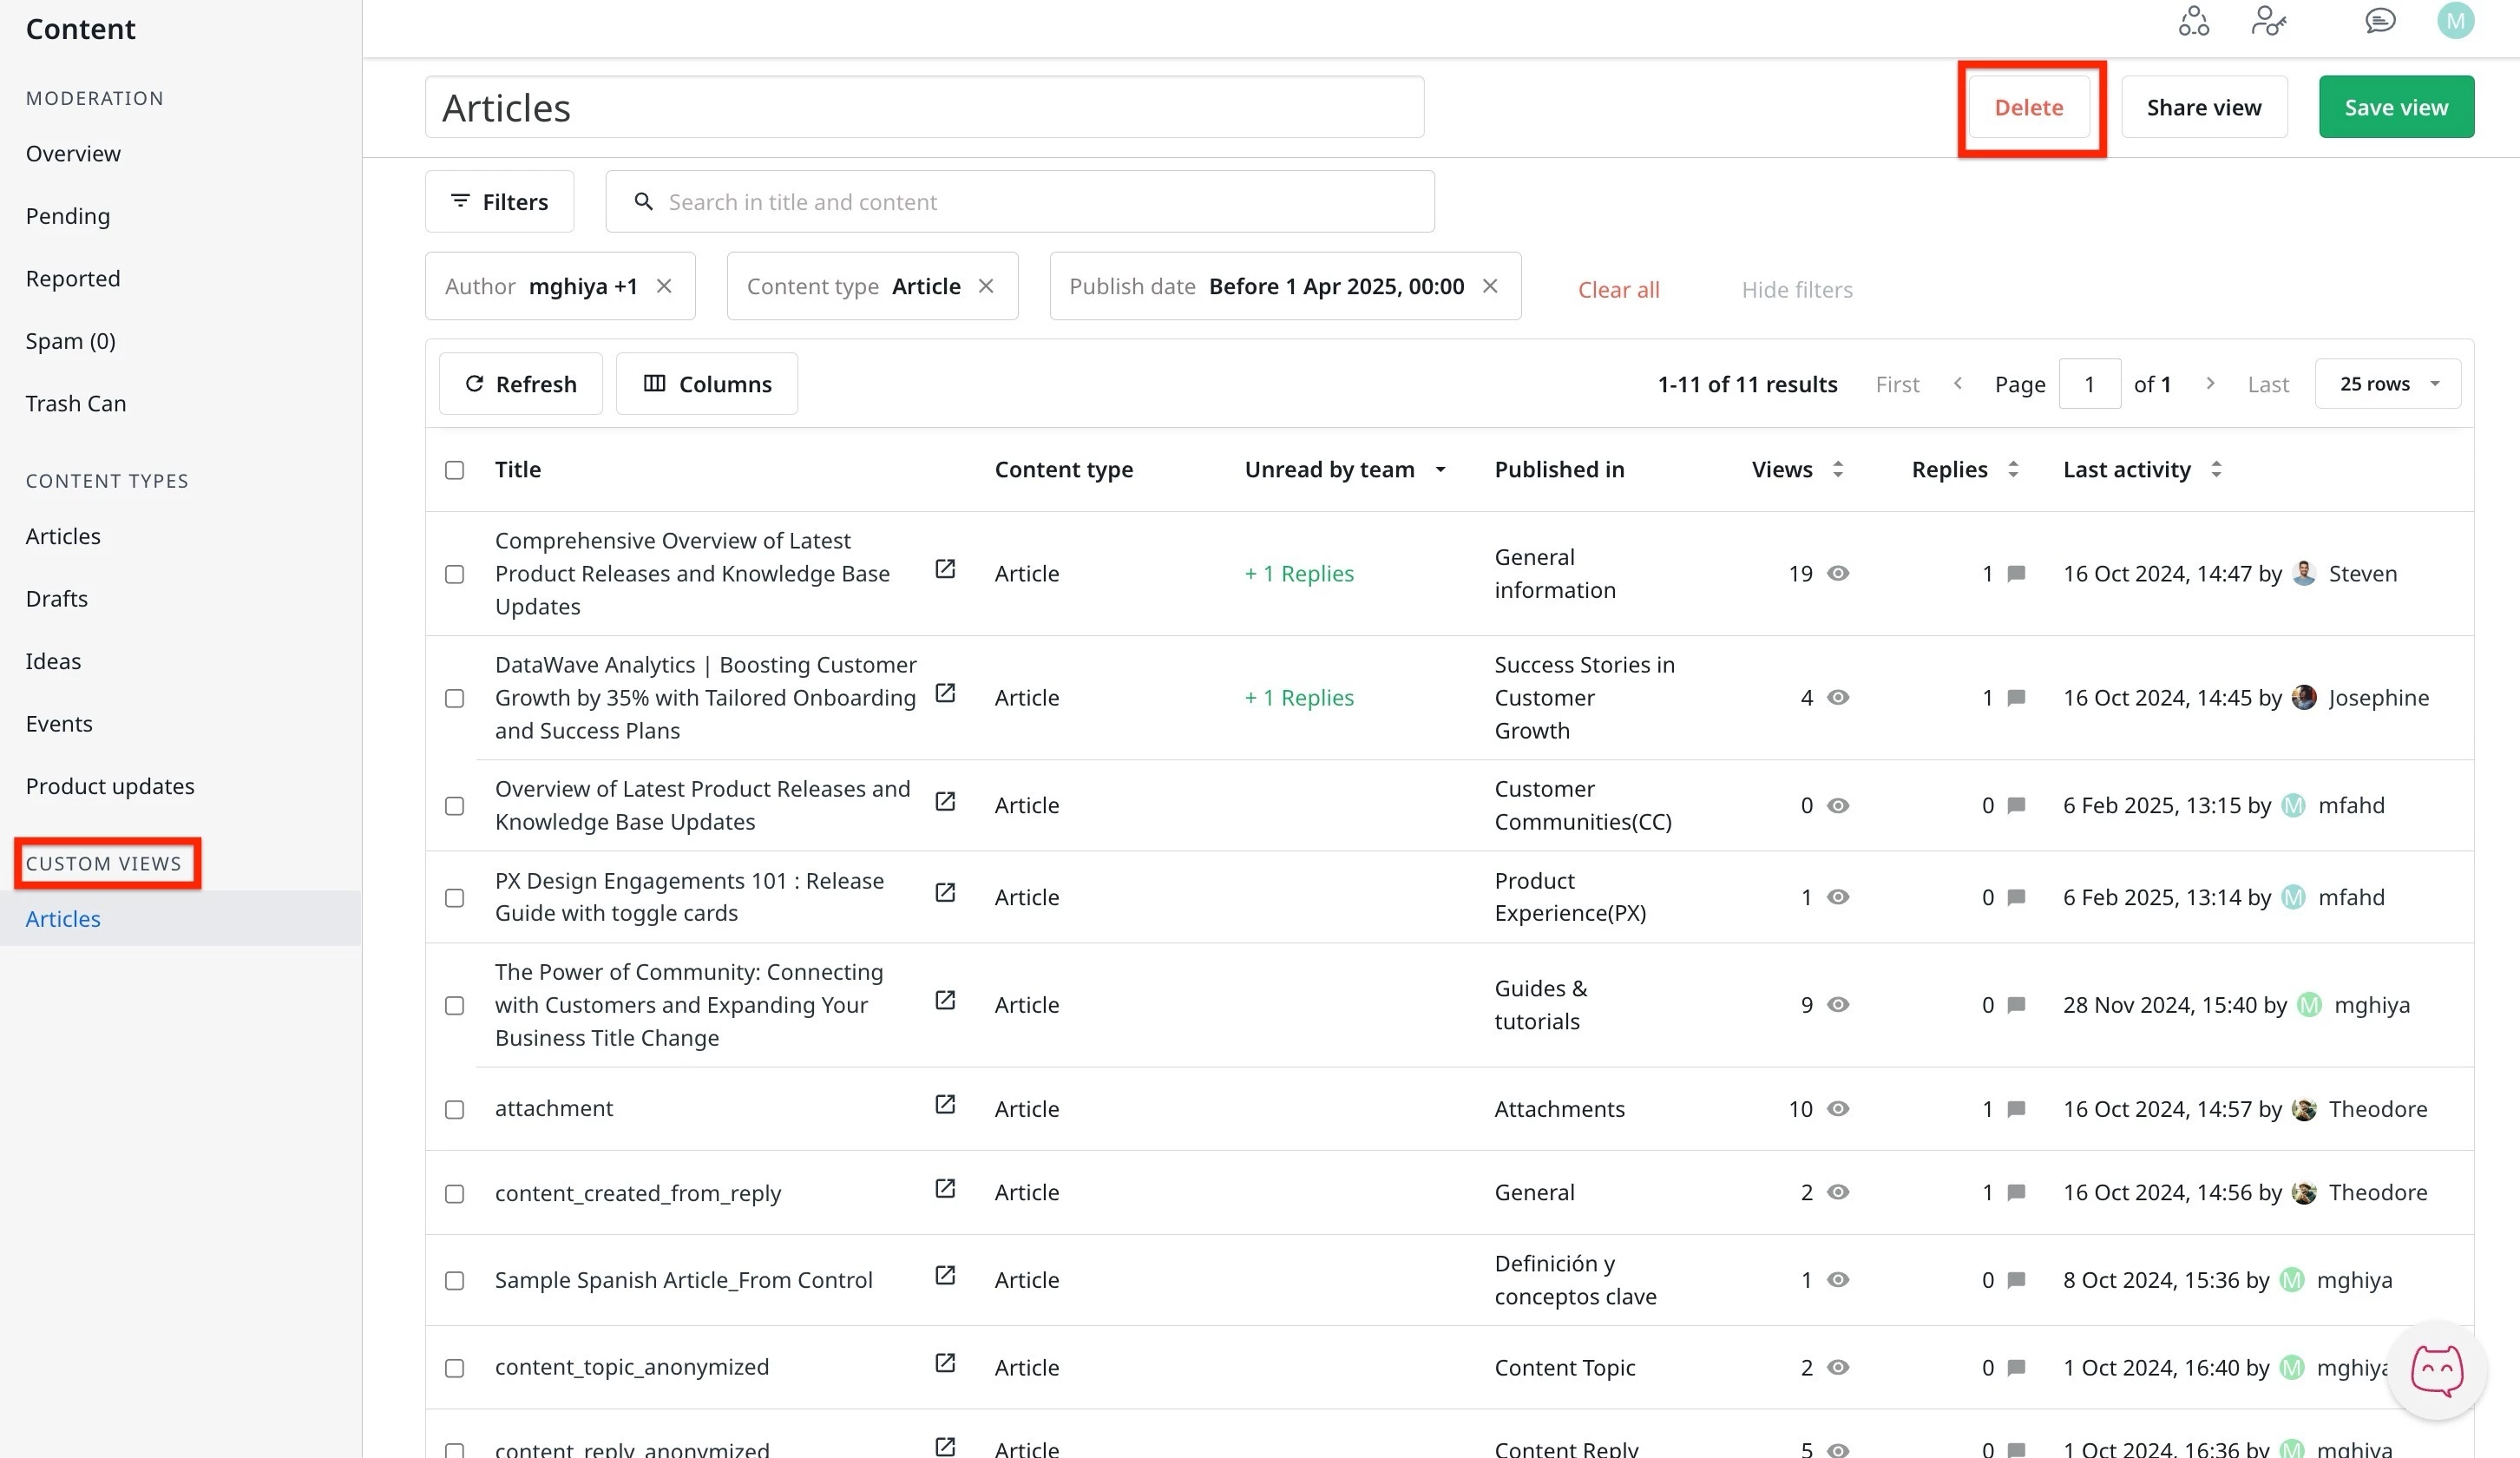
If required, you can delete a previously saved custom view.
To delete the saved custom view:
- Navigate to the Custom Views.
- Select the saved custom view you want to delete.
- Click Delete.
Note: Deleting a custom view is permanent and cannot be undone. You must manually reapply filters and column selections if you wish to recreate the view.
Share View
You can share your current Overview table view with other moderators or team members. When you click Share view, a unique URL is generated that includes all applied filters and column settings.
This is useful when you want to highlight specific content or unusual patterns. Sharing the view allows others to open the exact same filtered table, making it easier to collaborate and take action as needed.
Moderation Toolbar
The moderation toolbar on the Overview table allows you to take direct actions on selected content. These actions help manage conversations, enforce guidelines, and maintain content quality.
To perform such actions:
- On the Overview table, select the checkbox next to the content you want to moderate.
Note: You can perform actions on a single item or multiple items at once.
- Select from the available moderation actions in the toolbar:
Action Description Move To Move selected content to a different section of the community. Close Close the topic to prevent further replies. Mark As Read Mark all selected items under Unread by team as read Assign Moderator Assign a specific user as the moderator for the selected content. Moderation Label Apply a moderation label to categorize or flag content. Spam Mark the content as spam and ban the author. Trash Move the selected content to the Trash Can.