In this post, we'll guide you through the implementation of a multiselect feature in PX engagement, where users can select different options visually through checkboxes with images. Our implementation captures user selections, updates a custom attribute upon submission, and closes the engagement.

Below, you'll find the HTML code that forms the core of this functionality, along with an explanation of what each part does.
<div id="imageForm" style="display: grid; grid-template-columns: repeat(5, 1fr); gap: 10px; margin-top: 20px;">
<div class="image-checkbox" onclick="this.classList.toggle('selected'); this.style.borderColor = this.classList.contains('selected') ? '#007bff' : 'transparent'; this.style.boxShadow = this.classList.contains('selected') ? '0 0 10px rgba(0, 123, 255, 0.7)' : 'none';" data-value="Executive" style="cursor: pointer; display: flex; flex-direction: column; align-items: center; margin: 0 5px 10px; border: 2px solid transparent; transition: border-color 0.3s, box-shadow 0.3s;">
<img src="https://encrypted-tbn0.gstatic.com/images?q=tbn:ANd9GcQ98hHCI_jrnI-CHJy-UaWLKAY8YDSzNs-G3Q&s" alt="Executive" style="width: 80px; height: 80px; display: block; margin-bottom: 5px;" width="80" height="80">
<div style="font-size: 14px; text-align: center;">Executive</div>
</div>
<div class="image-checkbox" onclick="this.classList.toggle('selected'); this.style.borderColor = this.classList.contains('selected') ? '#007bff' : 'transparent'; this.style.boxShadow = this.classList.contains('selected') ? '0 0 10px rgba(0, 123, 255, 0.7)' : 'none';" data-value="Clinical" style="cursor: pointer; display: flex; flex-direction: column; align-items: center; margin: 0 5px 10px; border: 2px solid transparent; transition: border-color 0.3s, box-shadow 0.3s;">
<img src="https://encrypted-tbn0.gstatic.com/images?q=tbn:ANd9GcQ98hHCI_jrnI-CHJy-UaWLKAY8YDSzNs-G3Q&s" alt="Clinical" style="width: 80px; height: 80px; display: block; margin-bottom: 5px;" width="80" height="80">
<div style="font-size: 14px; text-align: center;">Clinical</div>
</div>
<div class="image-checkbox" onclick="this.classList.toggle('selected'); this.style.borderColor = this.classList.contains('selected') ? '#007bff' : 'transparent'; this.style.boxShadow = this.classList.contains('selected') ? '0 0 10px rgba(0, 123, 255, 0.7)' : 'none';" data-value="IT" style="cursor: pointer; display: flex; flex-direction: column; align-items: center; margin: 0 5px 10px; border: 2px solid transparent; transition: border-color 0.3s, box-shadow 0.3s;">
<img src="https://encrypted-tbn0.gstatic.com/images?q=tbn:ANd9GcQ98hHCI_jrnI-CHJy-UaWLKAY8YDSzNs-G3Q&s" alt="IT" style="width: 80px; height: 80px; display: block; margin-bottom: 5px;" width="80" height="80">
<div style="font-size: 14px; text-align: center;">IT</div>
</div>
<div class="image-checkbox" onclick="this.classList.toggle('selected'); this.style.borderColor = this.classList.contains('selected') ? '#007bff' : 'transparent'; this.style.boxShadow = this.classList.contains('selected') ? '0 0 10px rgba(0, 123, 255, 0.7)' : 'none';" data-value="Data" style="cursor: pointer; display: flex; flex-direction: column; align-items: center; margin: 0 5px 10px; border: 2px solid transparent; transition: border-color 0.3s, box-shadow 0.3s;">
<img src="https://encrypted-tbn0.gstatic.com/images?q=tbn:ANd9GcQ98hHCI_jrnI-CHJy-UaWLKAY8YDSzNs-G3Q&s" alt="Data" style="width: 80px; height: 80px; display: block; margin-bottom: 5px;" width="80" height="80">
<div style="font-size: 14px; text-align: center;">Data</div>
</div>
<div class="image-checkbox" onclick="this.classList.toggle('selected'); this.style.borderColor = this.classList.contains('selected') ? '#007bff' : 'transparent'; this.style.boxShadow = this.classList.contains('selected') ? '0 0 10px rgba(0, 123, 255, 0.7)' : 'none';" data-value="Auditor" style="cursor: pointer; display: flex; flex-direction: column; align-items: center; margin: 0 5px 10px; border: 2px solid transparent; transition: border-color 0.3s, box-shadow 0.3s;">
<img src="https://encrypted-tbn0.gstatic.com/images?q=tbn:ANd9GcQ98hHCI_jrnI-CHJy-UaWLKAY8YDSzNs-G3Q&s" alt="Auditor" style="width: 80px; height: 80px; display: block; margin-bottom: 5px;" width="80" height="80">
<div style="font-size: 14px; text-align: center;">Auditor</div>
</div>
<div class="image-checkbox" onclick="this.classList.toggle('selected'); this.style.borderColor = this.classList.contains('selected') ? '#007bff' : 'transparent'; this.style.boxShadow = this.classList.contains('selected') ? '0 0 10px rgba(0, 123, 255, 0.7)' : 'none';" data-value="Communication" style="cursor: pointer; display: flex; flex-direction: column; align-items: center; margin: 0 5px 10px; border: 2px solid transparent; transition: border-color 0.3s, box-shadow 0.3s;">
<img src="https://encrypted-tbn0.gstatic.com/images?q=tbn:ANd9GcQ98hHCI_jrnI-CHJy-UaWLKAY8YDSzNs-G3Q&s" alt="Communication" style="width: 80px; height: 80px; display: block; margin-bottom: 5px;" width="80" height="80">
<div style="font-size: 14px; text-align: center;">Communication</div>
</div>
<div class="image-checkbox" onclick="this.classList.toggle('selected'); this.style.borderColor = this.classList.contains('selected') ? '#007bff' : 'transparent'; this.style.boxShadow = this.classList.contains('selected') ? '0 0 10px rgba(0, 123, 255, 0.7)' : 'none';" data-value="Project Manager" style="cursor: pointer; display: flex; flex-direction: column; align-items: center; margin: 0 5px 10px; border: 2px solid transparent; transition: border-color 0.3s, box-shadow 0.3s;">
<img src="https://encrypted-tbn0.gstatic.com/images?q=tbn:ANd9GcQ98hHCI_jrnI-CHJy-UaWLKAY8YDSzNs-G3Q&s" alt="Project Manager" style="width: 80px; height: 80px; display: block; margin-bottom: 5px;" width="80" height="80" id="px-7198f296-08f7-4e7a-88e2-3f4cf47b0132">
<div style="font-size: 14px; text-align: center;">Project Manager</div>
</div>
<div class="image-checkbox" onclick="this.classList.toggle('selected'); this.style.borderColor = this.classList.contains('selected') ? '#007bff' : 'transparent'; this.style.boxShadow = this.classList.contains('selected') ? '0 0 10px rgba(0, 123, 255, 0.7)' : 'none';" data-value="Trainer" style="cursor: pointer; display: flex; flex-direction: column; align-items: center; margin: 0 5px 10px; border: 2px solid transparent; transition: border-color 0.3s, box-shadow 0.3s;">
<img src="https://encrypted-tbn0.gstatic.com/images?q=tbn:ANd9GcQ98hHCI_jrnI-CHJy-UaWLKAY8YDSzNs-G3Q&s" alt="Trainer" style="width: 80px; height: 80px; display: block; margin-bottom: 5px;" width="80" height="80" id="px-36541e43-fb79-42e9-ad19-3d4c69a2232f">
<div style="font-size: 14px; text-align: center;">Trainer</div>
</div>
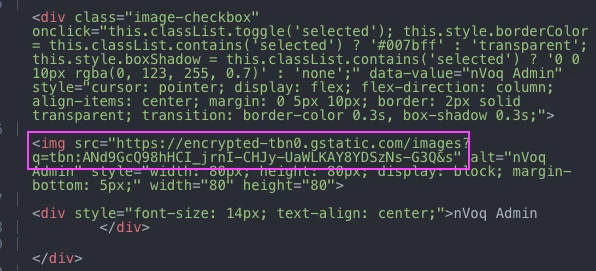
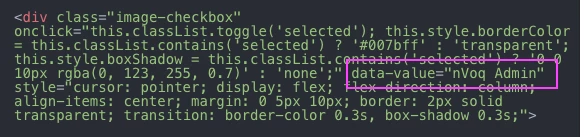
<div class="image-checkbox" onclick="this.classList.toggle('selected'); this.style.borderColor = this.classList.contains('selected') ? '#007bff' : 'transparent'; this.style.boxShadow = this.classList.contains('selected') ? '0 0 10px rgba(0, 123, 255, 0.7)' : 'none';" data-value="nVoq Admin" style="cursor: pointer; display: flex; flex-direction: column; align-items: center; margin: 0 5px 10px; border: 2px solid transparent; transition: border-color 0.3s, box-shadow 0.3s;">
<img src="https://encrypted-tbn0.gstatic.com/images?q=tbn:ANd9GcQ98hHCI_jrnI-CHJy-UaWLKAY8YDSzNs-G3Q&s" alt="nVoq Admin" style="width: 80px; height: 80px; display: block; margin-bottom: 5px;" width="80" height="80">
<div style="font-size: 14px; text-align: center;">nVoq Admin
</div>
</div>
<div class="image-checkbox" onclick="this.classList.toggle('selected'); this.style.borderColor = this.classList.contains('selected') ? '#007bff' : 'transparent'; this.style.boxShadow = this.classList.contains('selected') ? '0 0 10px rgba(0, 123, 255, 0.7)' : 'none';" data-value="Stakeholder" style="cursor: pointer; display: flex; flex-direction: column; align-items: center; margin: 0px 5px 10px; border: 2px solid transparent; transition: border-color 0.3s, box-shadow 0.3s; box-shadow: none;">
<img src="hhttps://encrypted-tbn0.gstatic.com/images?q=tbn:ANd9GcQ98hHCI_jrnI-CHJy-UaWLKAY8YDSzNs-G3Q&s" alt="Stakeholder" style="width: 80px; height: 80px; display: block; margin-bottom: 5px;" width="80" height="80" id="px-10ec3897-10e4-4362-a48d-dceb92810712">
<div style="font-size: 14px; text-align: center;">Stakeholder</div>
</div>
</div>
<div style="display: flex; justify-content: center; margin-top: 20px;">
<button id="pxCustomButton-a4923ef5-39b6-4a70-8fc0-82d2c39836bf" type="button" style="margin-top: 20px; padding: 10px 20px; background-color: #007bff; color: #fff; border: none; cursor: pointer;" onclick="(function() {const selectedRolesStr =Array.from(document.querySelectorAll('.image-checkbox.selected')).map(box =>box.getAttribute('data-value')).join(', ');console.log('Selected Roles:',selectedRolesStr);aptrinsic('set','user',{'Test_role':selectedRolesStr});})()" class="px-editor-selected-button-in-focus">Submit234567 </button>
</div>
Explanation: Image Click Functionality and Backend Processing
-
Image Selection Interaction:
- When you click on any of the images (which function as checkboxes), the JavaScript
onclickevent is triggered. - Toggle Selection: The
this.classList.toggle('selected')part of the JavaScript code toggles theselectedclass on or off for the clicked element. This acts as a visual indicator for selection.
- When you click on any of the images (which function as checkboxes), the JavaScript
-
Backend Processing on Submission:
- Upon clicking the Submit button, an immediately invoked function executes:
- Collect Selection: The code
Array.from(document.querySelectorAll('.image-checkbox.selected')).map(box => box.getAttribute('data-value')).join(', ');collects all elements with theselectedclass. It maps and retrieves thedata-valuefor each selected item, converting this list into a comma-separated string (e.g., "Executive, IT"). - Logging and Updates: It logs the selected roles to the console with
console.log('Selected Roles:', selectedRolesStr);and updates a custom attribute using theaptrinsicfunction (aptrinsic('set', 'user', {'Test_role': selectedRolesStr});), sending the collected data to the backend for storage or analysis.
- Collect Selection: The code
- Upon clicking the Submit button, an immediately invoked function executes:
-
Custom Attribute Update:
- The custom attribute update allows the backend system to store the selected roles in the user’s profile or session record.
Steps to Implement Multiselect Options in PX Engagement
-
Create a Custom Attribute in PX:
- Before starting with the engagement, create a custom attribute in your PX instance to store the values received from the engagement. This will allow you to capture and manage user selections efficiently.
-
Create a Single-Page Guide Engagement:
- Begin by creating a new single-page guide engagement in your PX administration panel.
-
Clear the HTML Code:
- Remove any existing HTML code in the engagement editor to start with a blank canvas.
-
Copy and Paste the Provided Code:
- Copy the multiselect options code shared in this post and paste it into the HTML editor of your engagement.
-
Save the Engagement:
- Save the engagement with the newly added code to ensure your changes are not lost.
-
Add Closing Functionality:
- Note Important: To enable the Submit button to close the engagement while updating the custom attribute, you will need to create an additional button temporarily.
- Insert a new button into the engagement and configure it to perform the action of closing the engagement.
-
Switch to Code View:
- Change to the code view of the editor after configuring the temporary button to capture the button ID.
-
Copy the Button ID:
- Take note of the button ID for the button you created, as you will use it in your main submit button's code.
-
Save the Engagement Again:
- Save the engagement once more to store the newly captured button ID.
-
Remove the Temporary Button:
- Delete the temporary button you created earlier, as it is no longer needed.
-
Update the Submit Button ID:
- In the previously pasted code, locate the Submit button section and replace its
onclickfunctionality to include the ID of the temporary button you just removed. Ensure it handles the closing of the engagement effectively.
- In the previously pasted code, locate the Submit button section and replace its
-
Swap Attribute Name:
- In the function that updates the custom attribute, swap the attribute name in the following line of code:
aptrinsic('set', 'user', {'Test_role': selectedRolesStr});
Replace'Test_role'with the name of the custom attribute you created in Step 1.
- In the function that updates the custom attribute, swap the attribute name in the following line of code:
-
Final Save:
- Save the engagement once more to confirm all changes.