In this article we’ll take a closer look on how to connect your CC to OKTA SSO
What is OKTA Single Sign-on (SSO)
Okta connects any person with any application on any device.
It's an enterprise-grade, identity management service, built for the cloud, but compatible with many on-premises applications. With Okta, IT can manage any employee's access to any application or device. Okta runs in the cloud, on a secure, reliable, extensively audited platform, which integrates deeply with on-premises applications, directories, and identity management systems.
General guidance for SSO with InSided:
How to setup OKTA SSO
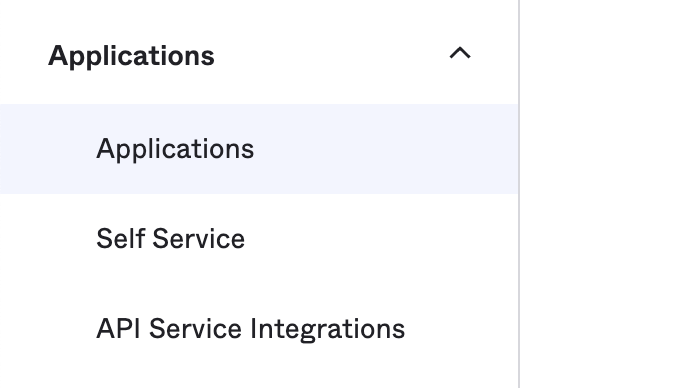
- Go to the applications page in Okta:
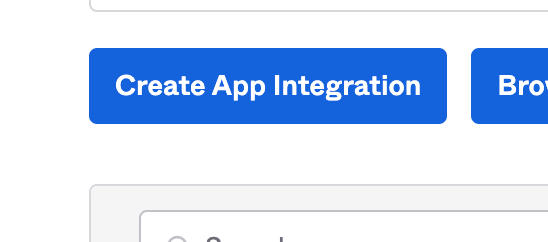
- Hit the ‘Create App Integration’ button:
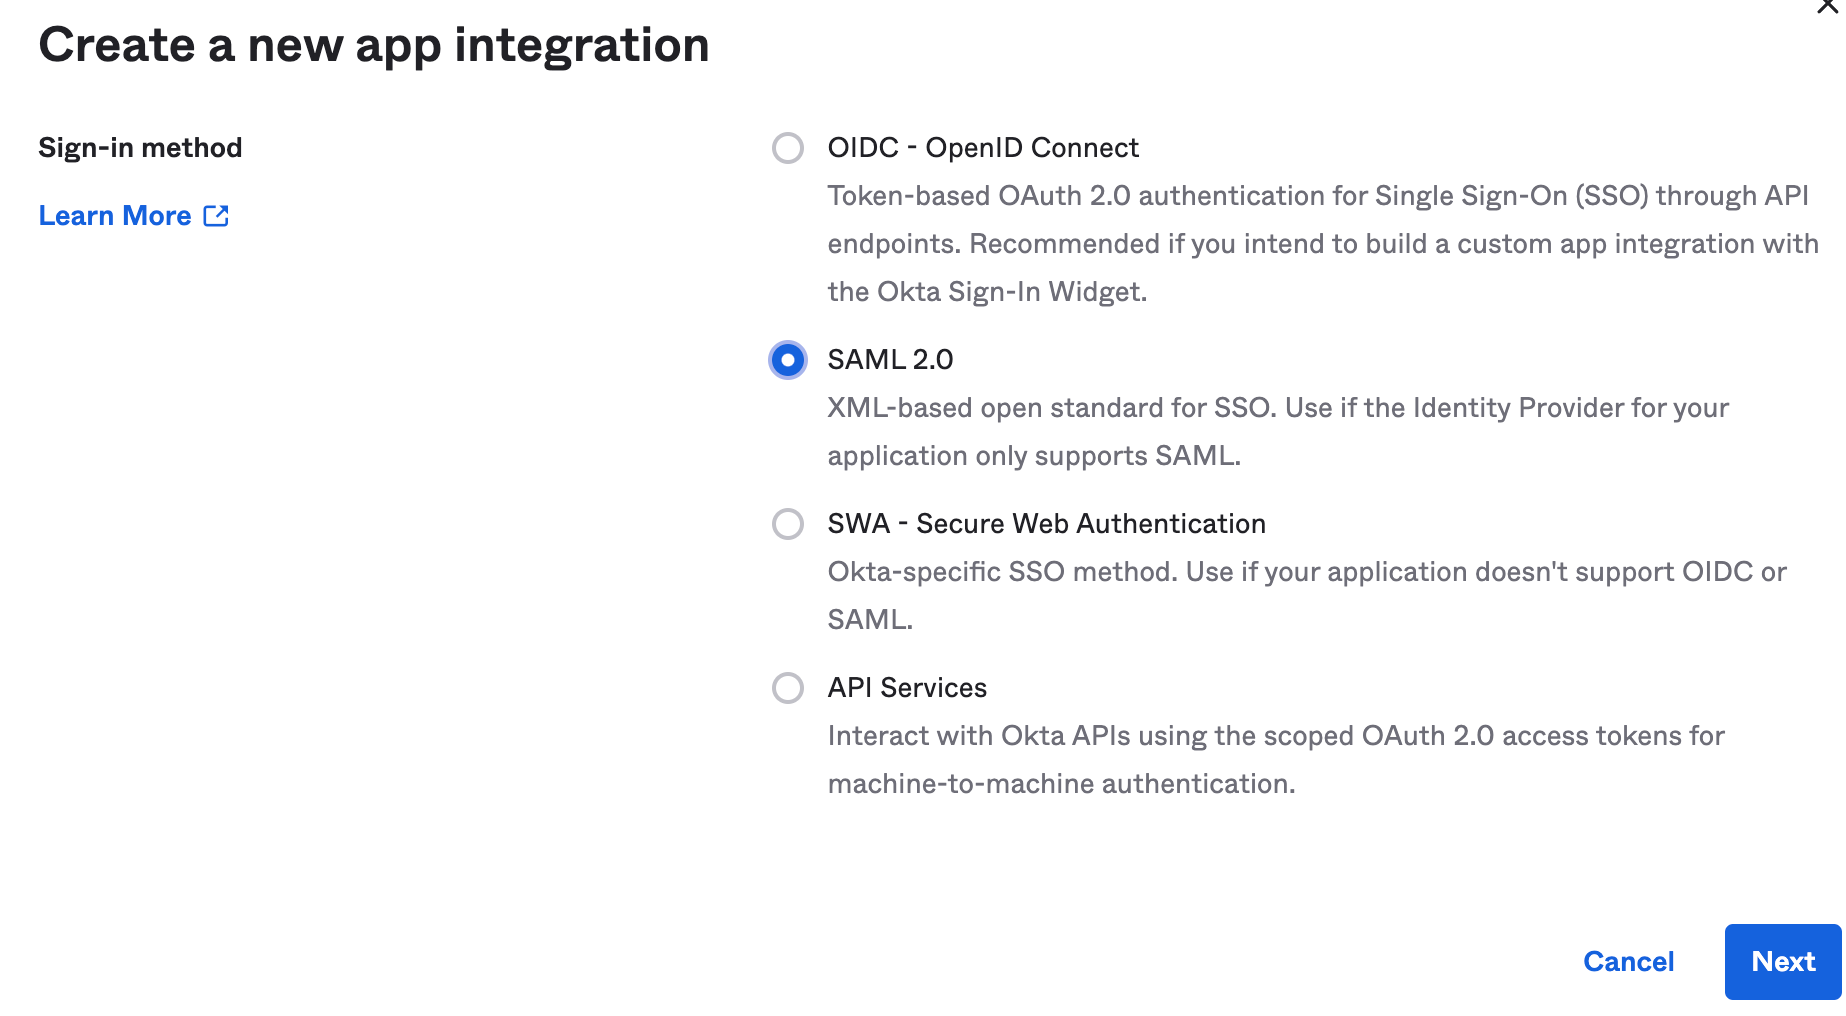
- Pick SAML 2.0 from the popup:
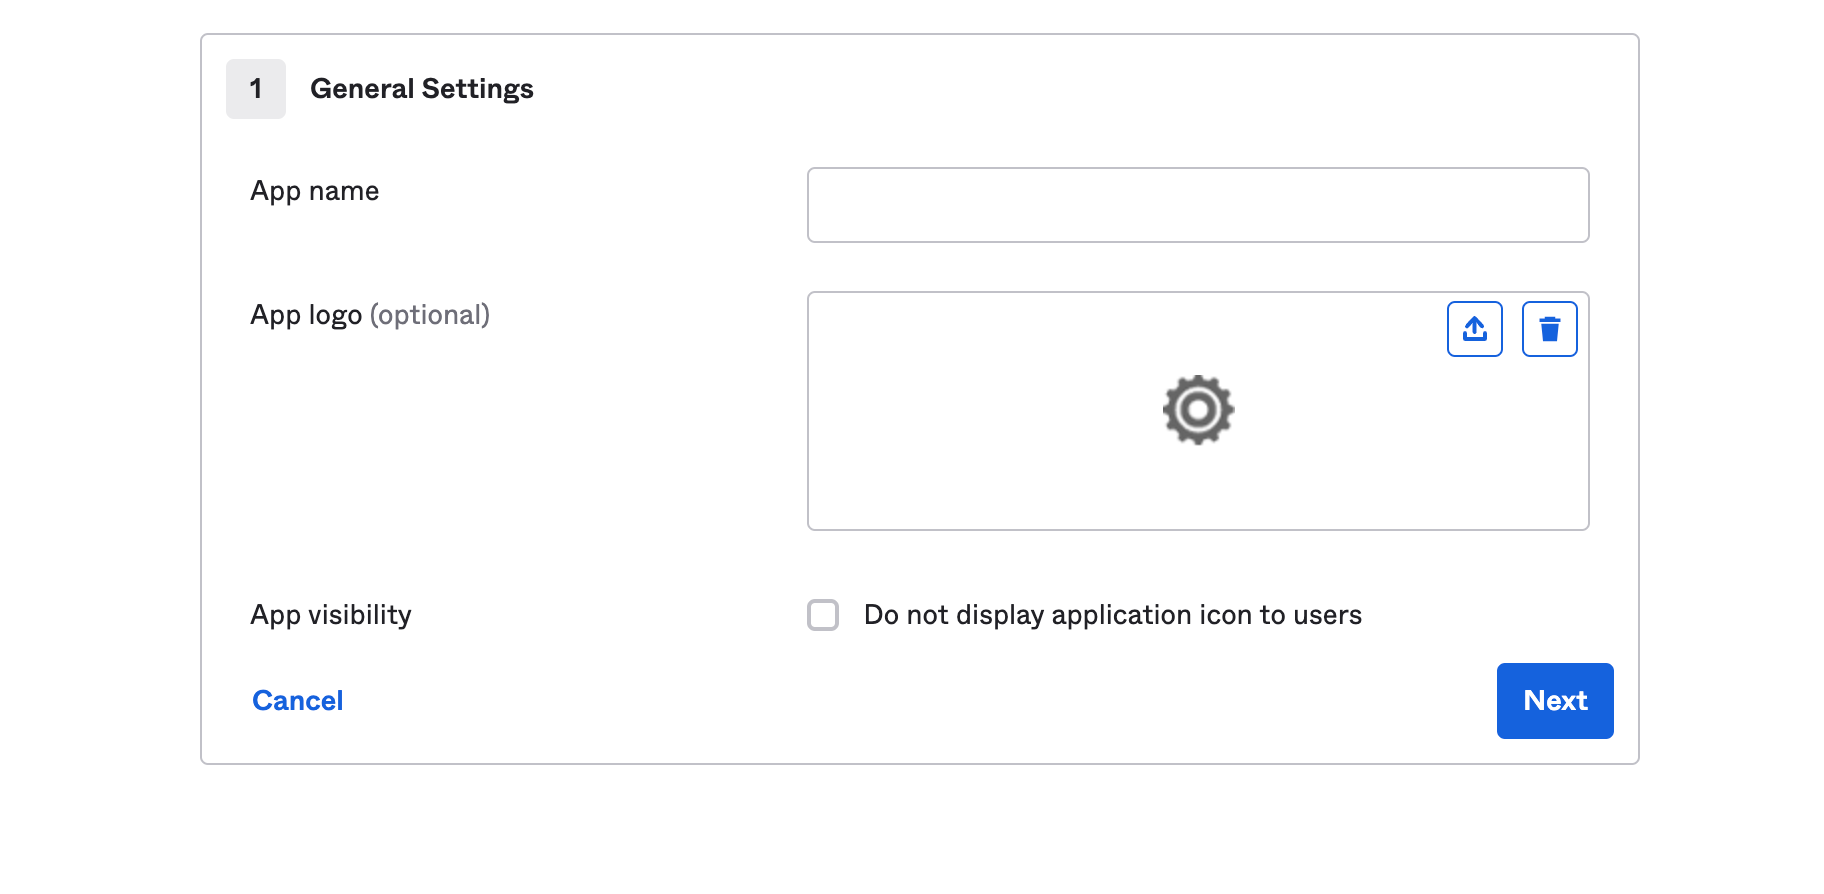
- Fill in the general settings with your desired App Name/ Logo / Visibility. Example App Name: inSided SSO
- Next on the SAML settings page, enter in the following information. More information found below:

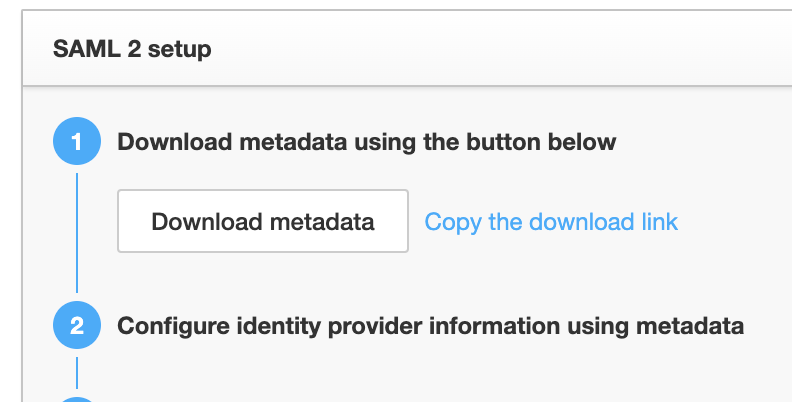
- The single sign-on URL can be taken from the metadata download from your control environment by hitting the download metadata option for SAML2 SSO. This can be found on your community-[en].insided.com/integration/sso
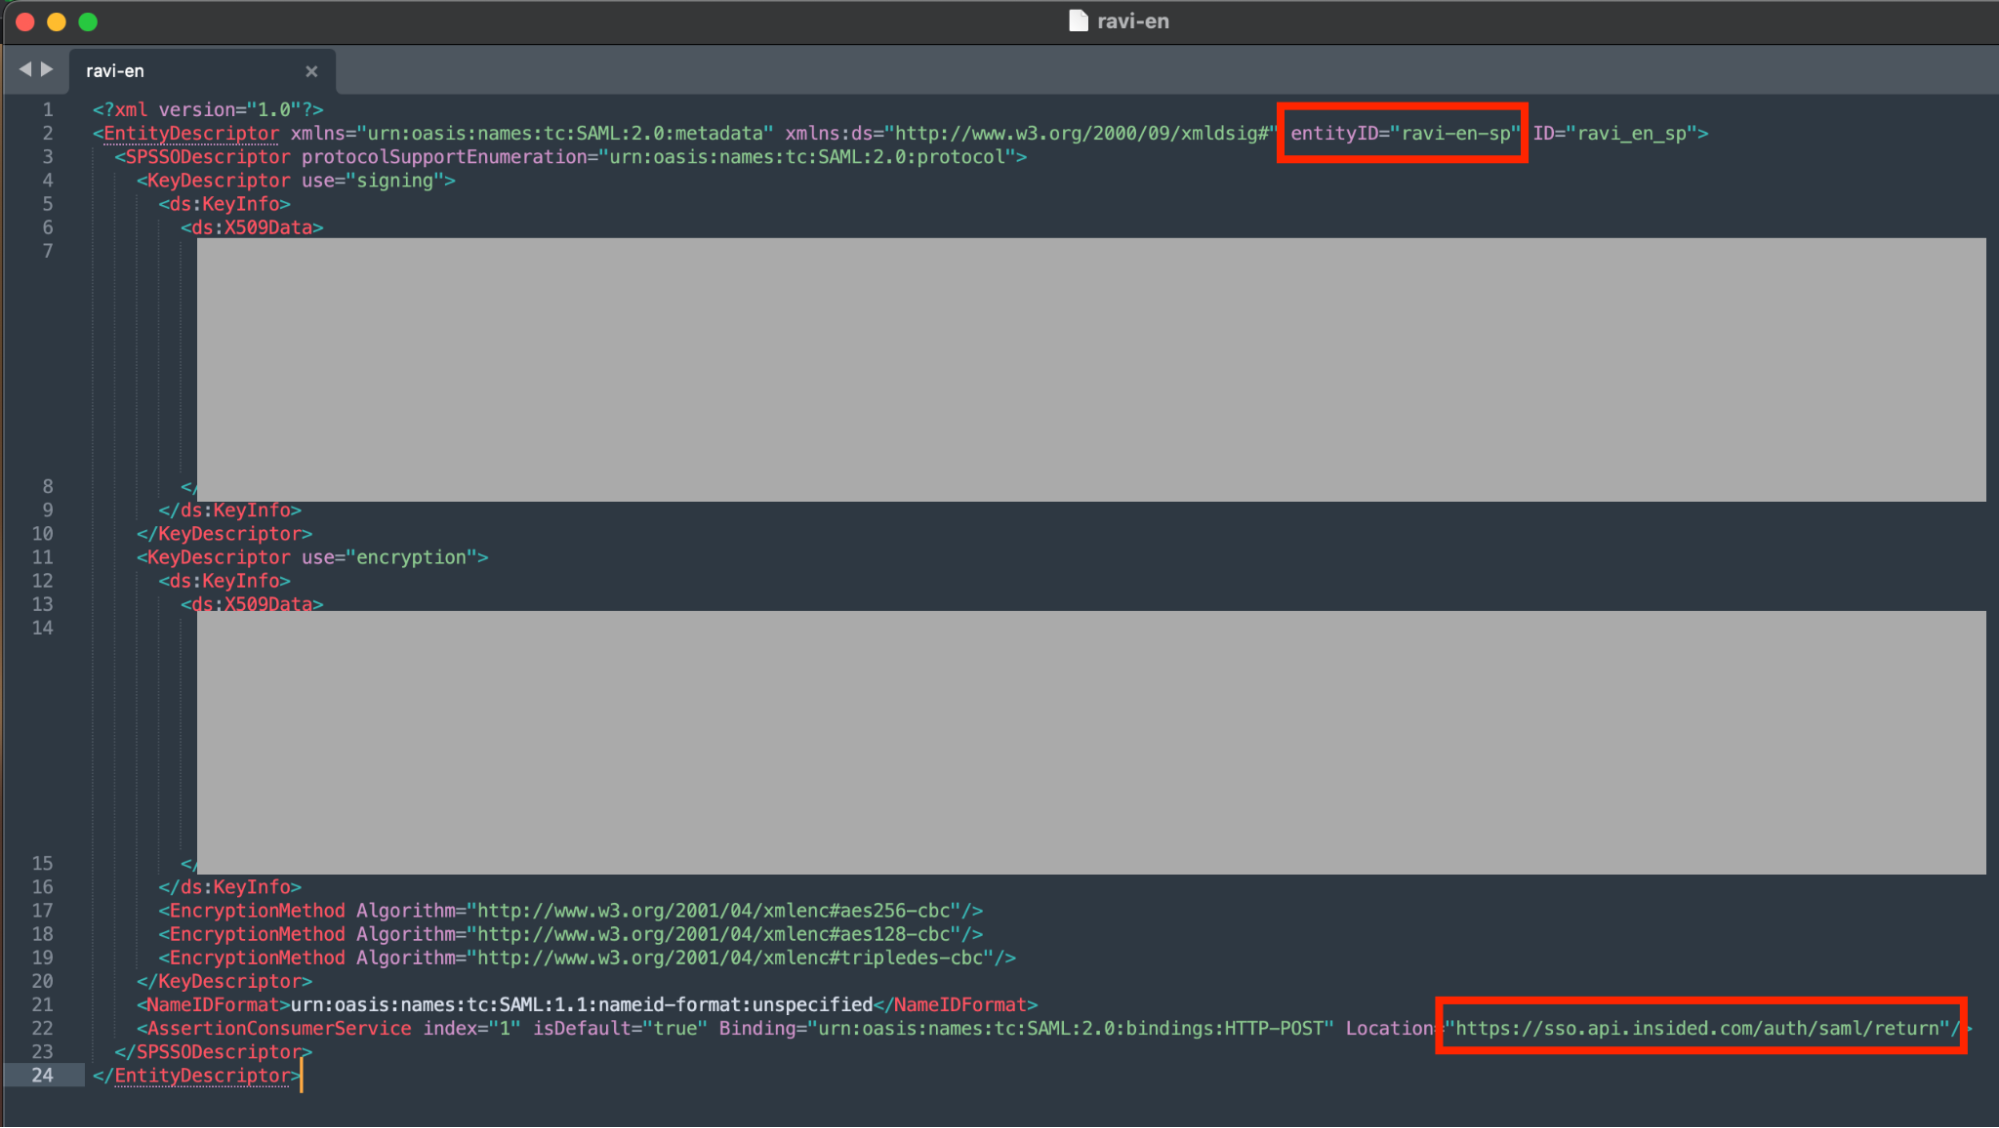
Opening up the metadata file, you will find the single sign on the URL highlighted below and the entity ID near the top.
- You can leave this option ticked:

- If you want to set up custom attributes e.g submitting usernames, or email addresses as part of the SSO payload then you can configure this here down below - Attribute Statements.
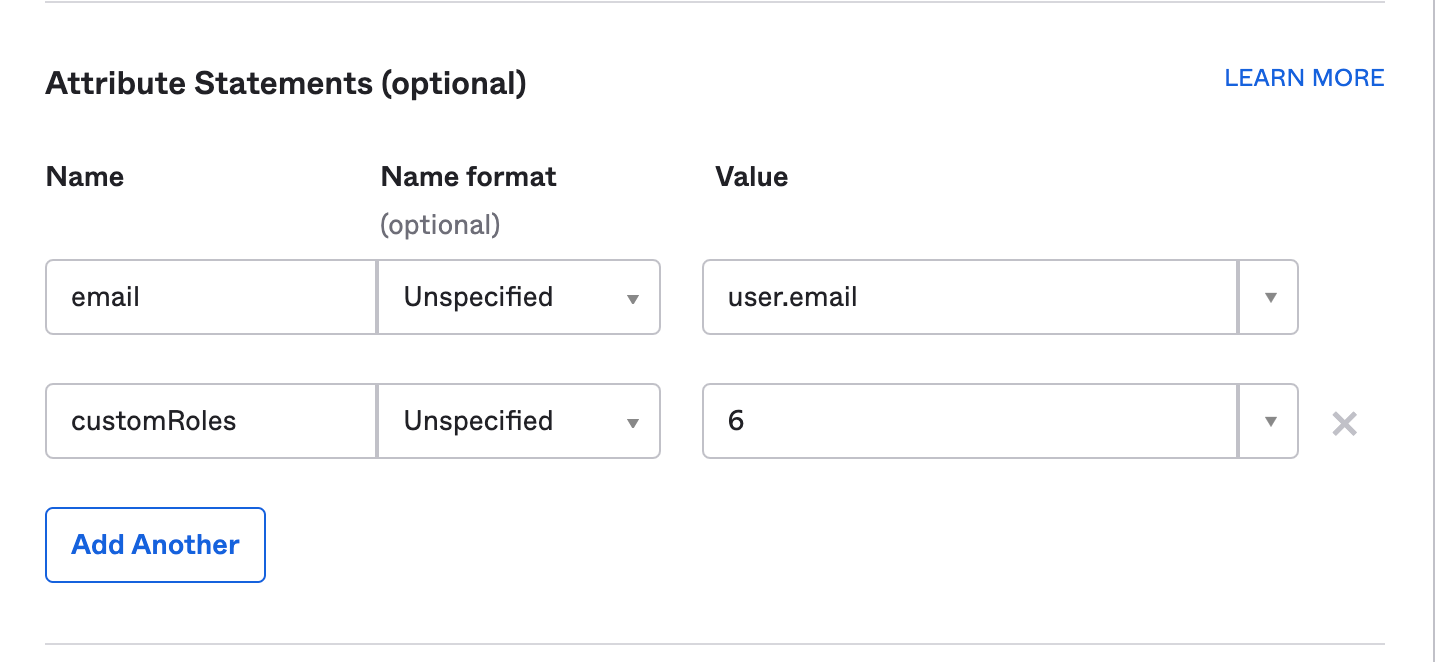
- In this example we will submit the users’ email in the SSO payload as well as a custom role with the ID of 6 (the ID value will correspond to the custom Role ID from the inSided /role/overview page in control).
- If you wanted to submit more custom roles, these need to be added as either an array of numbers e.g [1,5,6,7] or just a comma delimited string e.g “1,5,6,7”
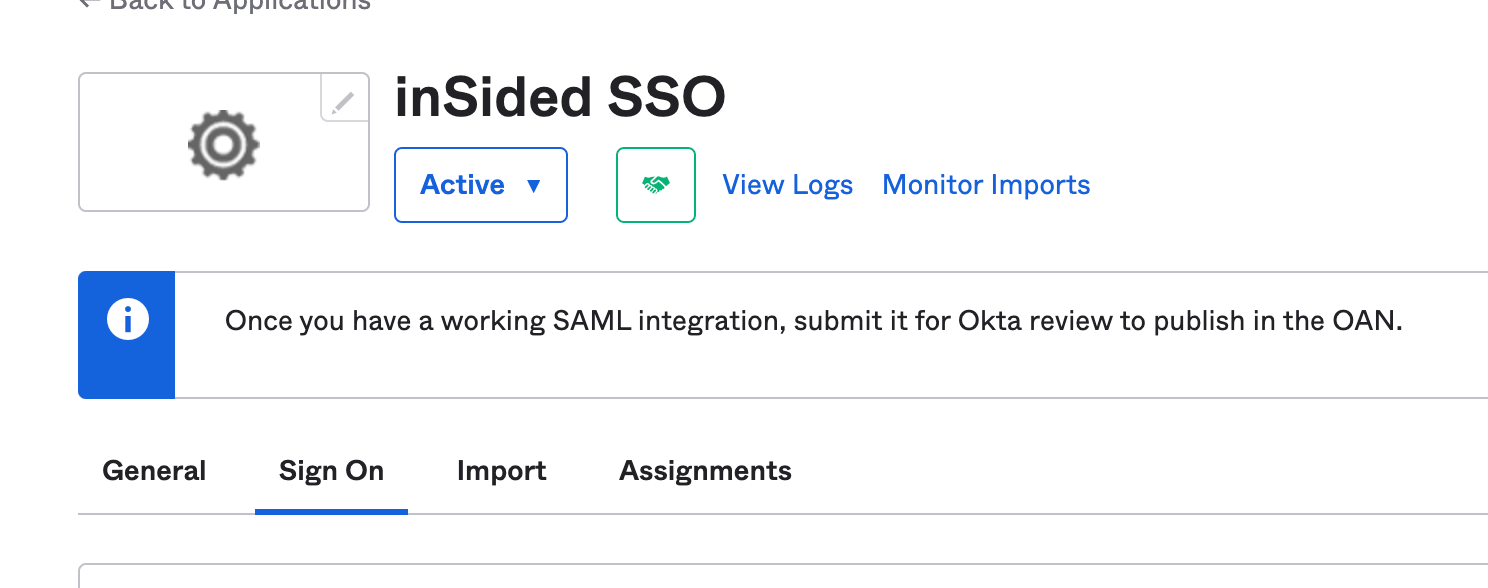
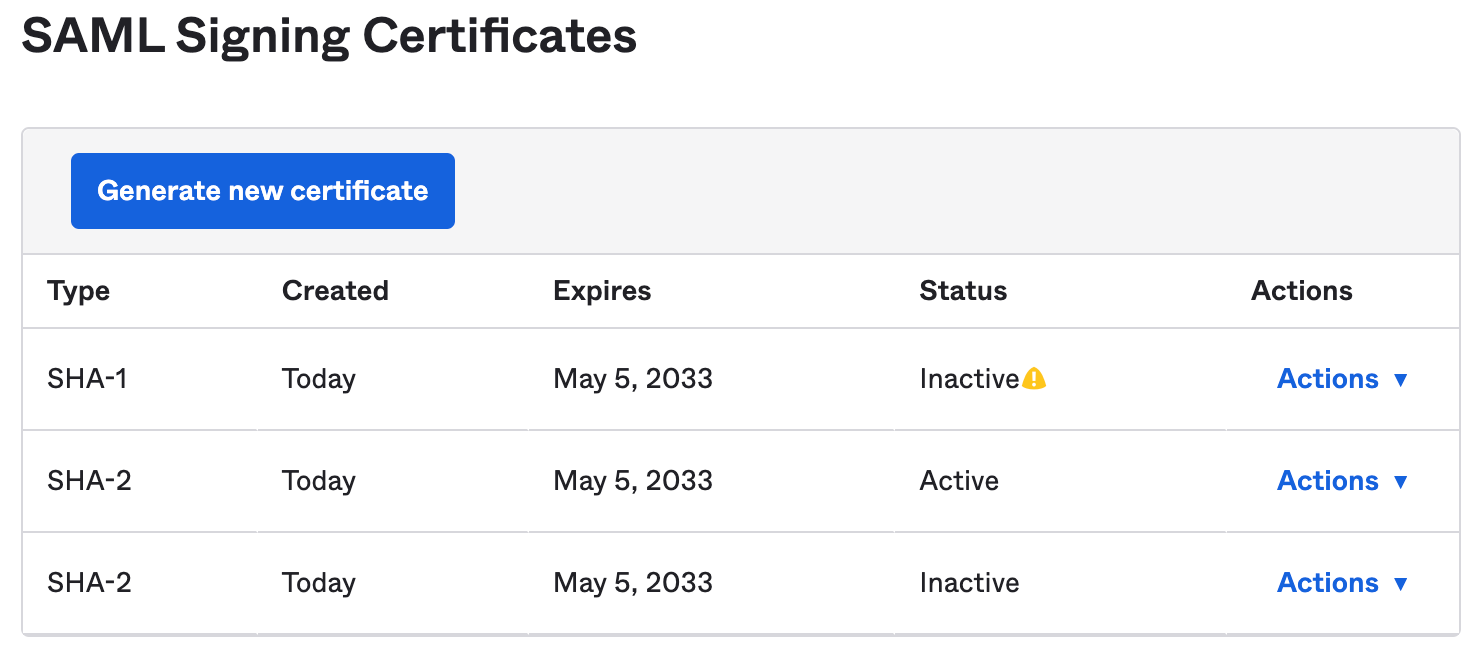
- After completing the setup of the app - you will need to grab the certificate which can be found on the Sign-On page of the app.
- Scrolling down a bit you will see the certificates. Please download this to upload to the inSided SSO page. Click on Actions -> Download Cert.

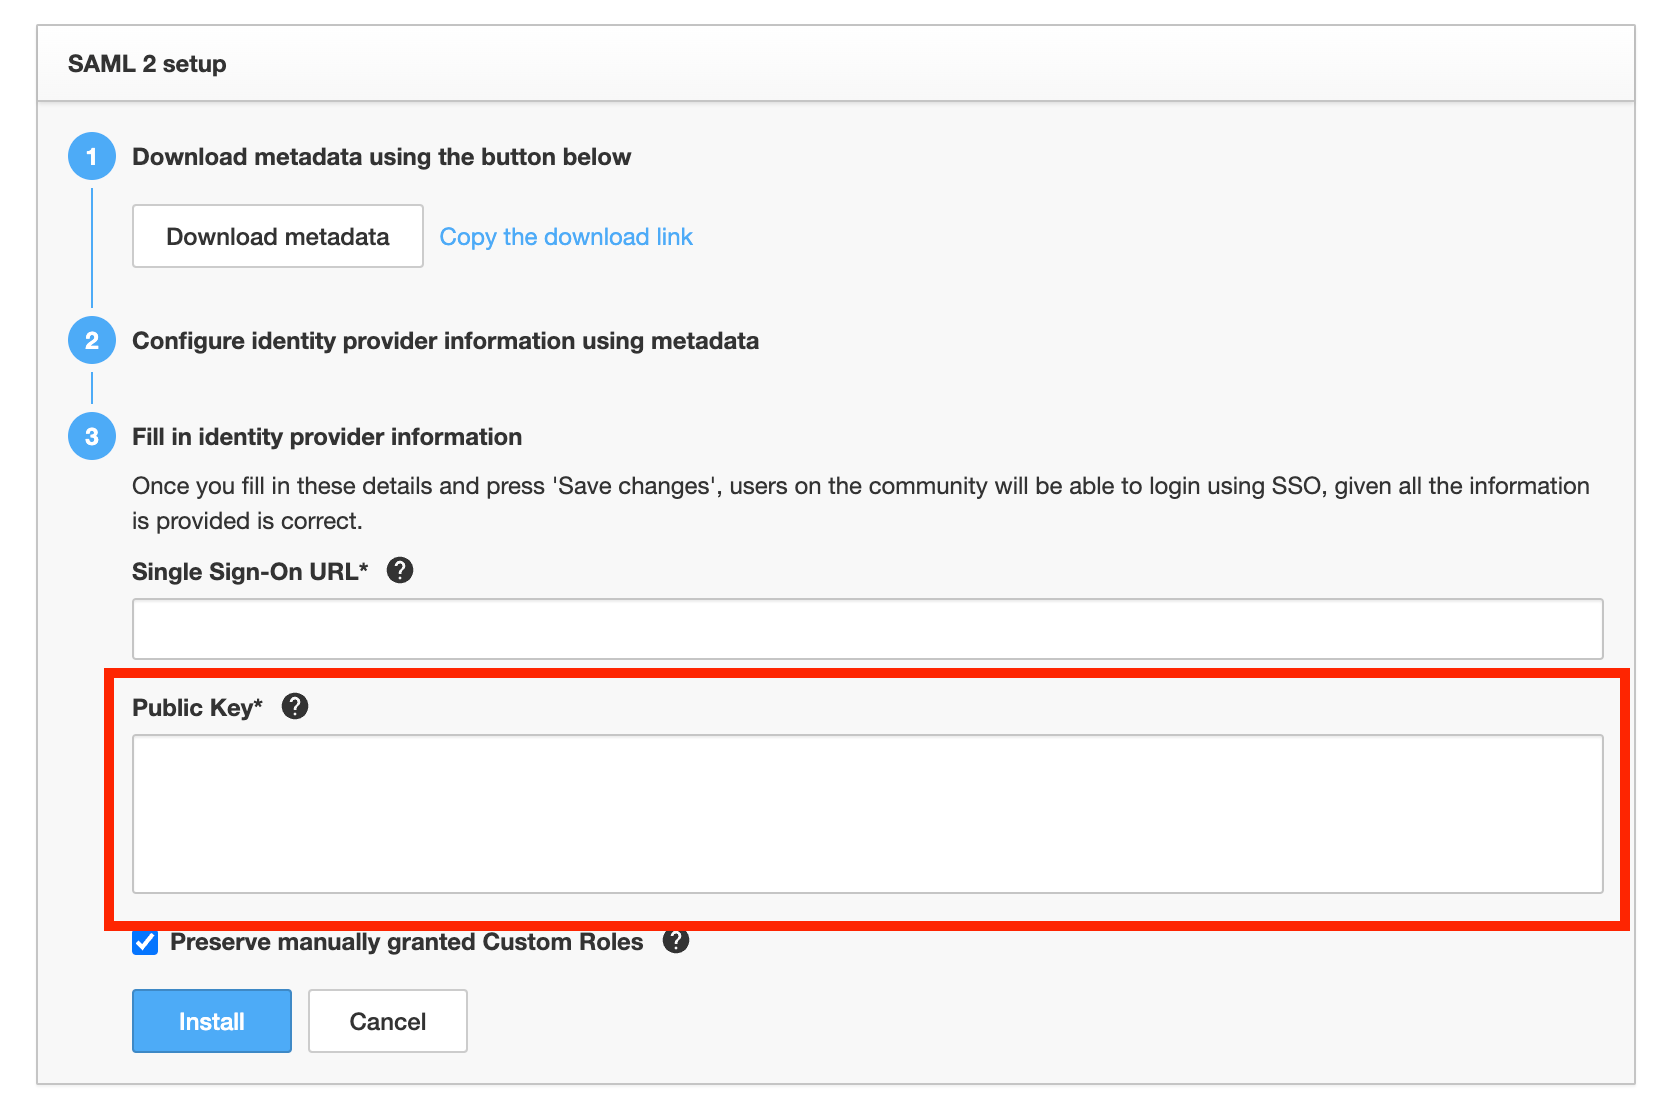
- Now head over to the SAML 2 integration page in your control inSided page /integration/sso
- Here you can paste in the SAML certificate from the previous step into the ‘Public Key’ - Note to include both the BEGIN/END Cert lines as well.
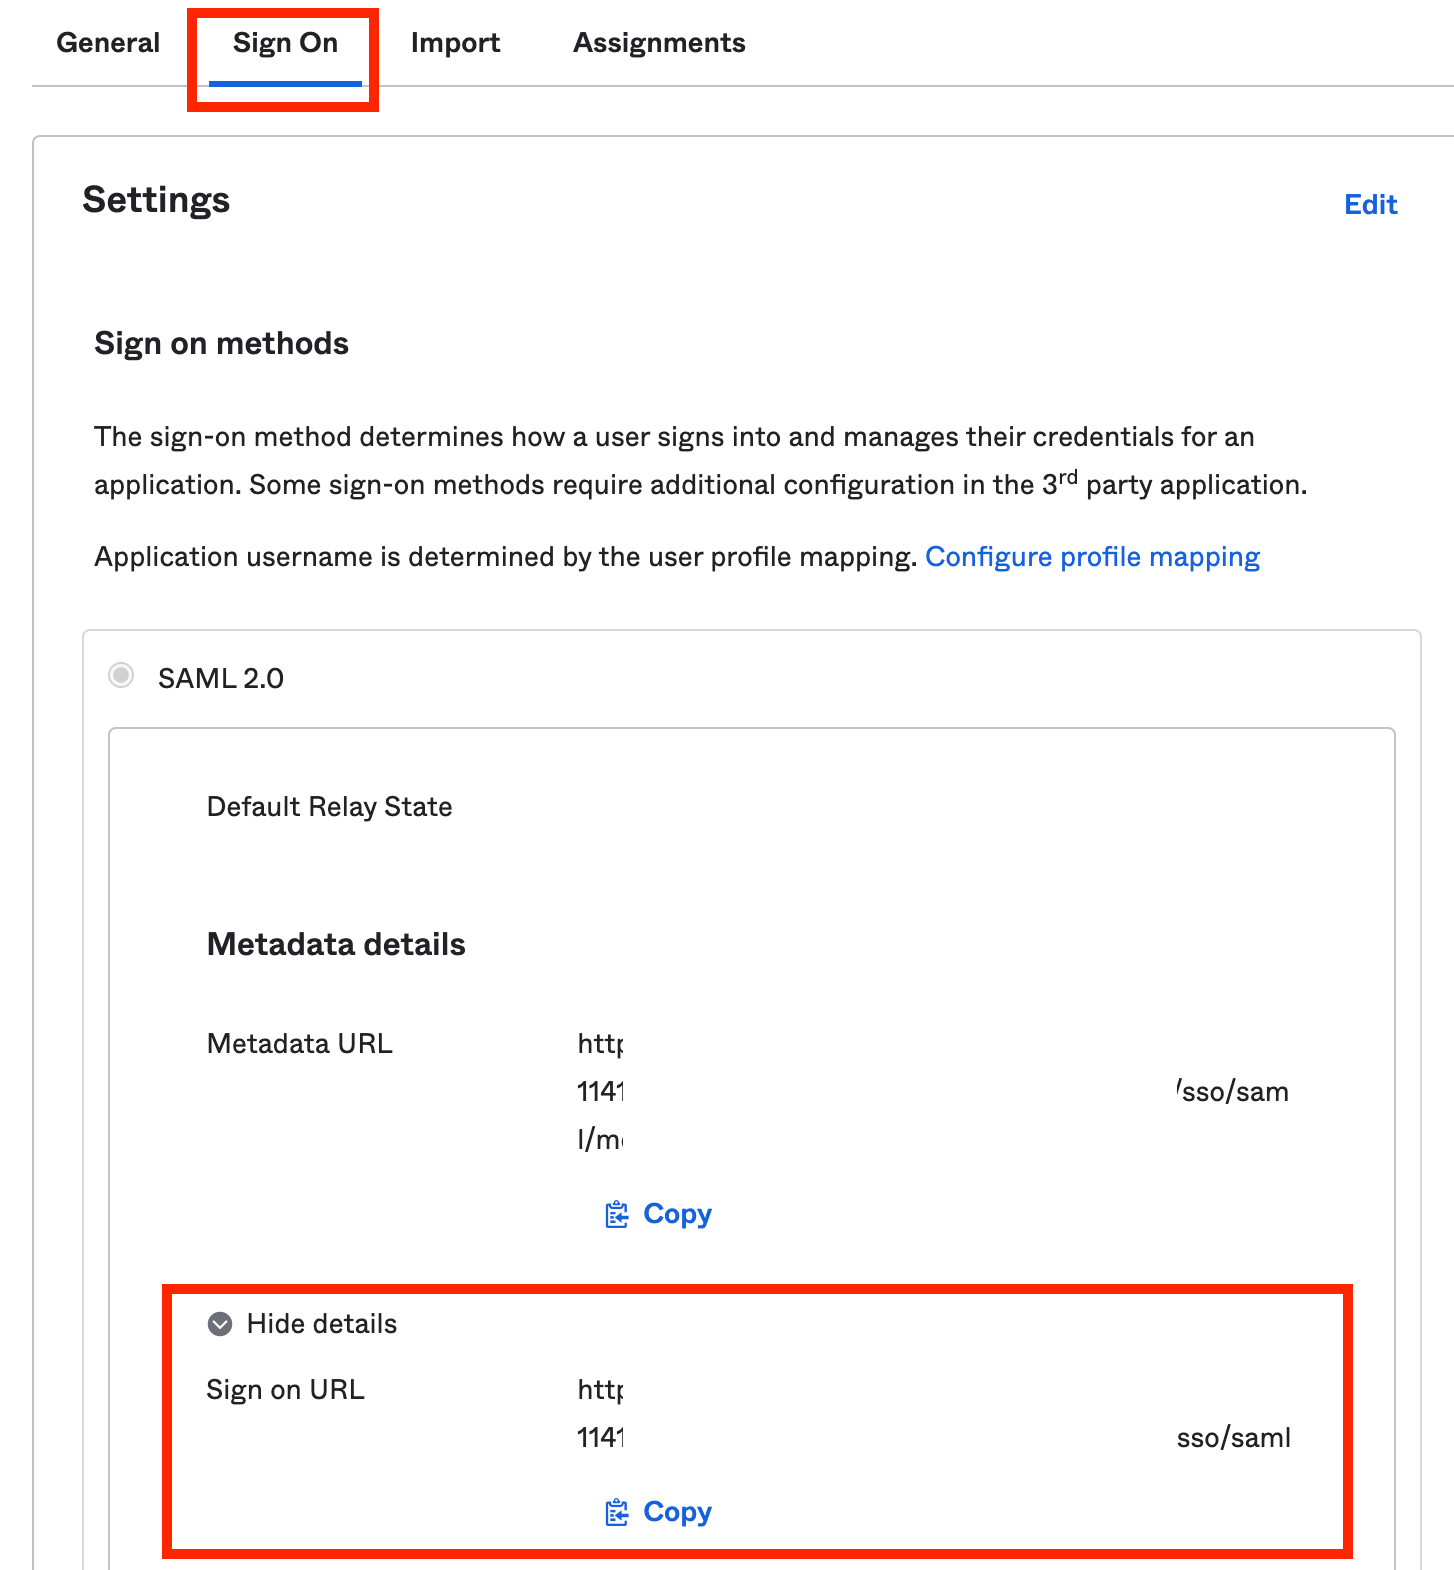
- You will also need the single sign on url too - this can be obtained by going to you application in Okta, the ‘sign-on’ tab and then expand the SAML 2.0 settings:
- Here you will see your application login url under ‘sign on url’
- This can then be pasted into the ‘Single Sign-on URL’ input field and the final result should then look like this:
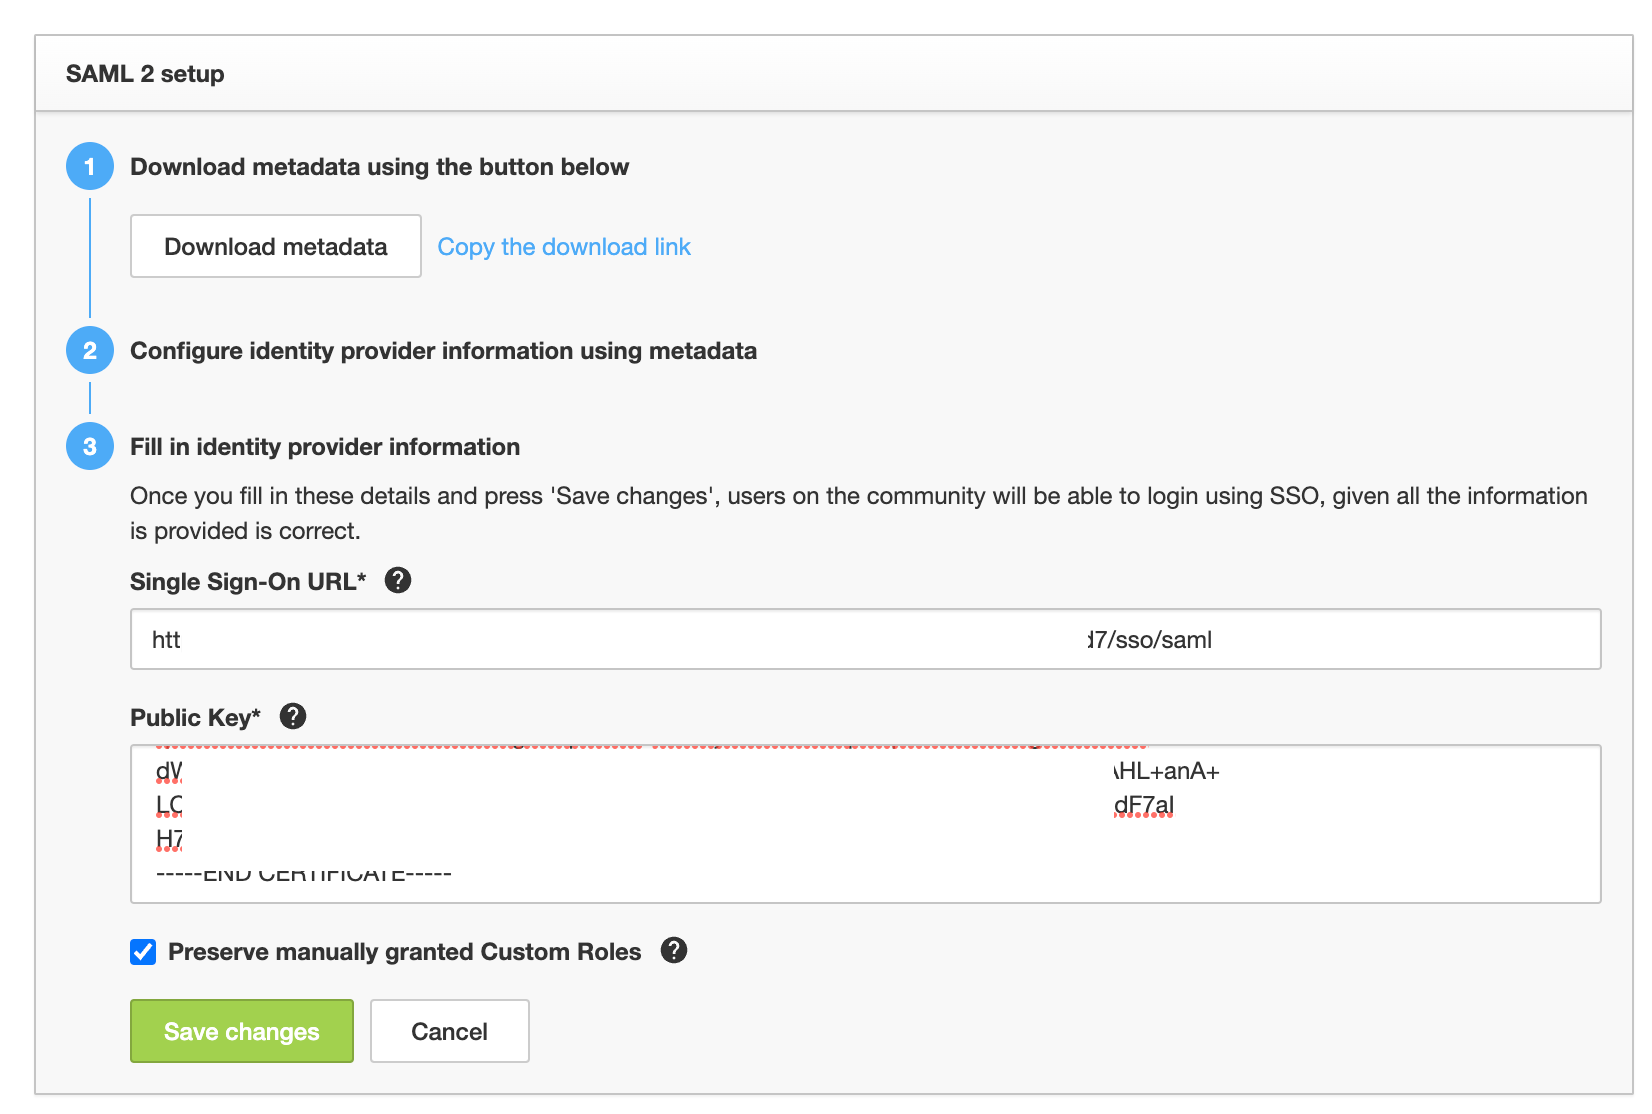
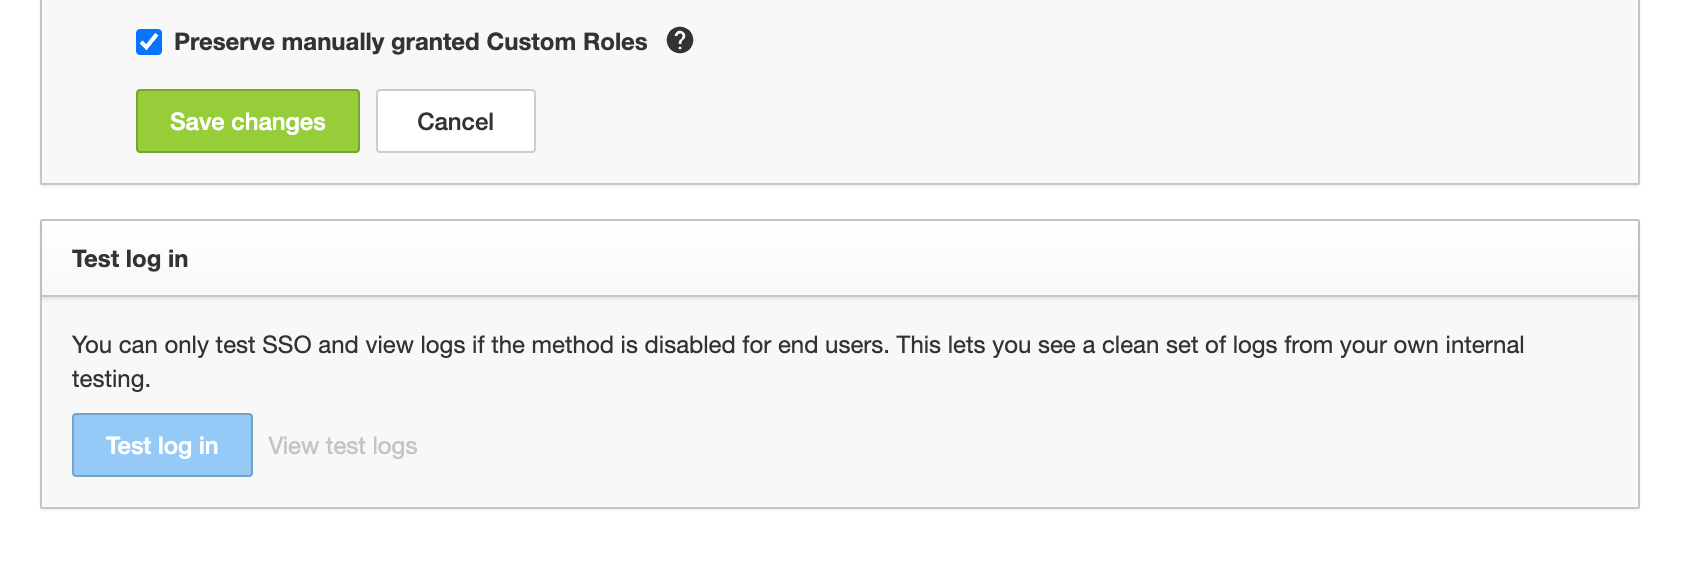
- If you want to preserve manually granted custom roles, check the box. If this is not enabled, the custom roles will get overwritten upon signing in again.
- Saves changes + test login
- If you run into any issues please reach out to our support team via ccsupport@gainsight.com
If you run into an issue where after logging in you receive: “customer not provided”
On step 5 → Change the return URL to end with “?customer=customer-id” → Where customer-id is your tenant id (i.e. gainsight-us).