

Create an Event
Last Updated On: March 16, 2026
This article guides control users, including community managers, administrators, and moderators on how to create new events and edit existing events.
Overview
Events help community managers to drive engagement in the community. They provide a space for all community users to gather,share and collaborate, while also providing a platform for community managers to promote their upcoming events and increase participation. Using events, community managers can facilitate knowledge sharing, build lasting relationships, drive product adoption and advocacy, highlight customer success stories, and much more.
Create an Event
To create an event:
- Log in to Control.
- Navigate to + > New Events. The new event page appears.
- In the Details pane, provide the following information:
- Event name: Enter a name for the event.
- Event type: Select the event type. Five default event types are available that can be configured as per your community requirements. For more information on configuring event types, refer to the How to Configure Event Types article.
- Location: Specify whether the event is online or in-person. If you leave this field blank, Online Event is displayed as default.
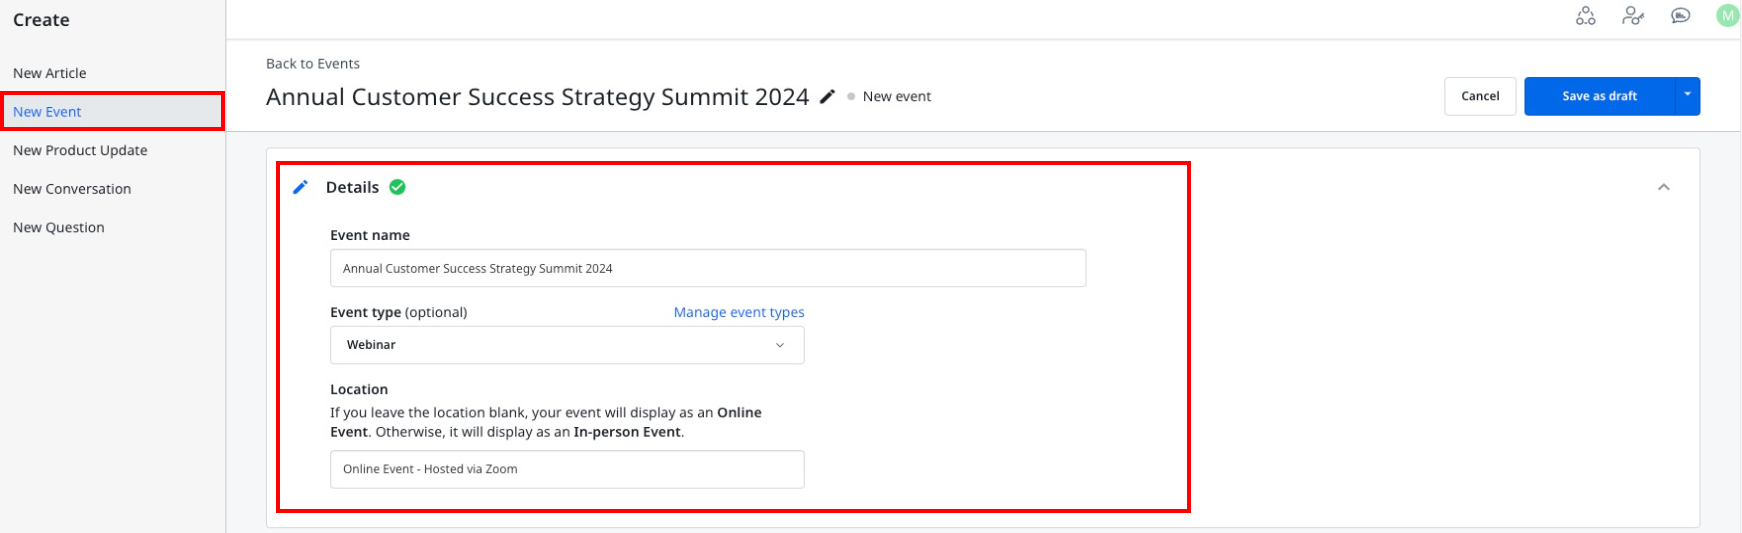
- In the Timezone pane, select the event time. When a date is selected, the event start and end time is automatically filled with an hour difference in between.
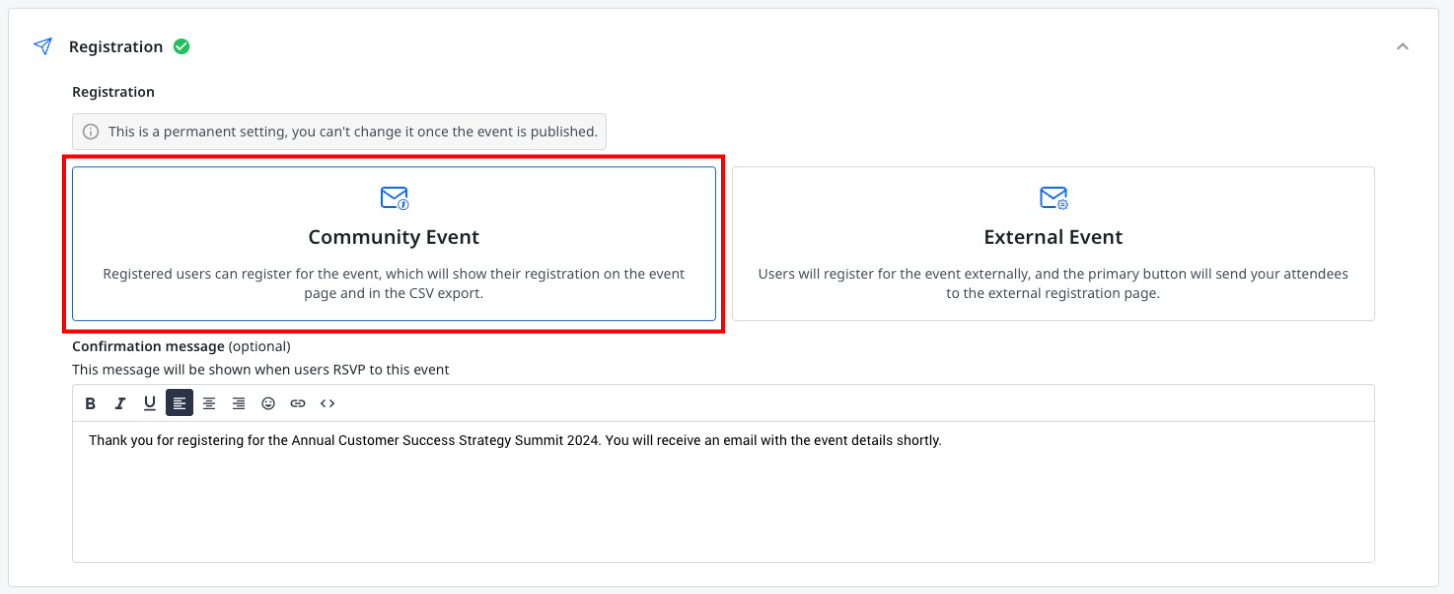
- In the Registration pane, select one of the following options:
- Community Event: Select this option if you want community users to register for an event through the Events page in your community.
- (Optional) Confirmation message: Enter an event related message that community users will receive upon registration.
- Community Event: Select this option if you want community users to register for an event through the Events page in your community.
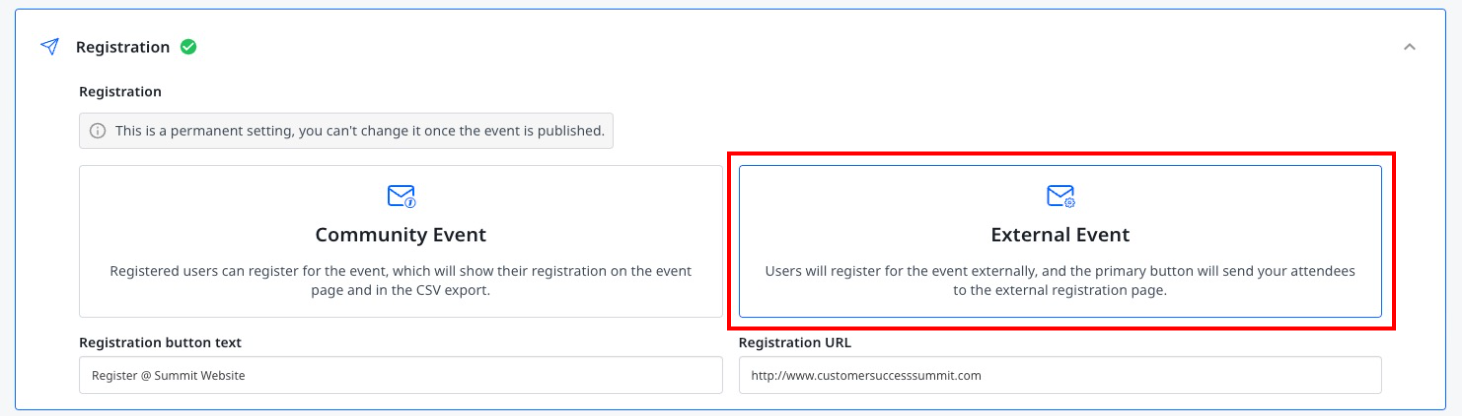
- External Event: Select this option if you want community users to register on an external page for an event hosted by a third-party.
- Registration button text: Enter the custom text for the button that will be available on the Events page.
- Registration URL: Provide the external link where community users can complete their registration.
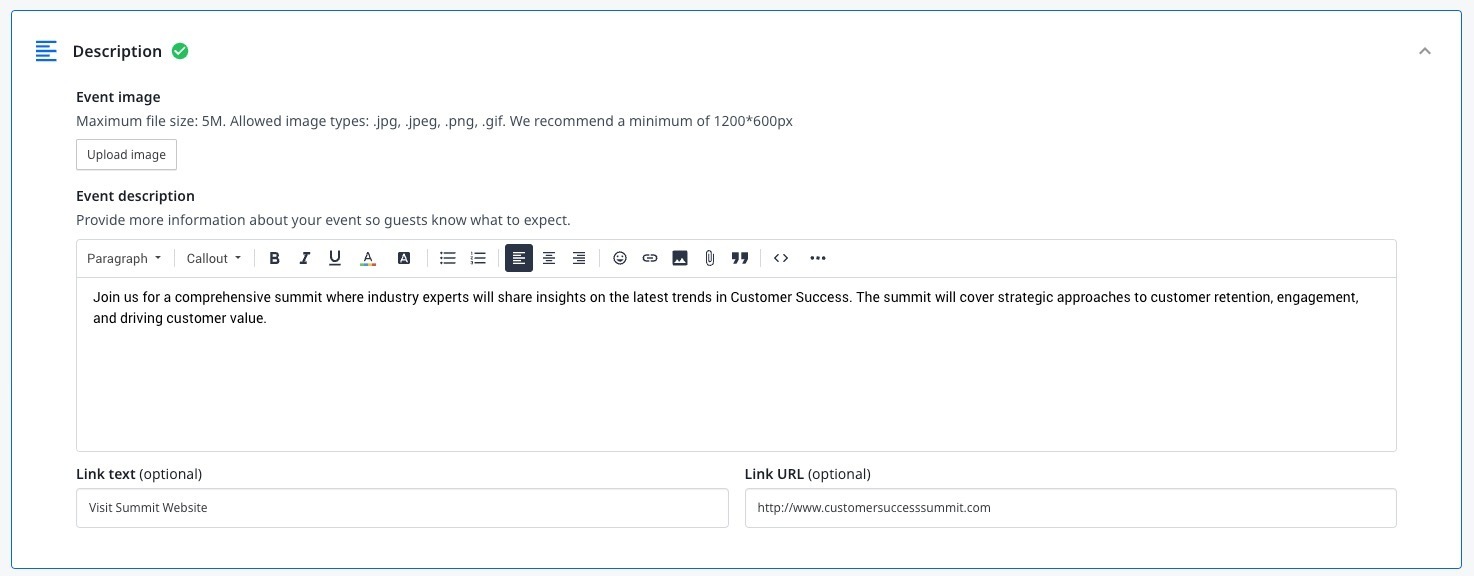
- In the Description pane, provide the following information:
- Event image: Upload an image for the event based on the defined criteria.
- Event description: Enter a detailed description to give community users insights about the event.
- (Optional) Link text: Enter a display text for a link where community users can get more information about the event.
- (Optional) Link URL: Enter the URL for the link text entered above.
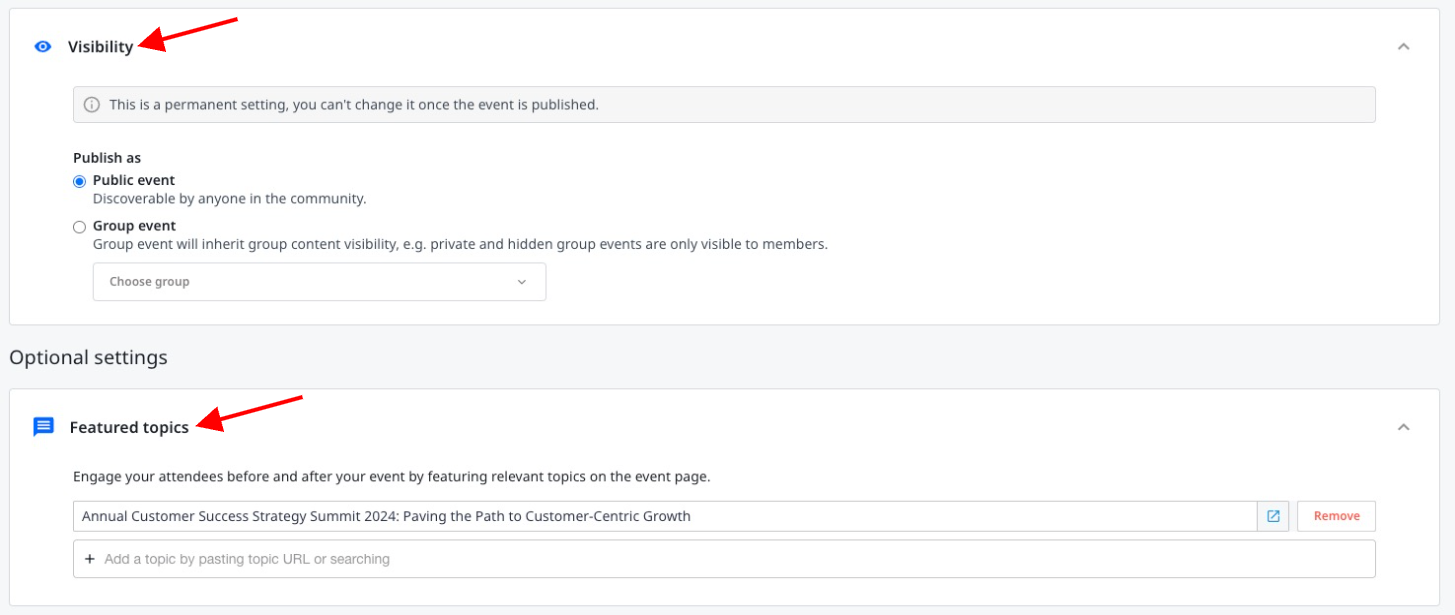
- In the Visibility pane, select one of the following options:
- Public Event: Select this option if you want this event to be publicly visible and accessible.
- Group Event: Select this option if you want to limit visibility and accessibility only to members of the selected group.
Note: Once the event is published in a private or hidden group, you need to ensure that the event is visible to users of that group. For more information on promoting events in a private or hidden group, refer to the Promote Events in a Private or Hidden Group article.
- In the Feature topics pane, provide the link to a topic that you want event attendees to access before or after the event.
- To publish the event, click Publish now.
- (Optional) To publish the event at a later date, click Save as draft.

Edit an Event
To make changes in an existing event:
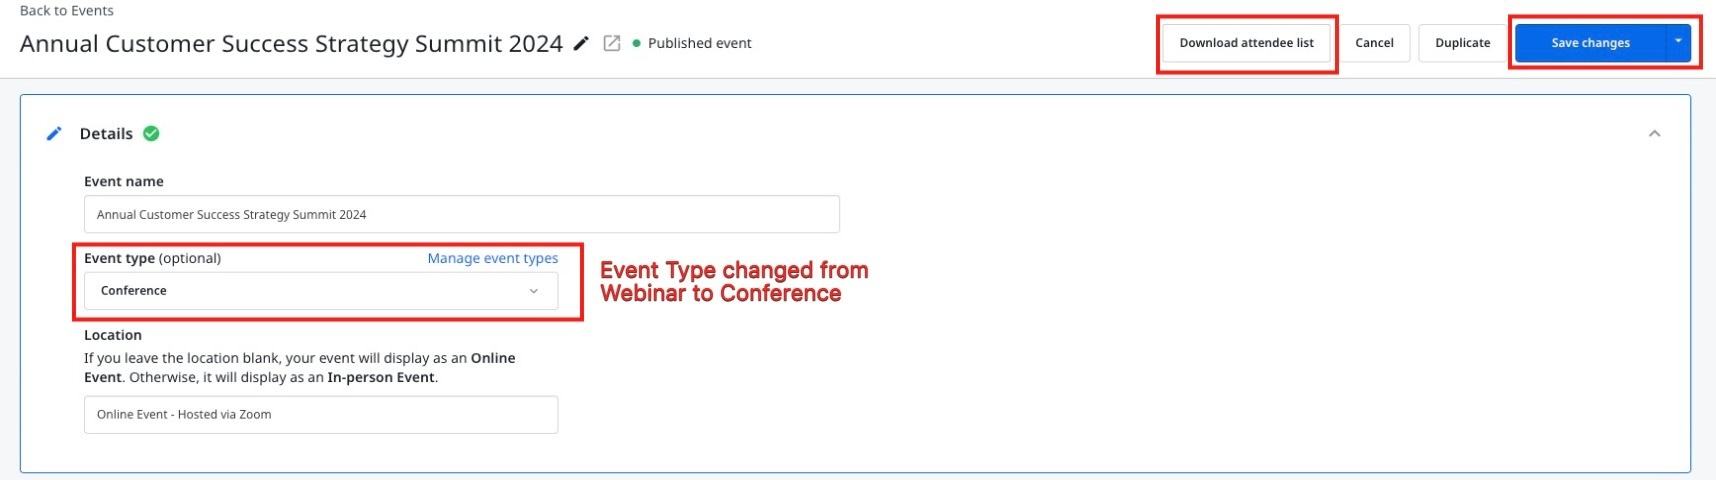
- Navigate to Platform > Events. The Events page appears.
- Select the event you want to edit.
- (Optional) To export the CSV file with attendee details, click Download attendee list.
- Make the required changes.
- Click Save Changes.
Note: Settings under the Registration and Visibility panes cannot be changed after the event is created and published.
Duplicate an Event
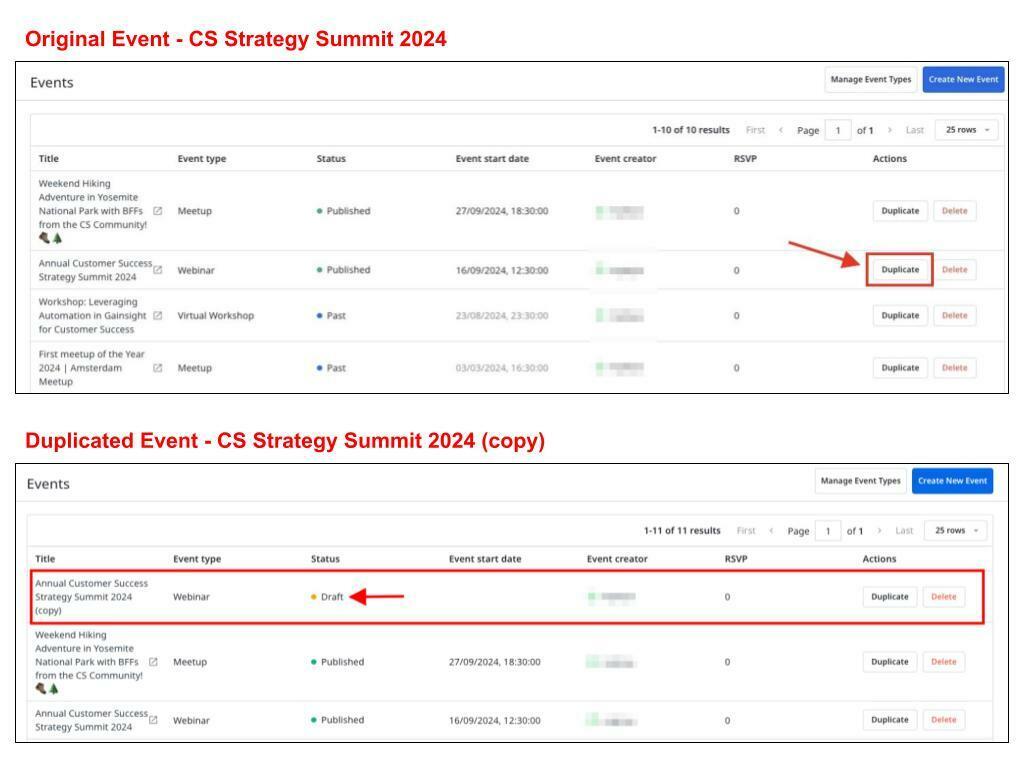
Duplicating an event is beneficial for creating similar events with consistent details that allows you to save time and ensure accuracy by reusing the existing event's settings and content. To duplicate an existing event, on the Events page, click the Duplicate button. A new duplicate event is created in the draft mode.
Note: All event settings, except those in the Time pane, are prefilled in the duplicate event.
Consider the image below: a duplicate of the CS Strategy Summit 2024 event is created. The duplicate event title includes the suffix (copy), and the event is in Draft status.
Manage Event Types
Five default event types are available, such as Conference, Meetup, Webinar, Virtual Workshop, and Virtual Conference. You can customize the existing event types or create new event types.
To access the Event Types page:
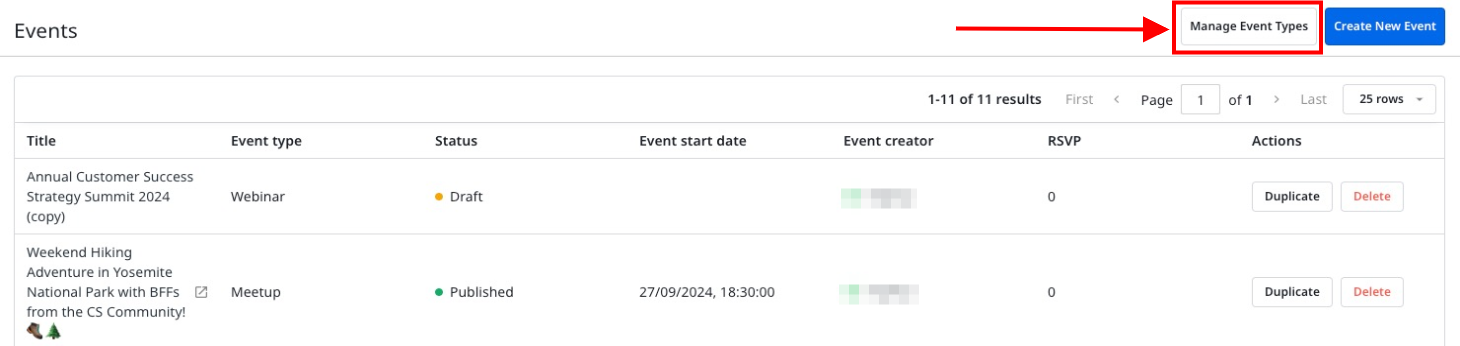
- Navigate to Platform > Events. The Events page appears.
- Click Manage Event Types. The Event Types page appears.
For more information on configuring event types, refer to the How to Configure Event Types article.
If you have any queries or feedback, please drop an email to docs@gainsight.com or post a reply to this article.