

How to Export Community Member & Activity Data to Salesforce
This article gives an overview of the Salesforce Export integration and explains how to set it up for your Salesforce instance. These instructions also apply if you want to use Salesforce as a data connector in your Gainsight instance.
Why use this integration?
Our Salesforce community data export enables you to:
- Provide Salesforce users with a 360 customer view of community activity around a specific Contact or Account.
- Get deeper insights on community engagement and ideation by combining community engagement data with your customer data in Salesforce.
- Create engagement workflows and campaigns by defining segments of Contacts and Accounts based on their activity in the community.
Our community member and community member activity objects in Salesforce are linked to both Contacts and Accounts, so if you’re a B2B company you can additionally get engagement insights on a company level as well as on the level of an individual person.
Steps to set up the integration to export community data to Salesforce
-
Install the Salesforce app on Community
-
Install the Salesforce components (custom objects) required for the integration.
-
Configure the Salesforce export integration on CC.
Once these steps are all complete, you’ll start receiving data as soon as the next refresh interval runs (within 6 hours).
Does the integration backfill any community data in Salesforce?
If a community member can be matched with a Contact, then we’ll create the community member (so yes, all existing community members that can be matched will be created).
However, community member activities (e.g. community visited, question asked, idea voted) will not be backfilled. We only send community member activity from the moment a community member is linked to a Contact and the Community Member object is created in Salesforce.
Install the Salesforce app on CC
Please follow this tutorial to install the Salesforce app on CC:
Install the required Custom Objects in Salesforce
To push community data into Salesforce, we need two custom objects available in your instance which hold the data:
-
Community Member (represents a community member)
-
Community Member Activity (represents activities of community members - e.g. a visit to the community, a question asked on the community, an idea submitted or voted).
We offer two unmanaged packages, all of which include the custom objects. One includes a set of basic reports/dashboards to inspire you on how you can combine CC data with other data in Salesforce.
To install these custom objects, please go to one of the following URLs to install our (Unmanaged) Packages. This requires admin access to your Salesforce instance.
Click ‘Install for All Users’ using one of the following links, based on whether you’re setting up the integration on your Sandbox or Production environment. Don''t forget to follow the post-installation instructions below the table to complete the installation.
| Package type | Production installation URL | Sandbox installation URL |
| Custom Objects: recommended for fastest install time ⚡️ | Install on Production | Install on Sandbox |
| Custom Objects + inspirational dashboards excluding ideation reports based on ARR* | Install on Production | Install on Sandbox |
The dashboards and reports are not required for this Salesforce integration to work, and do not result in any reduced functionality.
E.g all packages support ideation activity, even if some don’t have an ideation report/dashboard.
The inspirational dashboards we offer are a starting point, rather than a turnkey solution. It is always possible to create additional custom reports/dashboards after installation.
After you install the package, the dashboards can be found in a folder called ‘CC Dashboards’ within the Dashboard section of Salesforce.
*To complete the installation, follow the below post-installation instructions for the dashboards:
Reach dashboard
- Press Edit
- Press + Component
- Choose report % Accounts registered on the community
- Press Add
- Reposition (top of dashboard, since it’s a KPI)
- Press Save changes
Engagement dashboard
- Press Edit
First component
- Press + Component
- Choose report %Accounts w/ community post last 30d (c)
- Press Add
- Reposition (top of dashboard, since it’s a KPI)
Second component
- Press + Component
- Choose report % Accounts w/ community visit last 30d
- Press Add
- Reposition (top of dashboard, since it’s a KPI)
- Press Save changes
Ideation dashboard
- Press Edit
- Press + Component
- Choose report % Accounts engaged with ideation last 90d
- Press Add
- Reposition (top of dashboard, since it’s a KPI)
- Press Save changes
Configure the Salesforce Export integration on CC
Ensure that you’ve completed the above two steps before continuing (install Salesforce app on CC & install custom objects in your Salesforce instance).
- As a community manager/admin user, go to Control → Integrations → Apps → Salesforce
- Under integrations, click on the panel ‘Export community member and activity data to Salesforce’.
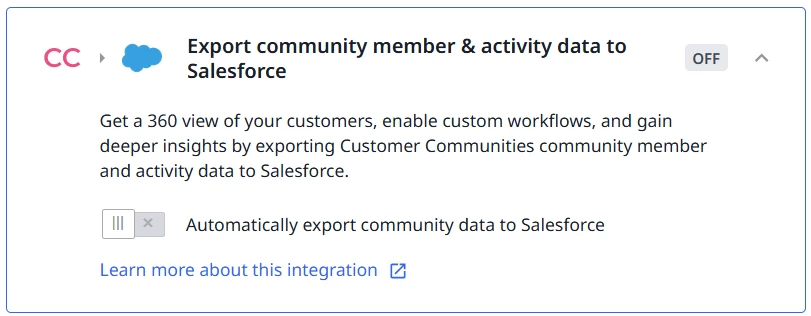
- Enable the toggle to automatically export community data to Salesforce and press Save changes.
- You’re done!
What happens next?
Automatically export Community Members to Salesforce
- The Salesforce export currently runs on a schedule every 12 hours to import Contacts in order to link them with Community Members.
- Every 12 hours, we’ll import all Contacts from your Salesforce instance and try to link them with Community Members based on a matching email address.
- If we find a match, then we create a new Community Member object in Salesforce.
- In order to export community member activities, we need a matching community member first. If we have successfully matched a community member and a contact in Salesforce, then new activity is pushed to Salesforce on a schedule every 3 hours.