This article provides information on the Group Moderator role and enhanced member management features within Gainsight CC.
Overview
The Group Moderator role is a new capability that empowers trusted community members to manage their groups directly from the Destination. This role replaces the earlier Group Admin designation and enables decentralized, secure group management without requiring access to the Control.
Group Moderators can perform key tasks such as adding or removing members, managing join requests for private and hidden groups, and curating featured content, all from within the group’s overview page. This change enhances scalability for community managers while giving groups more autonomy to stay active and relevant.
Note: When the Group Moderator feature is enabled, three new system email templates are automatically added: Promotion, Demotion, and Adding New Member to Group. These emails use default Gainsight styling. If your community uses custom branding, navigate to the system email settings to update these templates to match your organization's branding.
What Can a Group Moderator Do?
Group Moderators can now manage key group functions from the Destination, including:
- Member Management:
- Add or remove existing community members in real time
- Instantly add users without email confirmations or approval workflows
- Join Request Handling (for private and hidden groups only): View, approve, or decline join requests from within the Destination.
- Content Control: Edit and update featured content displayed prominently at the top of the group's page to ensure visibility for key discussions and resources.
- Moderation Widget Access: Use the Moderation Widget on the group overview page to access group management functions without needing to log into the Control.
- Secure Invite Links: Invite links now include expiry settings (24 hours, 7 days, 30 days, or 90 days), preventing unauthorized or prolonged access.
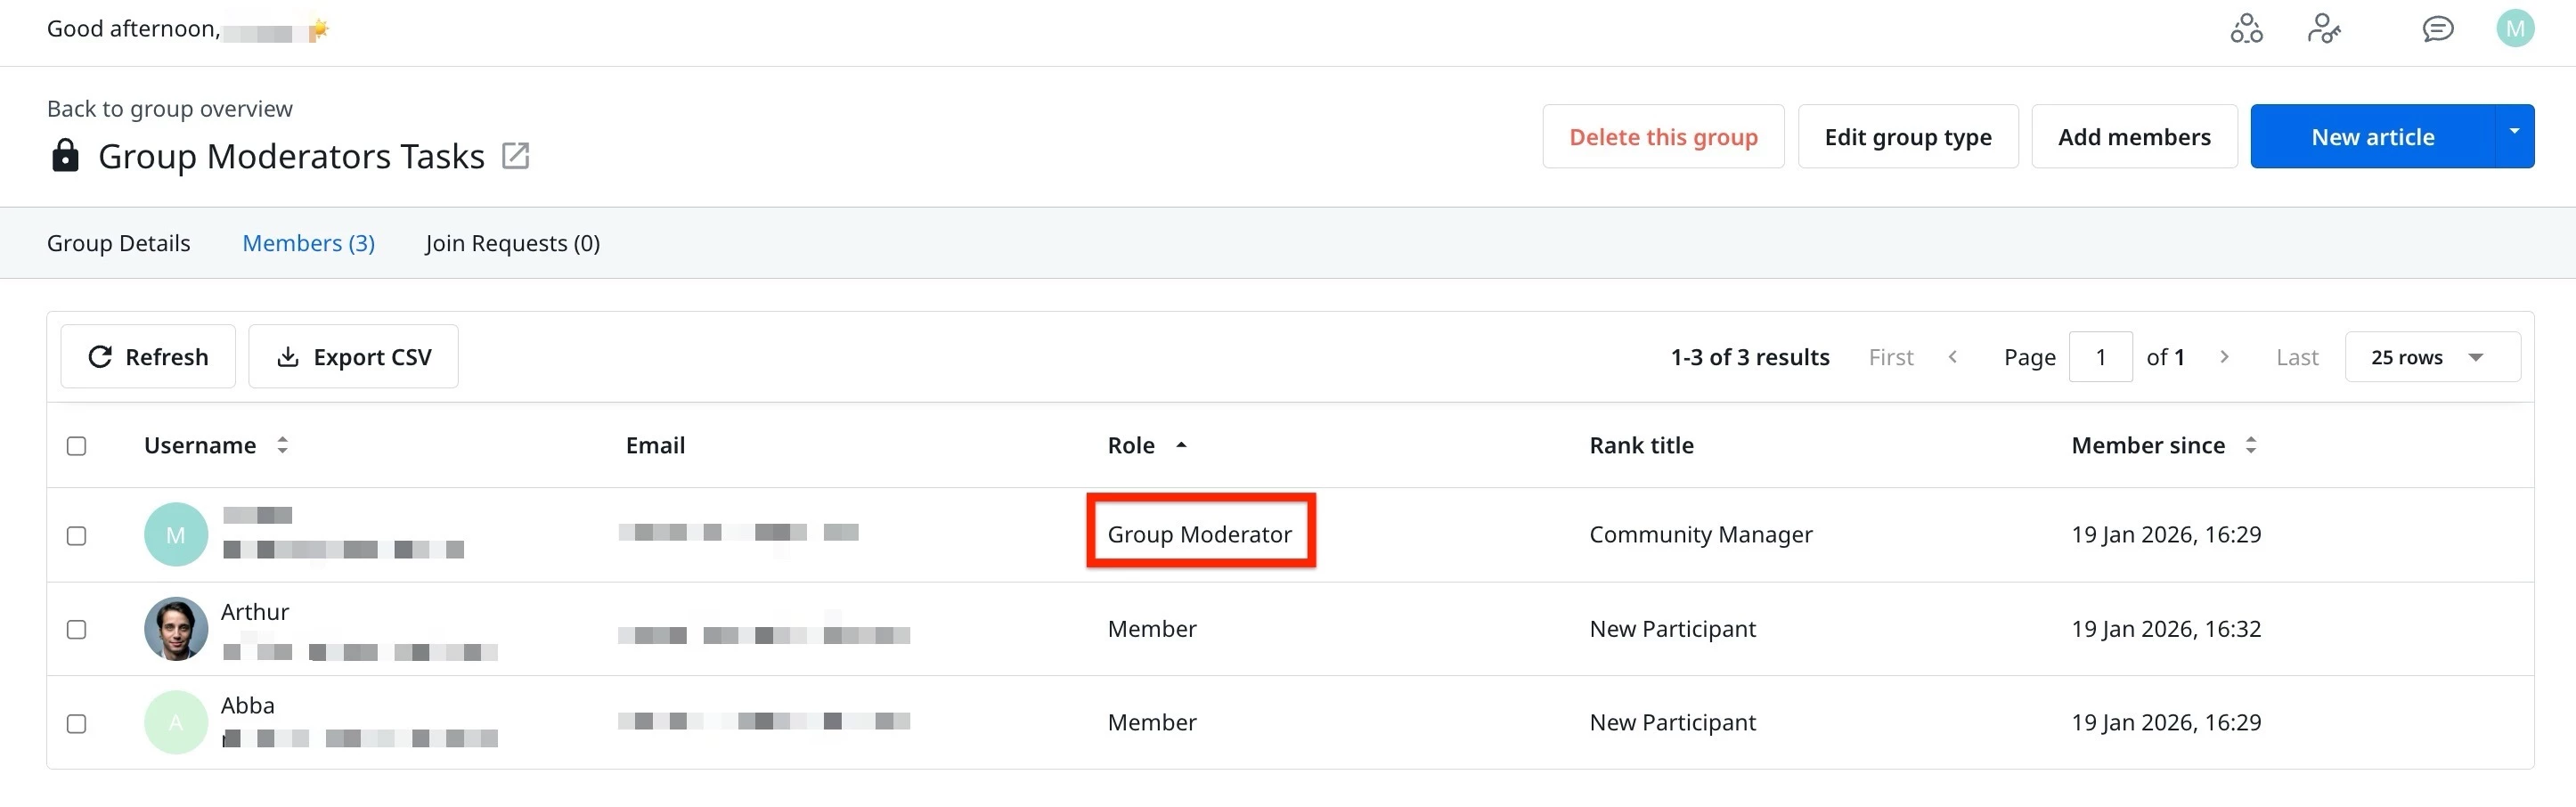
Assign a Group Moderator From Control
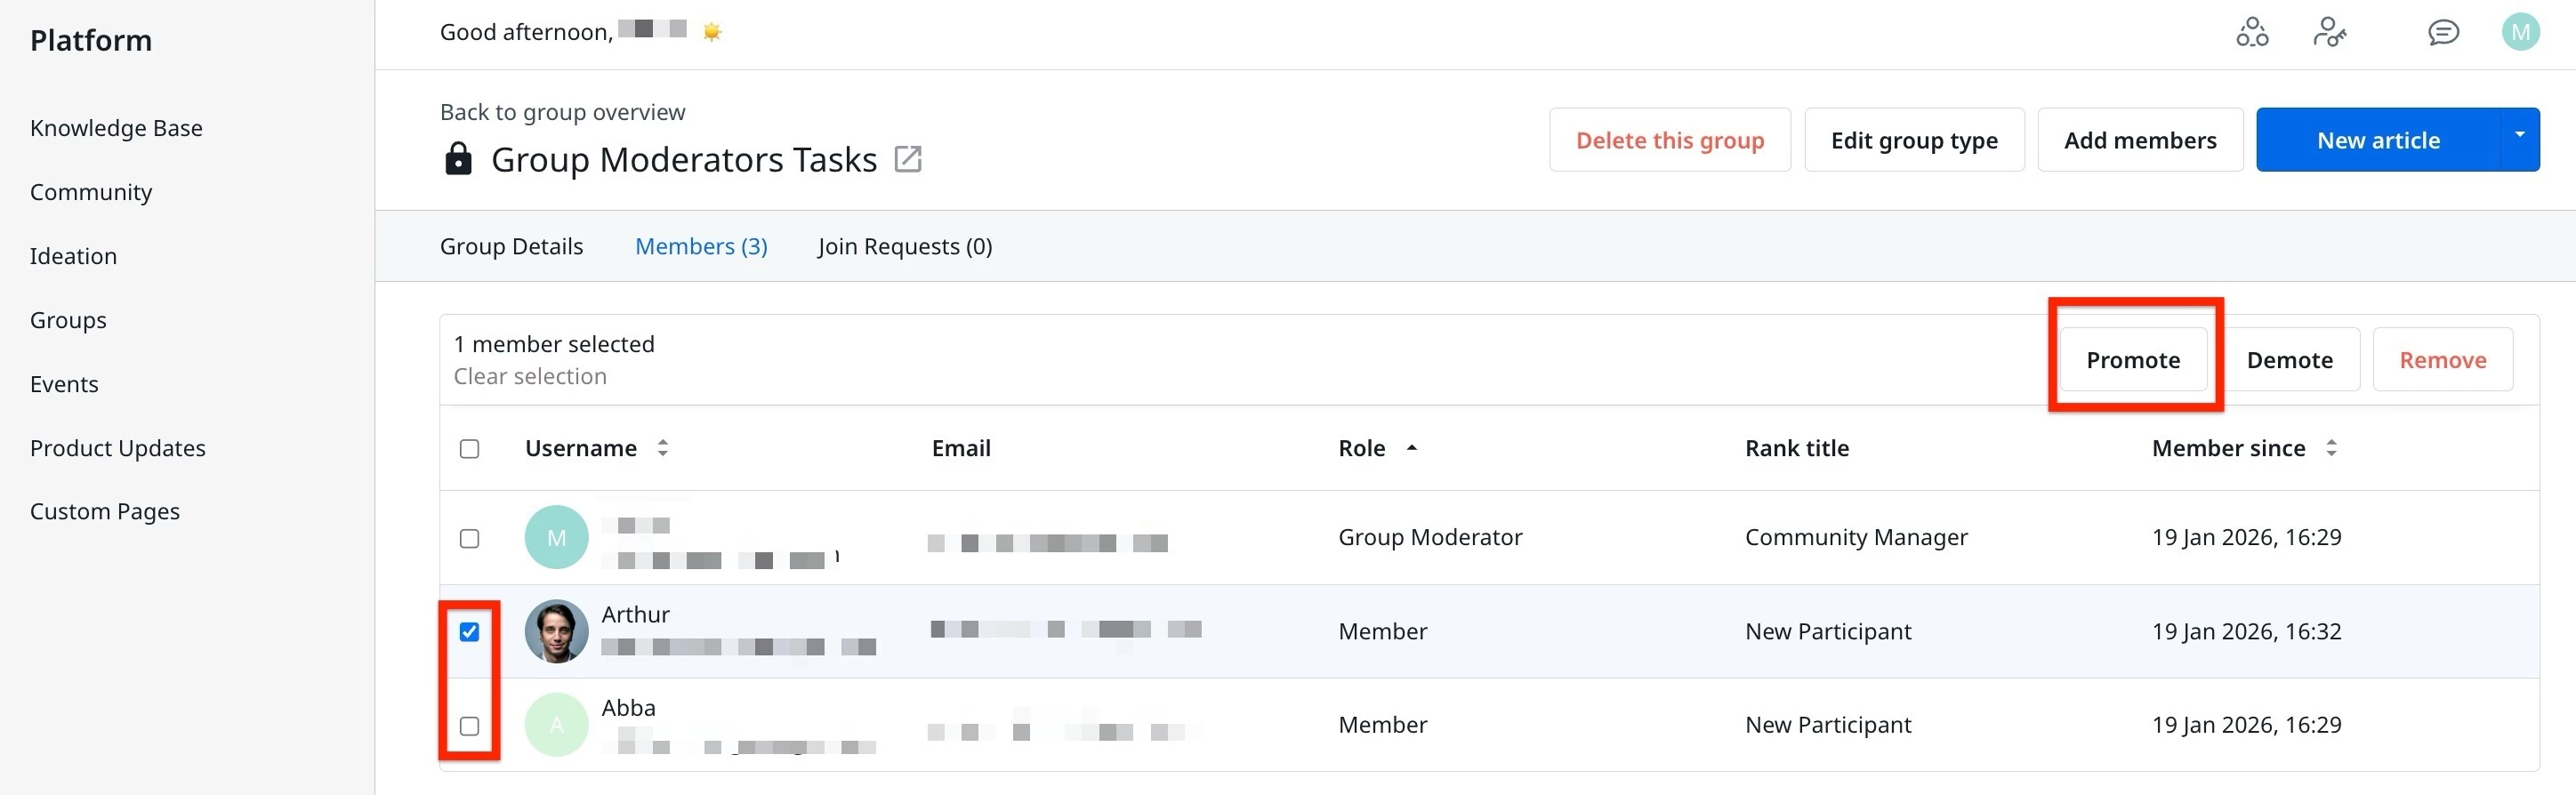
Community Managers or Admins in a group can promote a user to the Group Moderator role from control. To promote a user role:
- Log in to Control.
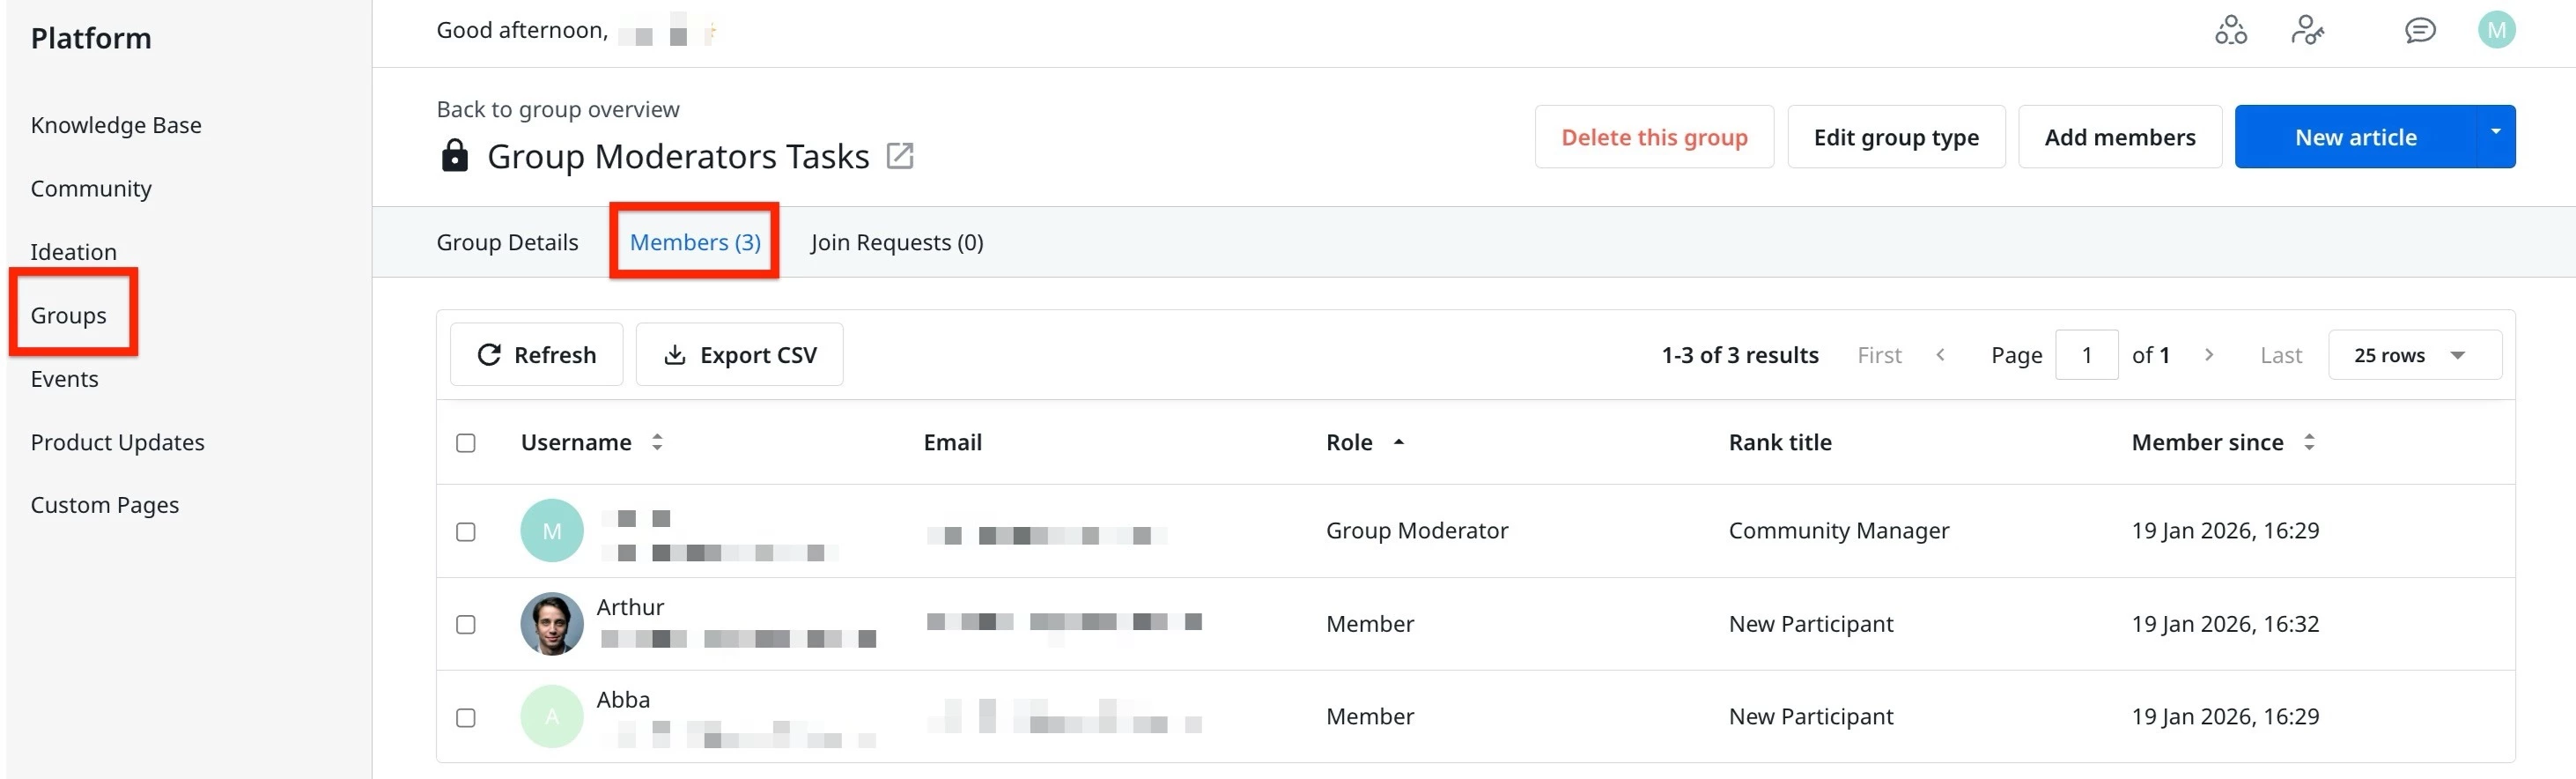
- Navigate to Platform > Groups and click Members tab.
- Select the checkbox next to the user you want to promote.
- Click Promote to promote the user to Group Moderator role.
Note: Gainsight suggests having at least one Group moderator
Manage Group Members
As a Group Moderator, you are responsible for controlling who is part of your group. This includes adding and removing members, sharing invite links, and reviewing join requests for private groups. These capabilities help keep your group secure, active, and relevant.
- Add Members
- Use Invite Links
- Accept Join Requests (Private/Hidden Groups Only)
- Remove Members
Add Members
Group Moderators can directly add existing community members to a group. This method bypasses the previous email confirmation flow and allows members to join instantly.
From Control
Community users can be directly added to groups without the email confirmation from Control.
To add users:
- Log in to Control.
- Navigate to Platform > Groups and click Members tab.
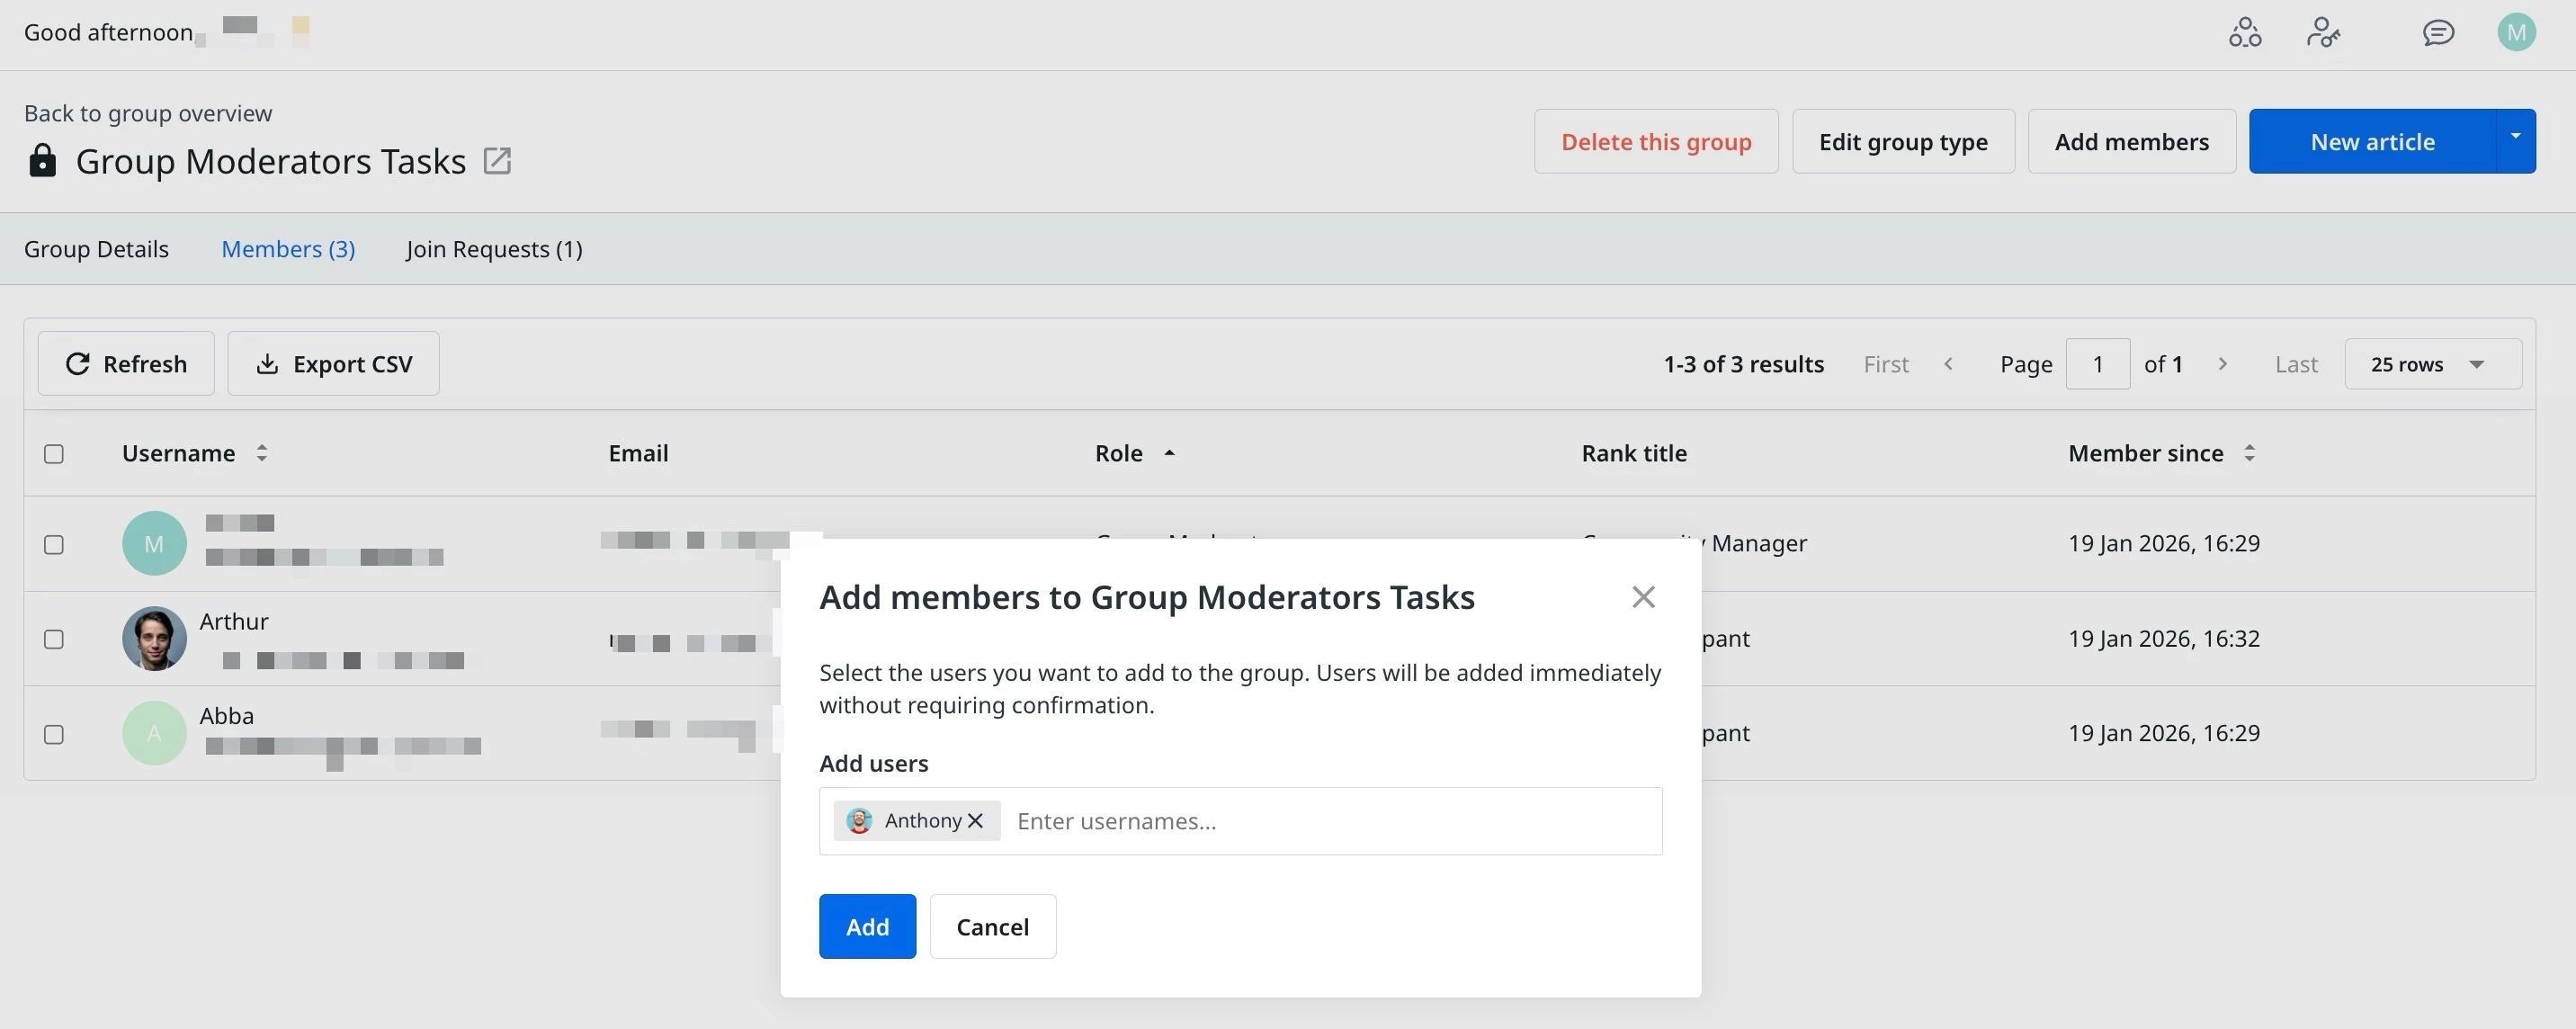
- Click Add Members. The Add members to Group Moderators Tasks dialog appears.
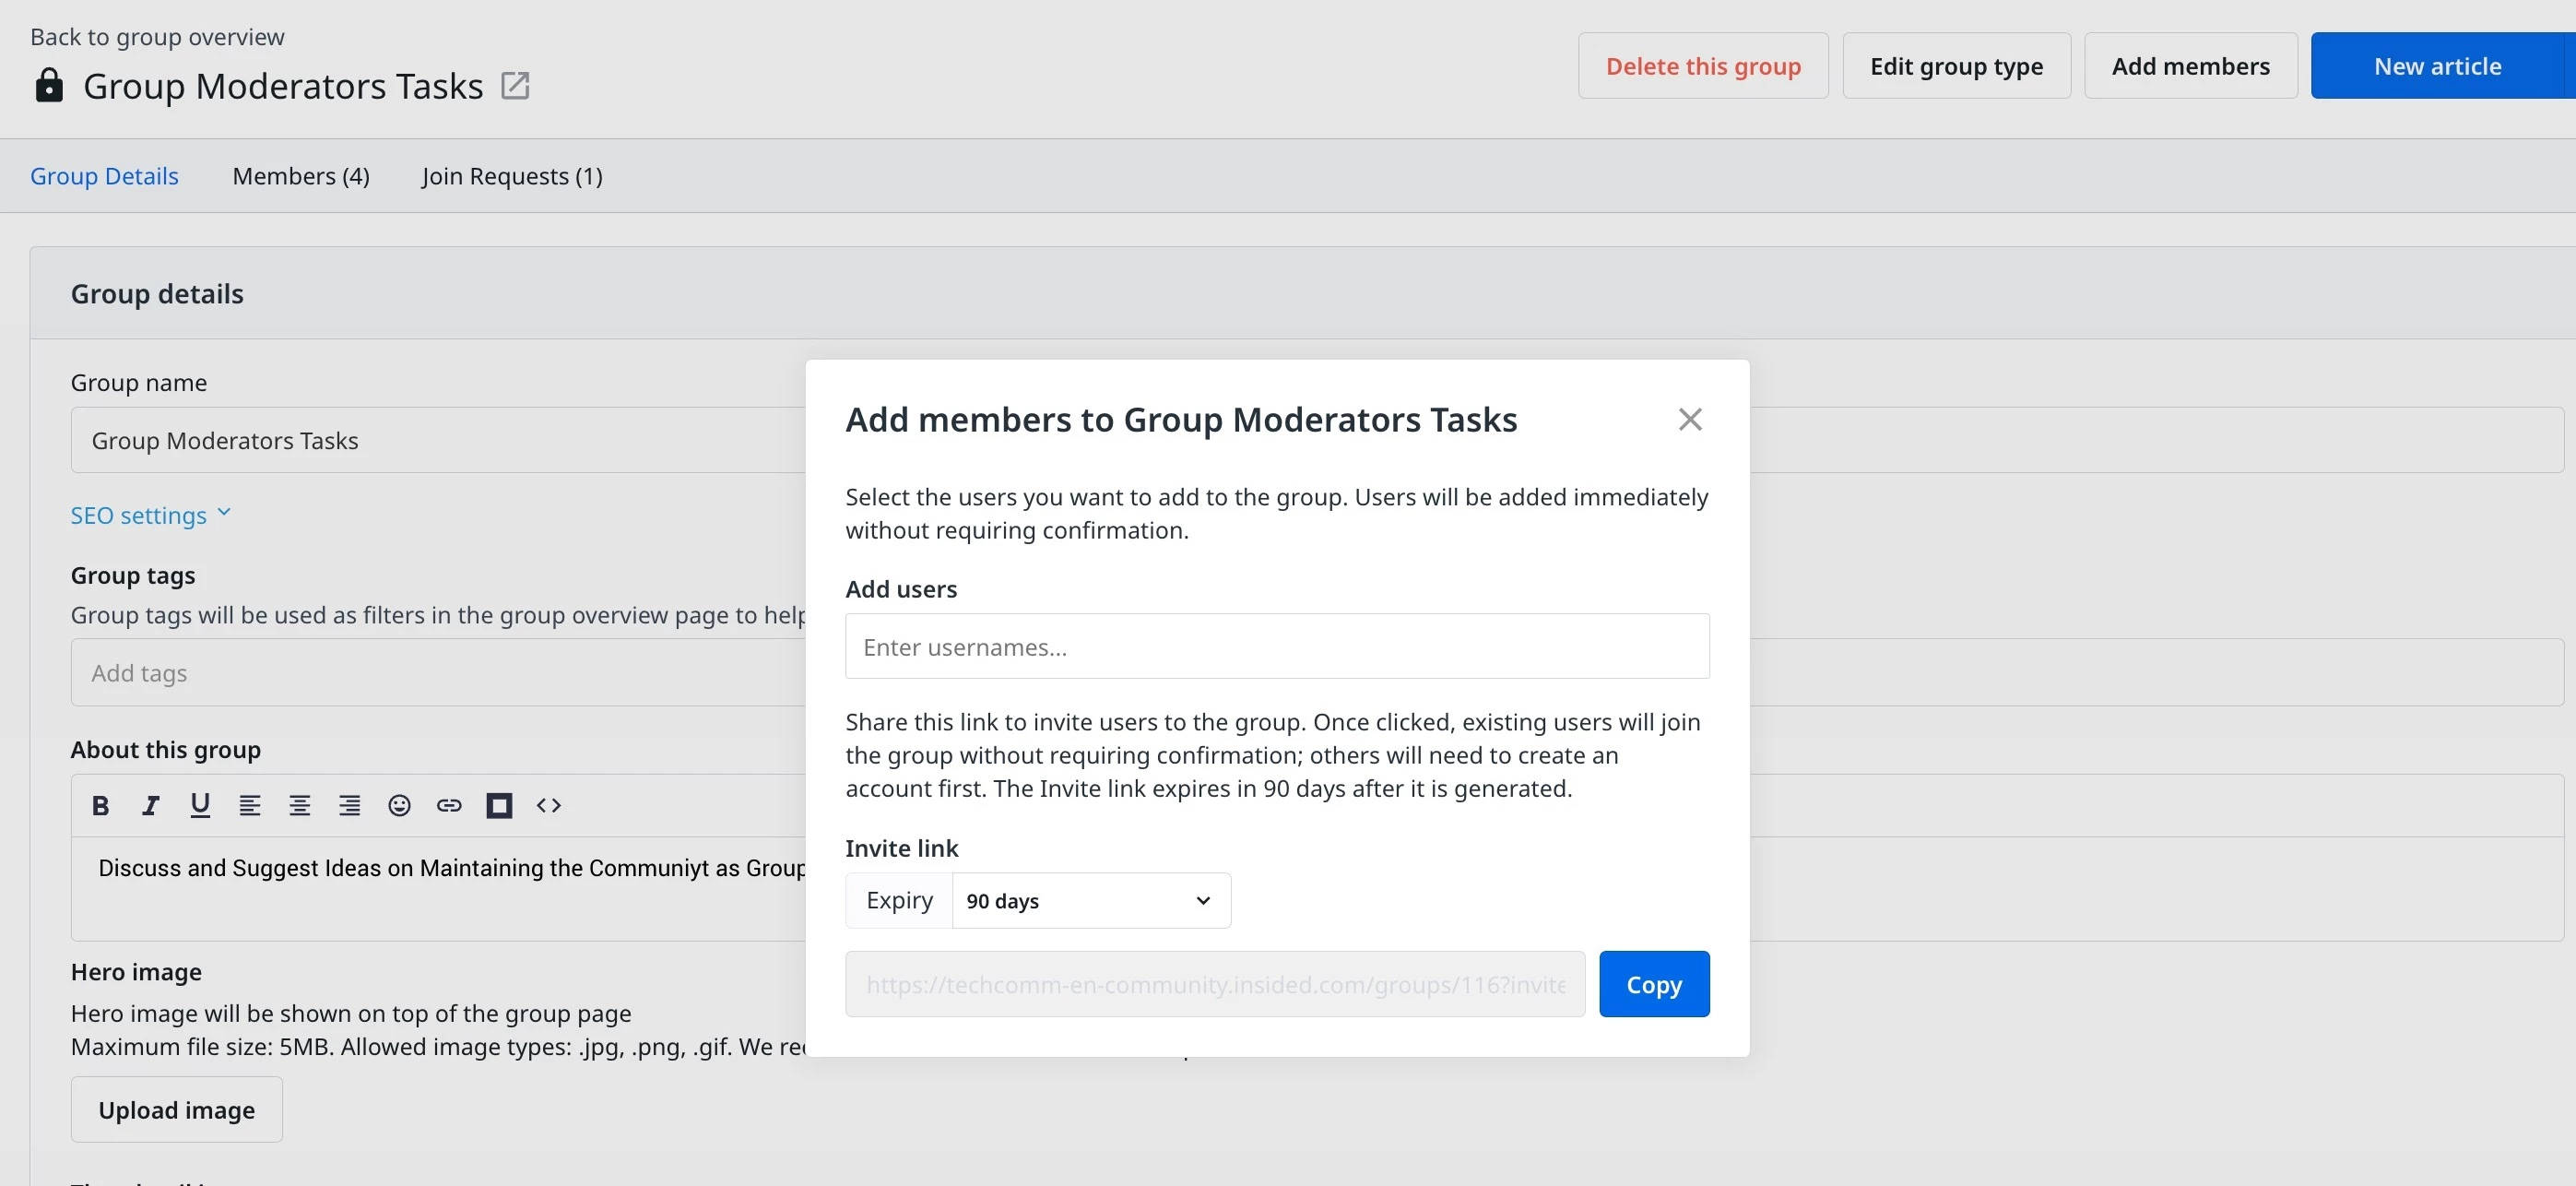
- In the Add Users field, enter the users name.
Note: These users should already be a member in the community.
- Click Add. The community user will be added as member in the group.
From Destination
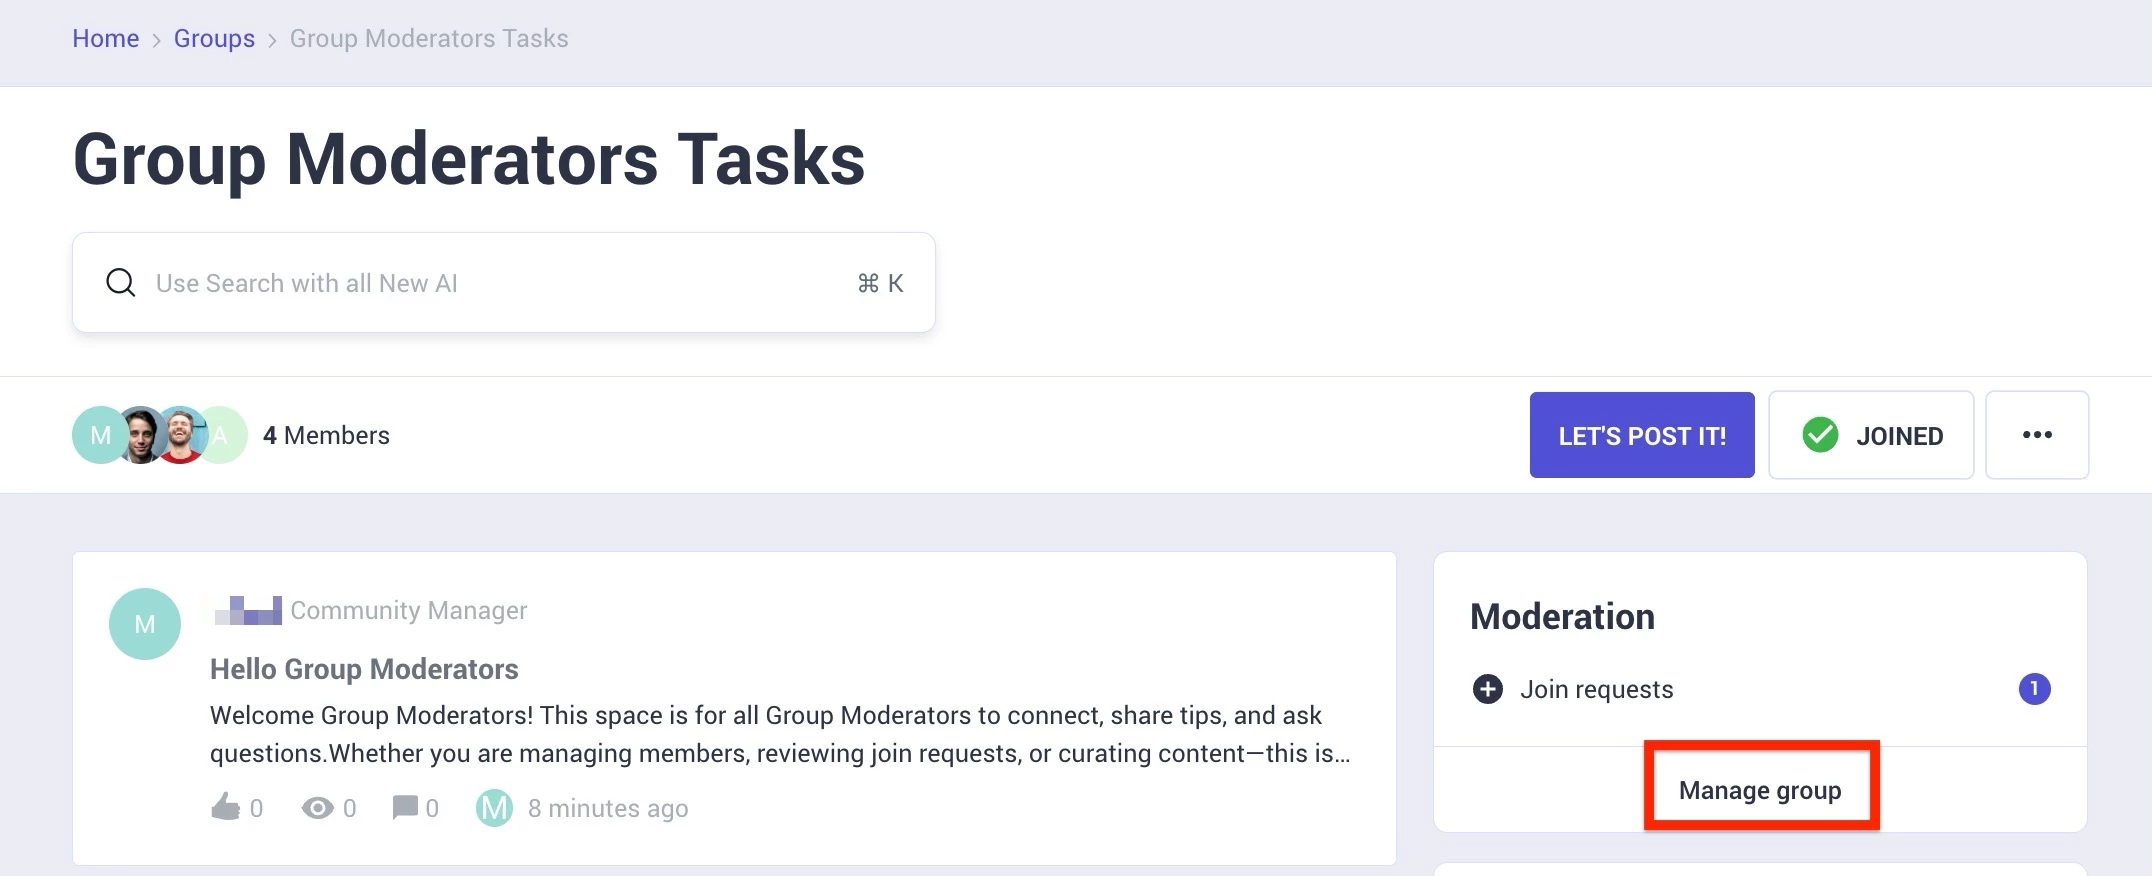
Use the Moderation widget to add members directly from the destination. To add members:
- Log in to Destination as a Group Moderator.
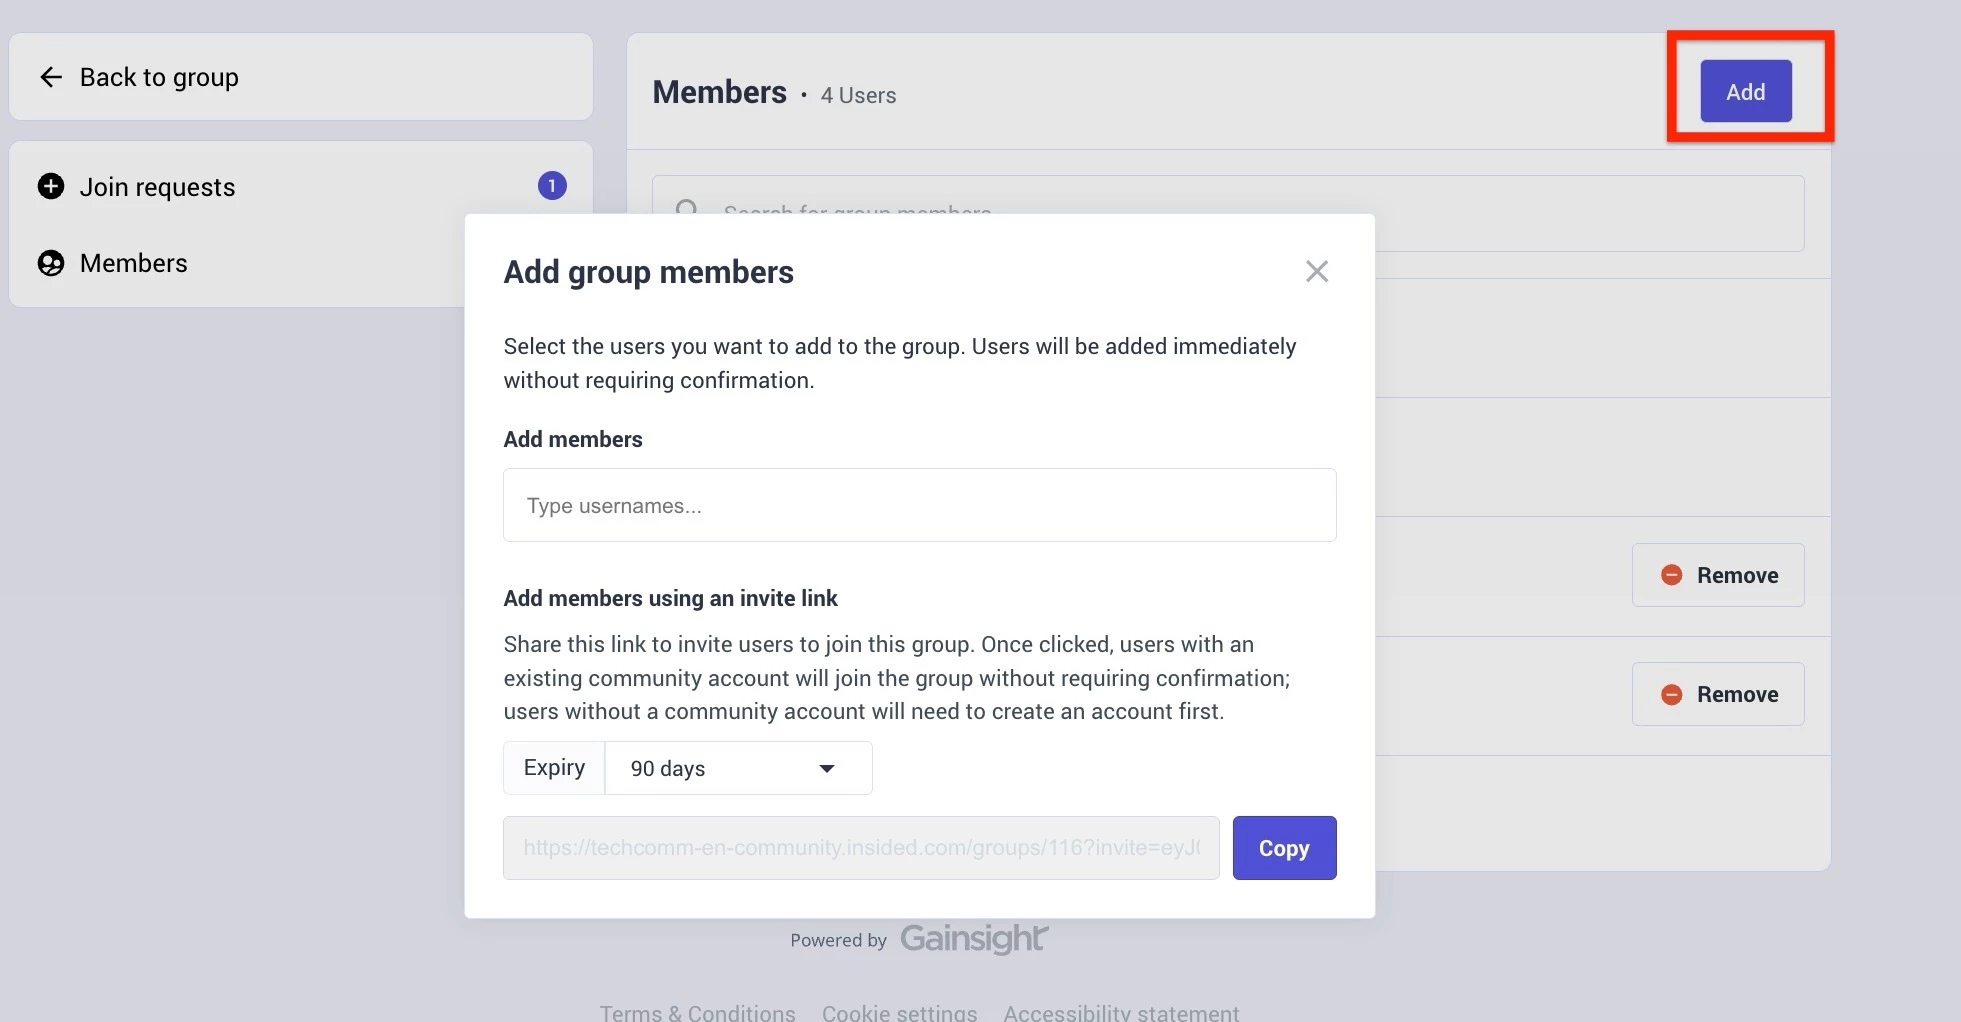
- Click Manage group. The Members page appears.

- Click Add. The Add Group Members dialog appears.
- In the Add members field, enter the username.
Note: These users should already be a member in the community.
- Click Add. The community user will be added as member in the group.
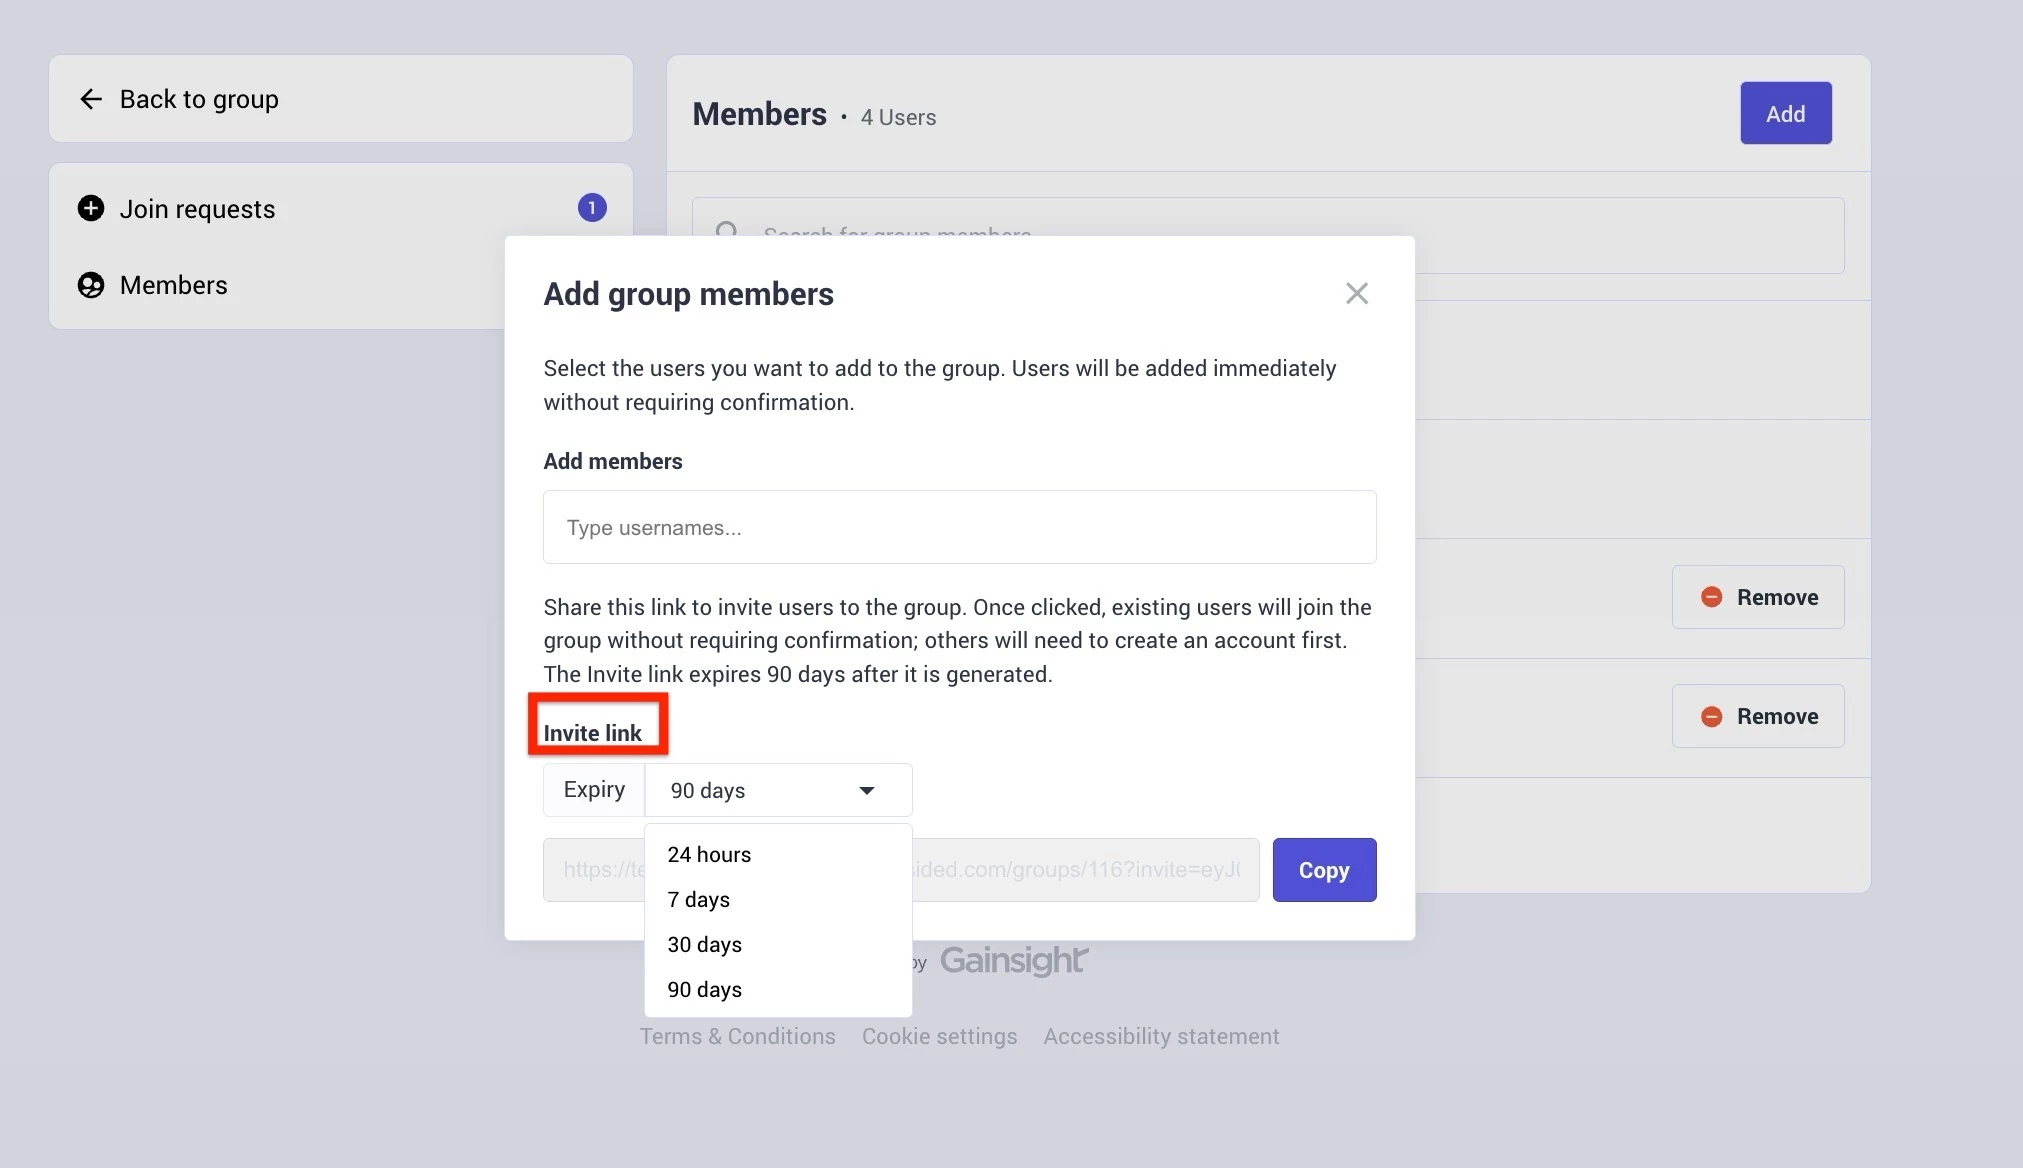
Use Invite Link
Invite links allow you to invite users in bulk by sharing a group link through email or chat. The invite link includes an expiry time (24 hours, 7 days, 30 days, or 90 days) to ensure secure, temporary access.
From Control
From control, use invite links to invite bulk users into a group. To send an invitation:
- Log in to Control.
- Navigate to Platform > Groups and click Members tab.
- Click Add Members. The Add members to Group Moderators Tasks dialog appears.
- From the Enquiry dropdown, select the link expiry option.
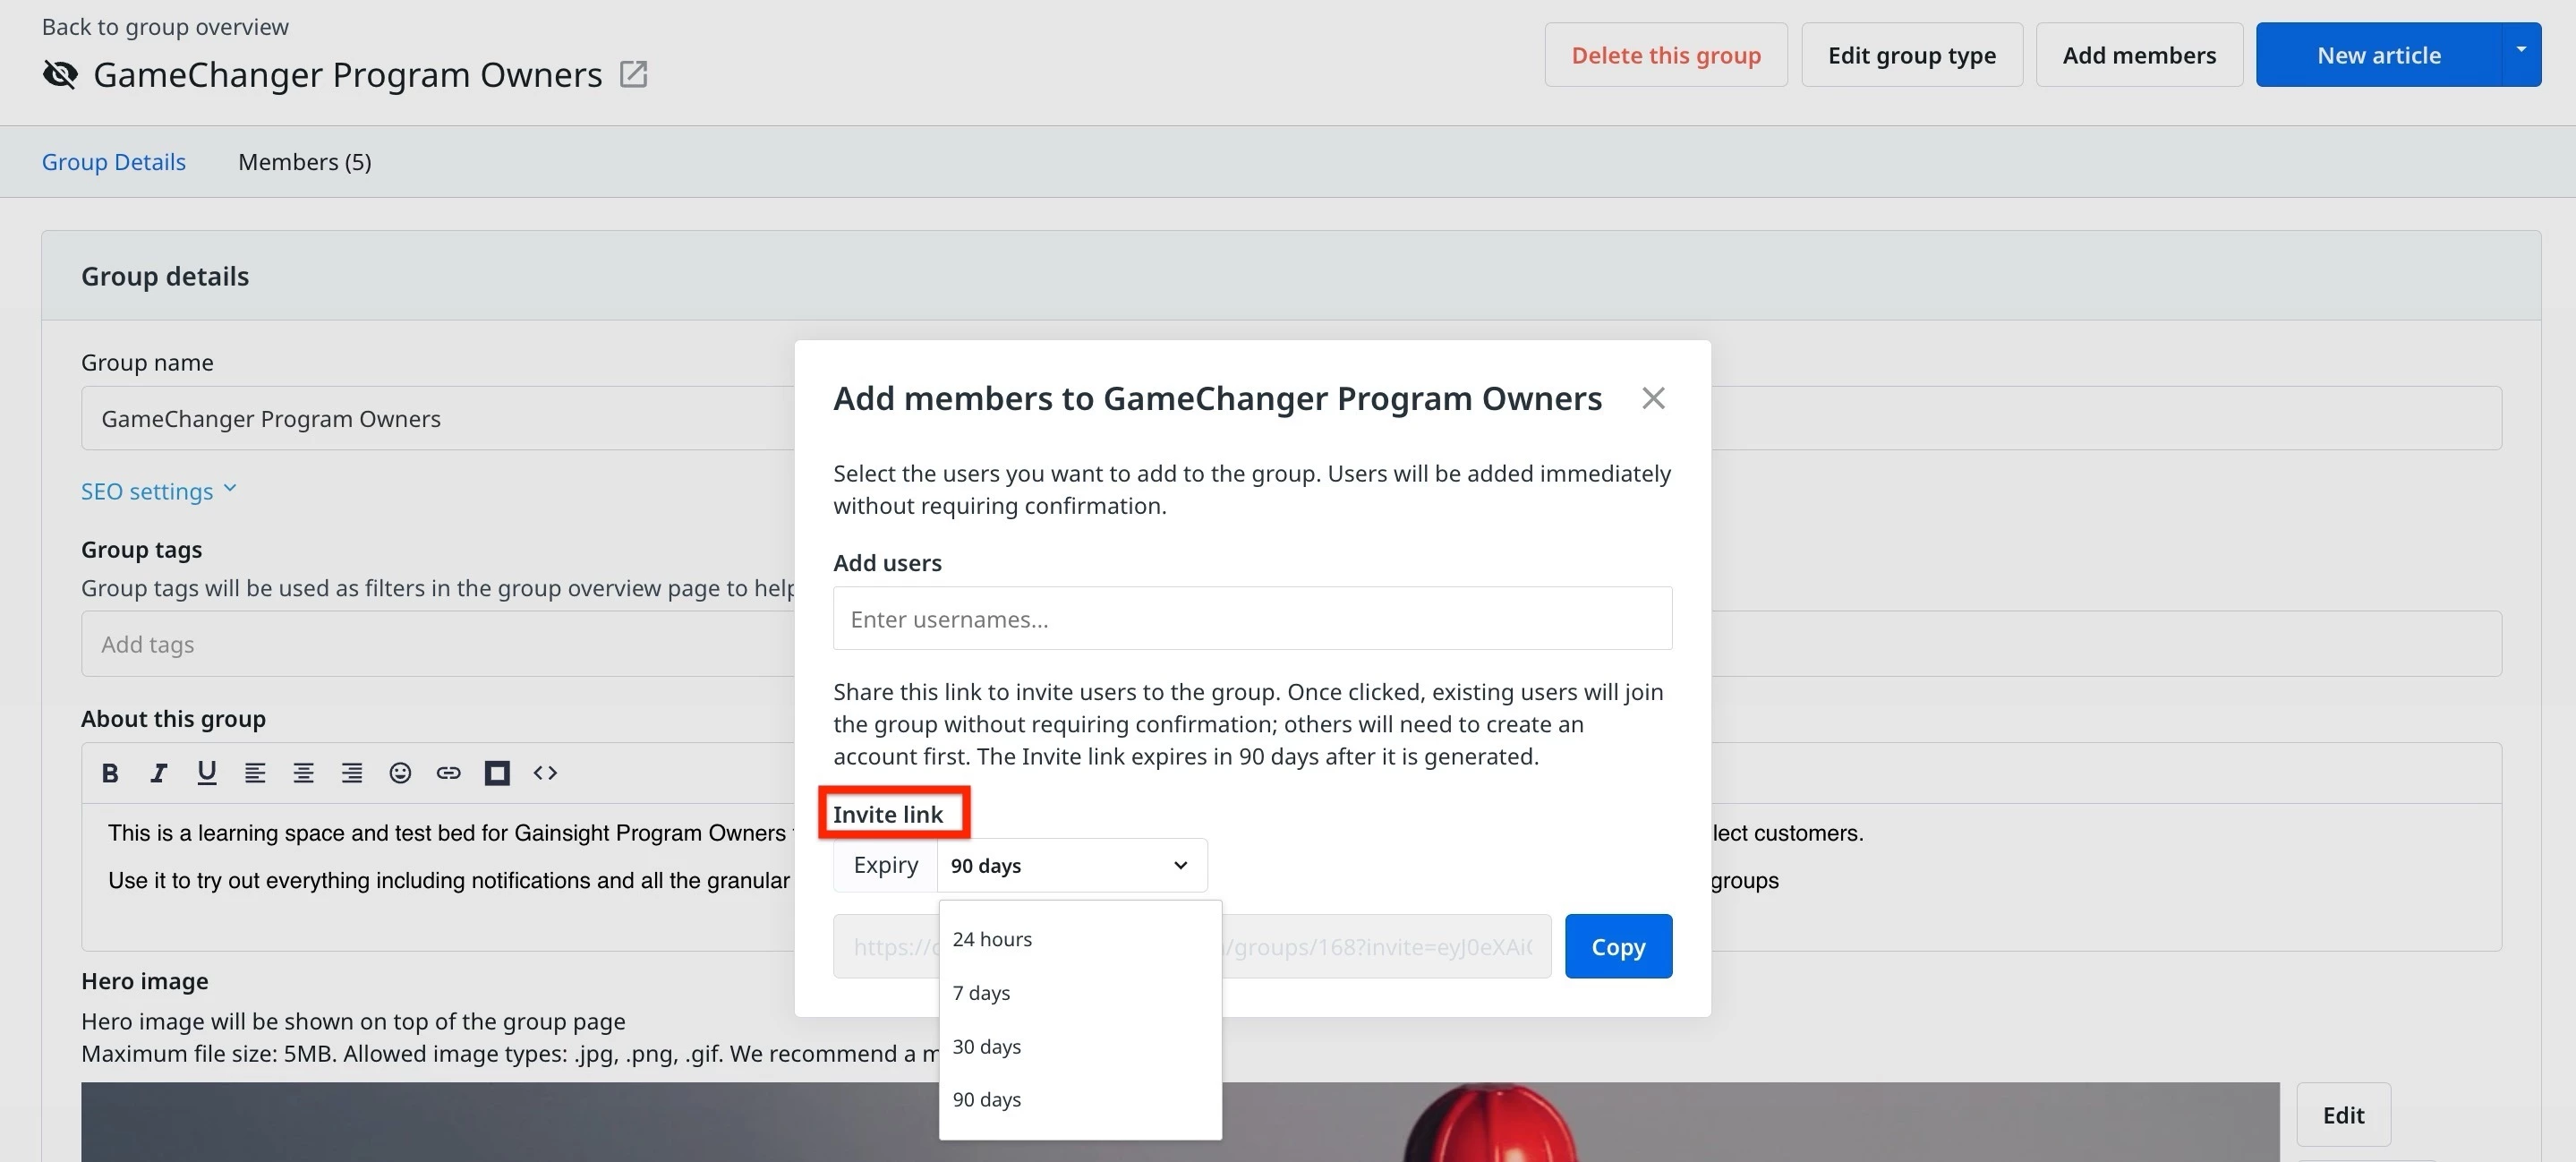
- Click Copy to copy the invite.
Use this link to share with the users through emails or messages.
Note: Invite links include expiry time (24 hours, 7 days, 30 days, or 90 days), preventing unauthorized or prolonged access.
From Destination
From Destination, you can use invite links to invite bulk users into a group. To send an invitation:
- Log in to Destination as a Group Moderator.
- Click Manage group. The Members page appears.

- Click Add. The Add Group Members dialog appears.
- From the Enquiry dropdown, select the link expiry option.
- Click Copy to copy the invite.
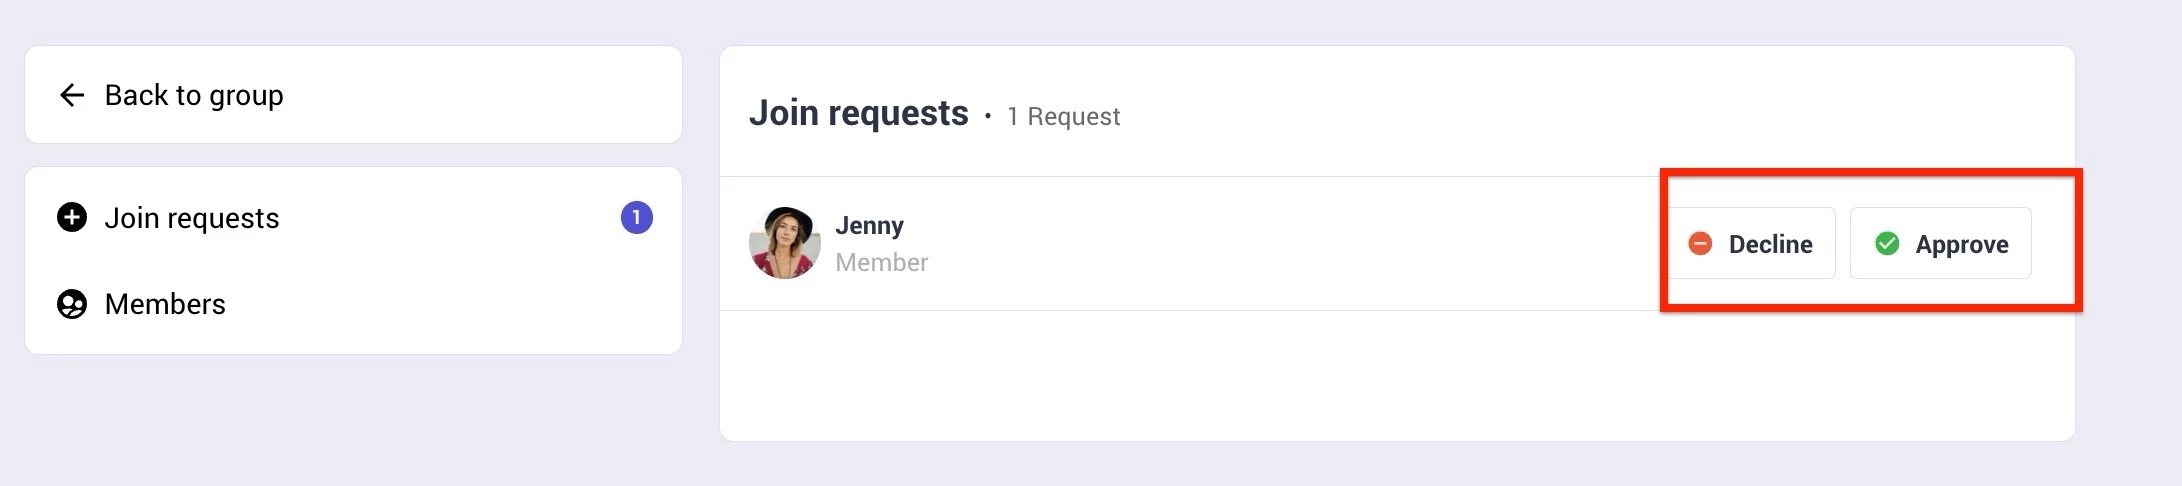
Accept Join Requests
In private groups, users must send a join request. Group Moderators can view these requests and approve or decline them as needed.
From Control
As a group moderator, you can accept joining requests sent by community members from Control.
- Log in to Control.
- Navigate to Platform > Groups and click Join Requests tab. A list available requests is shown in this tab.
- Click Accept or Decline.
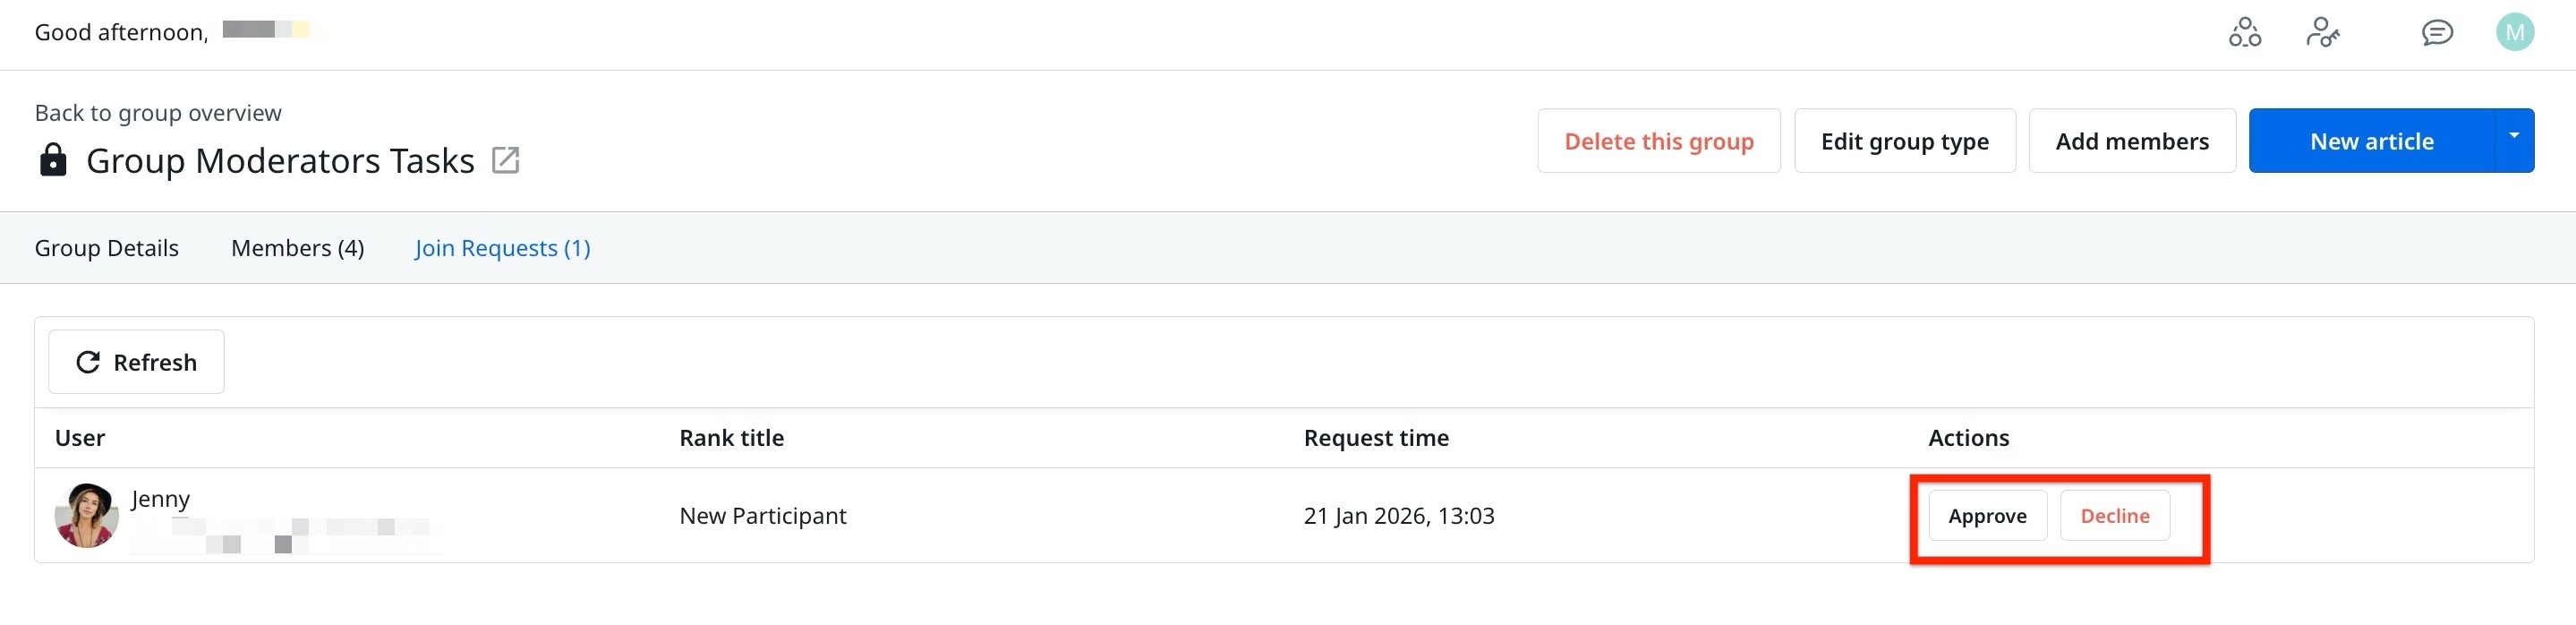
From Destination
As a group moderator, you can accept joining requests sent by community members from Destination.
To accept or decline a joining request:
- Log in to Destination as a Group Moderator.
- Click Join requests. The Join requests page appears.
- Click Approve or Decline.
Remove Members
You can remove any existing member from the group to maintain its relevance or based on participation and behavior.
From Control
As a Group Moderator, you can add members in a group from Control. To remove members:
- Log in to Control.
- Navigate to Platform > Groups and click Members tab.
- Select the checkbox next to the user to remove.
- Click Remove.
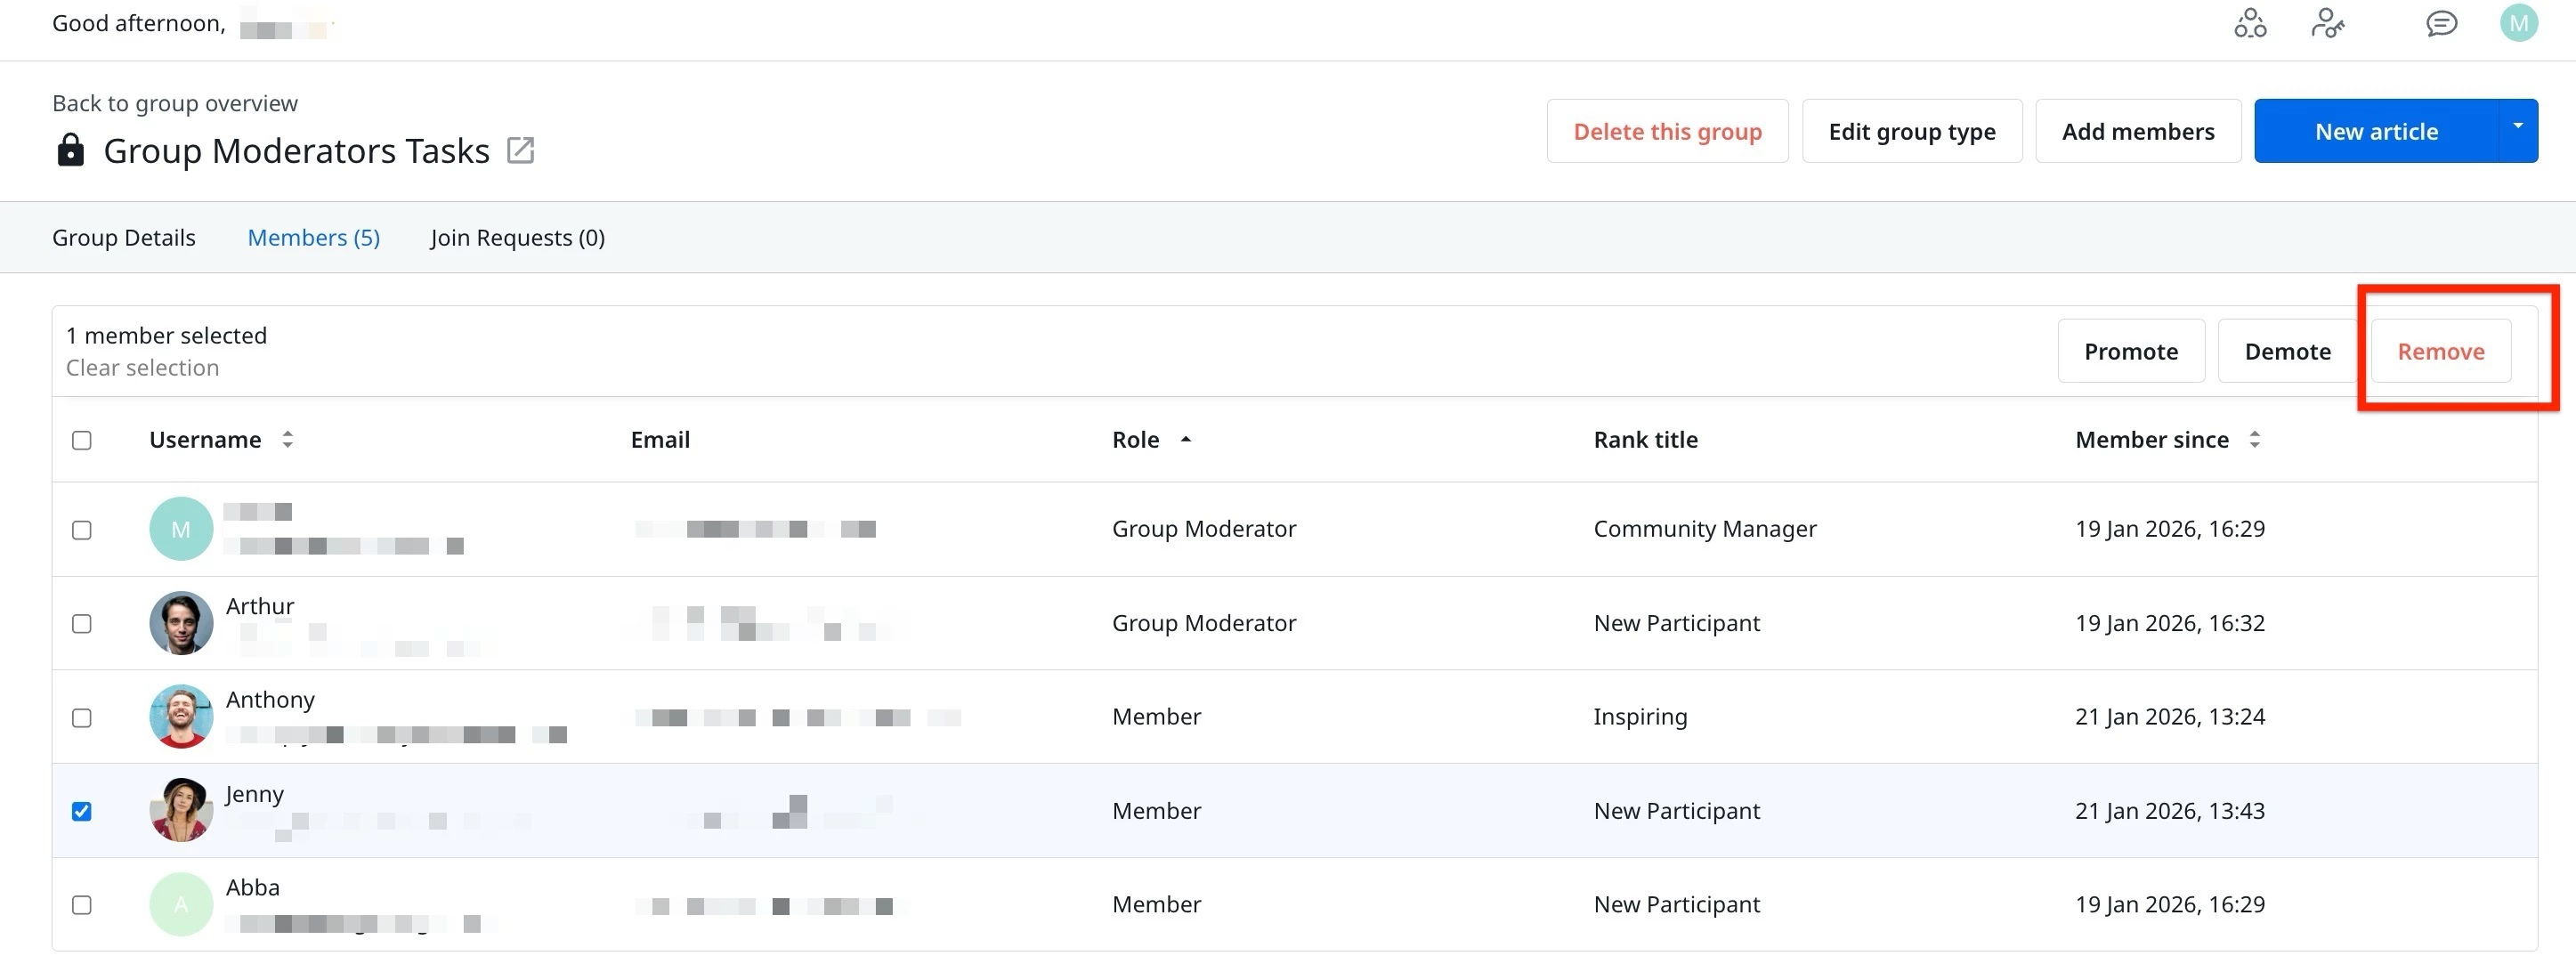
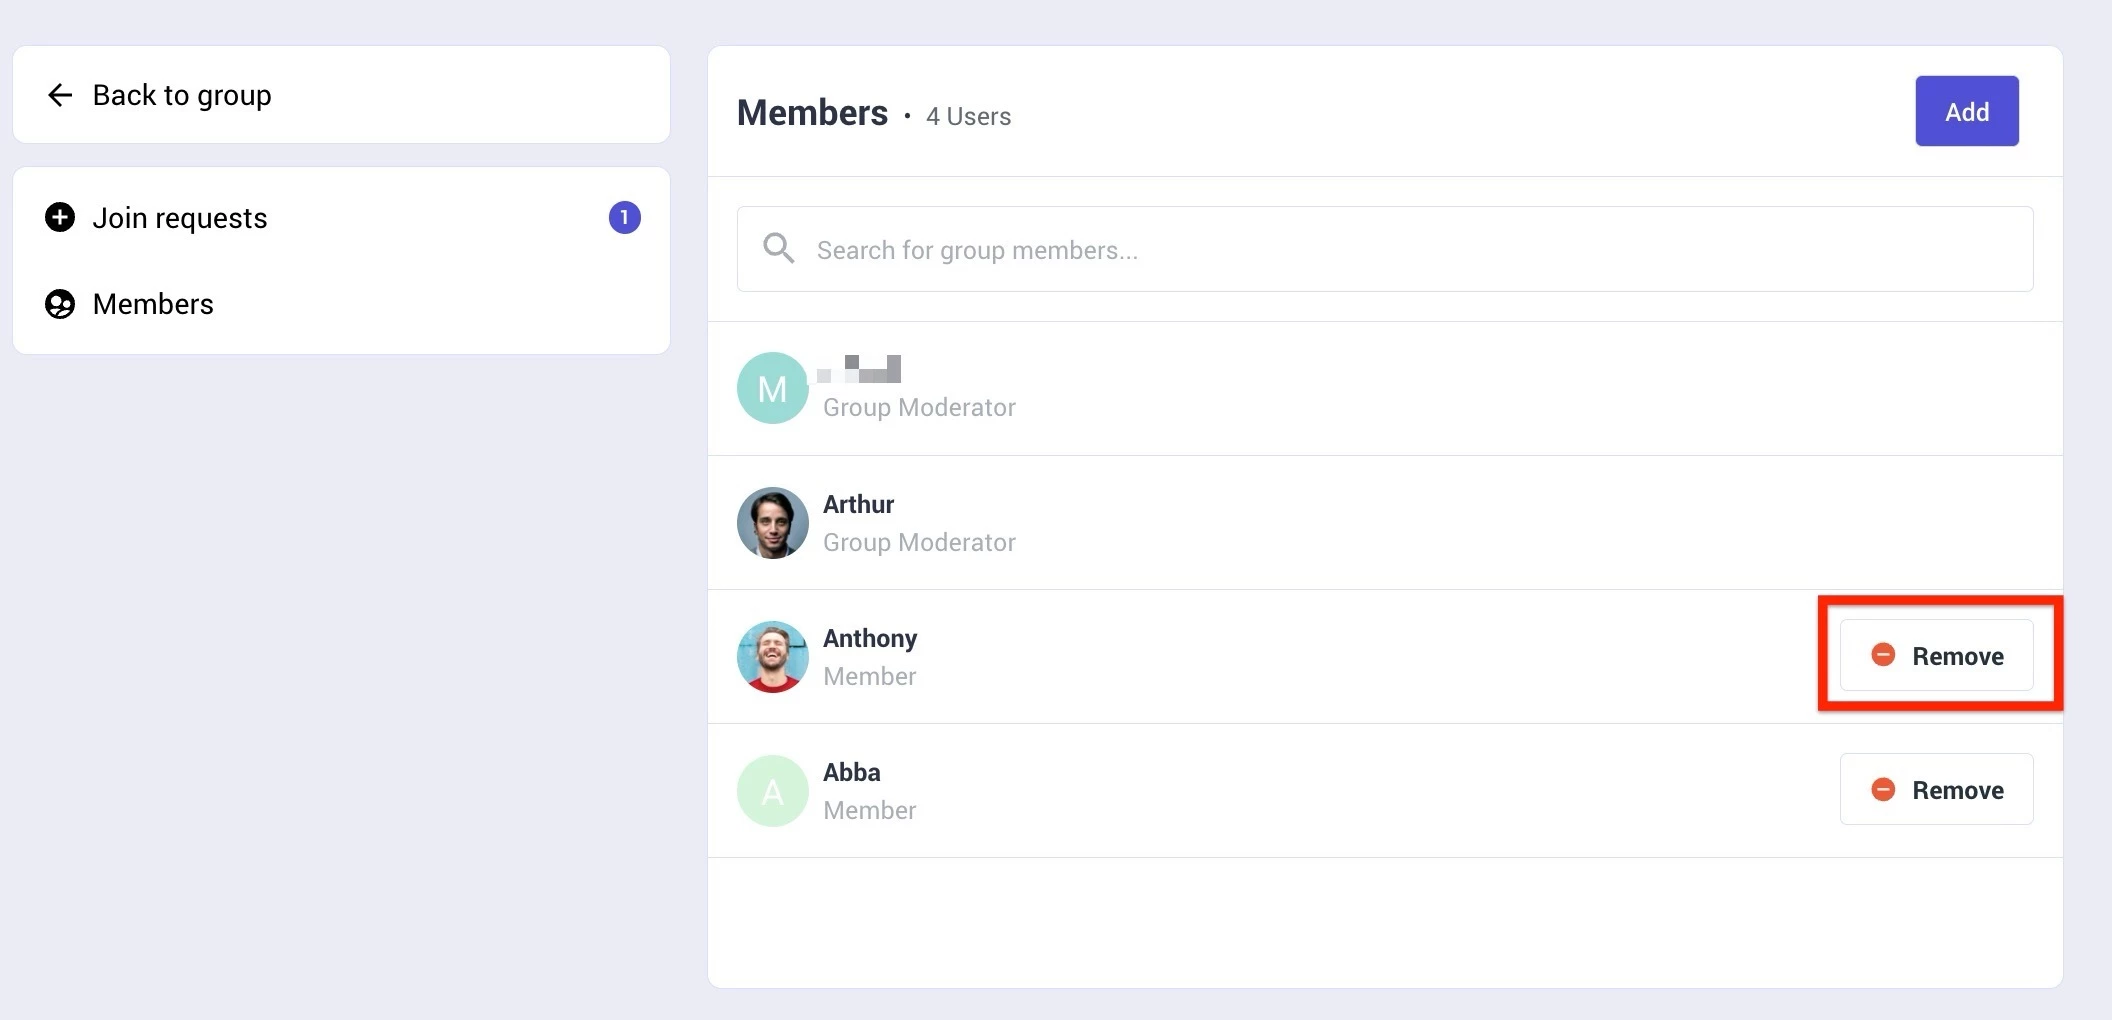
From Destination
As a Group Moderator, you can add members in a group from Destination. To remove members:
- Log in to Destination as a Group Moderator.
- Click Manage group. The Members page appears.
- Click Remove next to the member you want to remove from the group.